
Make Selfhosted Services Public
If you are hosting services at home and want to be accessed from outside, there are couple of options:
- Cloudflare Tunnel
- frp
- nps
- ngrok
Cloudflare Tunnel
Cloudflare Tunnel provides protection for selfhosted services, its a great choice for bloggers.
Before using Cloudflare Tunnel, a domain is required, I bought a domain name from namesilo, and changed nameservers to Cloudflare’s, this can be done in this page:
decker.ns.cloudflare.com
liberty.ns.cloudflare.com
Wait for couple of minutes, until nslookup gives the following results:
nslookup -type=ns example.com
Server:         127.0.0.53
Address:        127.0.0.53#53

Non-authoritative answer:
example.com     nameserver = decker.ns.cloudflare.com.
example.com     nameserver = liberty.ns.cloudflare.com.
Cloudflare Tunnel can be found by following below path:
Websites » Traffic » Cloudflare Tunnel
or click here to get there, then click Launch Zero Trust Dashboard
to launch Cloudflare Zero Trust dashboard.
To create a tunnel, from dashboard, go to Access » Tunnels, click Create a
tunnel then follow the directions to create one.
There is always a better to do this, using command is clearly more efficient, this does exist, with cloudflared you can do anything that is equivalent to web UI, there is also an official docker image, this makes tunnel operations more easier.
Befoe creating a tunnel, first we need to login:
mkdir cloudflared
sudo chown 65532:65532 cloudflared
docker run -it --rm -v ${PWD}/cloudflared:/home/nonroot/.cloudflared cloudflare/cloudflared:2022.3.4 tunnel login
Then follow instruction from the command output, the credentials are saved in cloudflared.
Now create the first tunnel:
docker run -it --rm -v ${PWD}/cloudflared:/etc/cloudflared/ cloudflare/cloudflared:2022.3.4 tunnel create my-tunnel
Tunnel credentials written to /etc/cloudflared/845f3a1d-e6c9-43b4-ae87-6f1203313436.json. cloudflared chose this file based on where your origin certificate was found. Keep this file secret. To revoke these credentials, delete the tunnel.
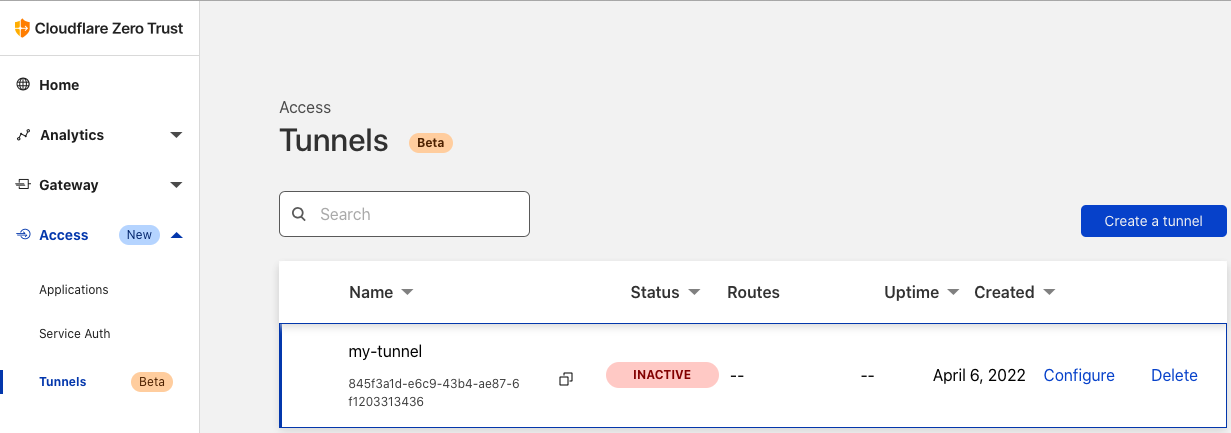
Created tunnel my-tunnel with id 845f3a1d-e6c9-43b4-ae87-6f1203313436
$ ls cloudflared
845f3a1d-e6c9-43b4-ae87-6f1203313436.json cert.pem
A tunnel named my-tunnel was created, you can see this in the web interface.
Then create a DNS CNAME record hostname that points to the tunnel that we just created:
docker run -v ${PWD}/cloudflared:/etc/cloudflared cloudflare/cloudflared:2022.3.4 tunnel route dns my-tunnel blog.example.com
use -f to overrides the old one:
docker run -v ${PWD}/cloudflared:/etc/cloudflared cloudflare/cloudflared:2022.3.4 tunnel route dns -f my-tunnel blog.example.com
Below is an example of docker-compose.yml for cloudflared:
cat << EOF >> docker-compose.yml
cloudflared:
        container_name: '\${CLOUDFLARED_NAME}'
        hostname: '\${CLOUDFLARED_NAME}'
        image: 'cloudflare/cloudflared:\${CLOUDFLARED_VERSION}'
        volumes:
            - '\${PWD}/cloudflared:/etc/cloudflared/'
        command: 'tunnel --config /etc/cloudflared/config.yml run'
        user: root
        restart: 'on-failure'
EOF
And environment variables:
cat << EOF >> .env
CLOUDFLARED_NAME=cloudflared
CLOUDFLARED_VERSION=2022.3.4
EOF
The last thing we need to do before launching docker is to create a config file:
cat << EOF >> cloudflared/config.yml
tunnel: 1e768a67-1c95-4304-9e9b-fa227455d7ce
credentials-file: /etc/cloudflared/1e768a67-1c95-4304-9e9b-fa227455d7ce.json
warp-routing:
  enabled: true
ingress:
 - hostname: blog.example.com
   service: http://192.168.0.15:9090
 - hostname: files.example.com
   service: http://192.168.0.15:9091
 - service: http_status:404
Now we are ready to run:
docker-compose up -d
You are ready to access blog.example.com when you see the following information:
cloudflared    | 2022-04-06T15:23:03Z INF Connection 3ed8462f-c3c8-410d-9f0e-4c4e03336927 registered connIndex=0 location=SJC
cloudflared    | 2022-04-06T15:23:05Z INF Connection f96969b3-c08f-4eed-9255-fe874bc06c16 registered connIndex=1 location=LAX
cloudflared    | 2022-04-06T15:23:07Z INF Connection dcb2e626-62a6-4dd1-a939-2e02b7328b76 registered connIndex=3 location=LAX
cloudflared    | 2022-04-06T15:23:16Z INF Connection f040f22f-8018-4de3-93e6-bb0b6fc70d80 registered connIndex=2 location=SJC
For a full list of tunnel command see help:
docker run -v ${PWD}/cloudflared:/etc/cloudflared cloudflare/cloudflared:2022.3.4 tunnel -h
frp
Using frp need a server with a public IP address, it has server and client side, download the latest version and copy to server:
latest=$(curl -sL https://api.github.com/repos/fatedier/frp/releases/latest | jq -r ".tag_name" | cut -c2-)
wget -c https://github.com/fatedier/frp/releases/download/v${latest}/frp_${latest}_linux_amd64.tar.gz
Configurations for server side:
cat << EOF >> frps.ini
[common]
bind_port = 7000

# Specify a UDP port for KCP.
kcp_bind_port = 7000

vhost_http_port = 8080
subdomain_host = example.com
EOF
./frps -c frps.ini
Configurations for client side:
cat << EOF >> frpc.ini
[common]
server_addr = ip_address_of_vps
server_port = 7000

[nextcloud]
type = http
local_ip = 192.168.15.9
local_port = 8081
subdomain = cloud
EOF
./frpc -c frpc.ini
If there is nothing wrong with both client and server side, then make them start on boot by adding them to system service.
server:
sudo cp systemd/frps.service /usr/lib/systemd/system/
sudo cp frps /usr/bin/frps
sudo mkdir /etc/frp/
sudo cp frps.ini /etc/frp
sudo systemctl enable frps
sudo systemctl start frps
sudo systemctl status frps
client:
sudo cp systemd/frpc.service /usr/lib/systemd/system/
sudo cp frpc /usr/bin/frpc
sudo mkdir /etc/frp/
sudo cp frpc.ini /etc/frp
sudo systemctl enable frpc
sudo systemctl start frpc
sudo systemctl status frpc
nps
nps is another option simiar to frp, actually I tried this before frp, but it is not working very well in my opinion, the dashboard crashes randomly, the page does not refresh on itme creation, I need to click refresh to make it working, it has documentation, but it seems outdated, and it does not match the web UI.
It has docker images, that’s the reason I try it first, I make it running mainly according to the example it provides in its doc.
NPS Server
This is my configuration of server side:
cat << EOF >> server/conf/nps.conf
appname = nps
# Boot mode(dev|pro)
runmode = pro

# bridge
bridge_type=tcp
bridge_port=8024
bridge_ip=0.0.0.0

# web
web_host=a.o.com
web_username=admin
web_password=123
web_port = 8888
web_ip=0.0.0.0

# cache
http_cache=false
http_cache_length=100

# client disconnect timeout
disconnect_timeout=60
EOF
And this is the docker-compose.yml to run nps server:
cat << EOF >> server/docker-compose.yml
version: '3.5'

services:
  nps:
    container_name: nps
    image: ffdfgdfg/nps:latest
    restart: unless-stopped
    network_mode: host
    volumes:
      - ${PWD}/conf:/conf
EOF
After nps server is up an running, head to http://vps.ip.add.re.ss:8888
login with default admin account with password 123 to see the dashboard.
Create Client and Host for Serivces
First thing need to do is to create a client, find Client in the left and click
Add, confirm the fields and click Add again to add a client.
A refresh is required to see the client just created.
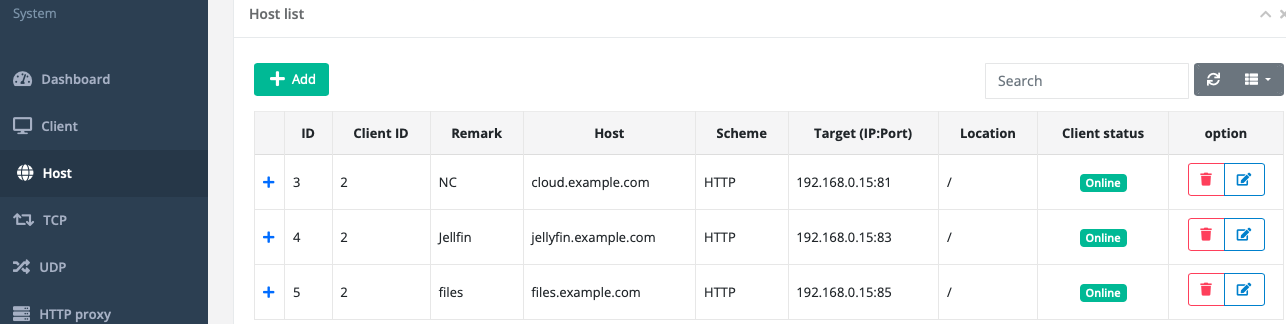
Then go to Host section to add our services, the following field is required:
- Client ID
- Host (Subdomain)
- Scheme
- Target (e.g. 192.168.0.15:81)
Same as the client, click refresh button to see the host list.
Now it’s ready to bring NPS client up to see if it works.
NPS Client
Below is a simple version of configration for NPS client, remeber to change the server_addr and vkey:
- server_addr is the ip address of vps
- vkey is
Unique verify Keyof the client
cat << EOF >> client/conf/npc.conf
[common]
server_addr=vps.ip.add.re.ss:8024    <--
conn_type=tcp
vkey=028b09cc05058c41                <--
auto_reconnection=true
max_conn=1000
flow_limit=1000
rate_limit=1000

crypt=true
compress=true
disconnect_timeout=60
EOF
This is the docker-compose.yml to run npc:
cat << EOF >> client/docker-compose.yml
version: '3.5'

services:
  npc:
    container_name: npc
    image: ffdfgdfg/npc:latest
    restart: unless-stopped
    network_mode: host
    command:
      - "-config=conf/npc.conf"
    volumes:
      - ${PWD}/conf:/conf
EOF
ngrok
ngrok is open sourced and free to use, but it was not developed for many years, v2 is free to use, but need to upgrade to at least basic tier to work with custom subdomains, I am not trying this, put it here for reference.
Troubleshooting
permission denied while writing cert
$ docker run -it --rm -v ${PWD}/cloudflared:/home/nonroot/.cloudflared cloudflare/cloudflared:2022.3.4 tunnel login

Please open the following URL and log in with your Cloudflare account:

https://dash.cloudflare.com/argotunnel?callback=https%3A%2F%2Flogin.cloudflareaccess.org%2FE02AXchtdov4bmA3dqSYa75ksT90ZDSCWimgsuchFwk%3D

Leave cloudflared running to download the cert automatically.
error writing cert to /home/nonroot/.cloudflared/cert.pem: open /home/nonroot/.cloudflared/cert.pem: permission denied
Here is the command that works for me. sudo chown 65532:65532 cert.pem The UID and GID of the user nonroot are defined in the base image distroless. See GoogleContainerTools/distroless#443
Create vhost http listener error, listen tcp 0.0.0.0:80: bind: permission denied
When using below frps.ini for server side of frp:
[common]
bind_port = 7000

vhost_http_port = 80
subdomain_host = example.com
frp report permission issue:
Create vhost http listener error, listen tcp 0.0.0.0:80: bind: permission denied
This is because ports below 1024 can be opened only by root, this is answered in serverfault, the solution is using another port above 1000, see 8080, and redirect to 80
iptables -t nat -A PREROUTING -p tcp --dport 80 -j REDIRECT --to-port 8080