
Sync Things with Syncthing
I use Syncthing to sync my notes from work desktop compute to vps server, so I can continue my work at home, syncthing is pretty easy to setup and use.
In this post I will use docker-compose to setup syncthing server and client.
Running syncthing in docker
The docker-compose file are as follows: Server side:
version: "3"
services:
  syncthing:
    image: syncthing/syncthing
    container_name: syncthing
    hostname: syncthing-server
    environment:
      - PUID=1000
      - PGID=1000
    volumes:
      - .:/var/syncthing
    ports:
      - 8384:8384
      - 22000:22000/tcp
      - 22000:22000/udp
    restart: unless-stopped
Client side:
version: "3"
services:
  syncthing:
    image: syncthing/syncthing
    container_name: syncthing
    hostname: syncthing-macOS
    environment:
      - PUID=1000
      - PGID=1000
    volumes:
      - ~/syncthing/dir_a/:/var/syncthing/dir_a
      - ~/syncthing/dir_b/:/var/syncthing/dir_b
    ports:
      - 8384:8384
      - 22000:22000/tcp
      - 22000:22000/udp
    restart: unless-stopped
Start syncthing by running docker-compose up, when the following messages shows
up, your syncthing is ready to use:
syncthing | [Z35SY] 00:01:12 INFO: Access the GUI via the following URL: http://127.0.0.1:8384/
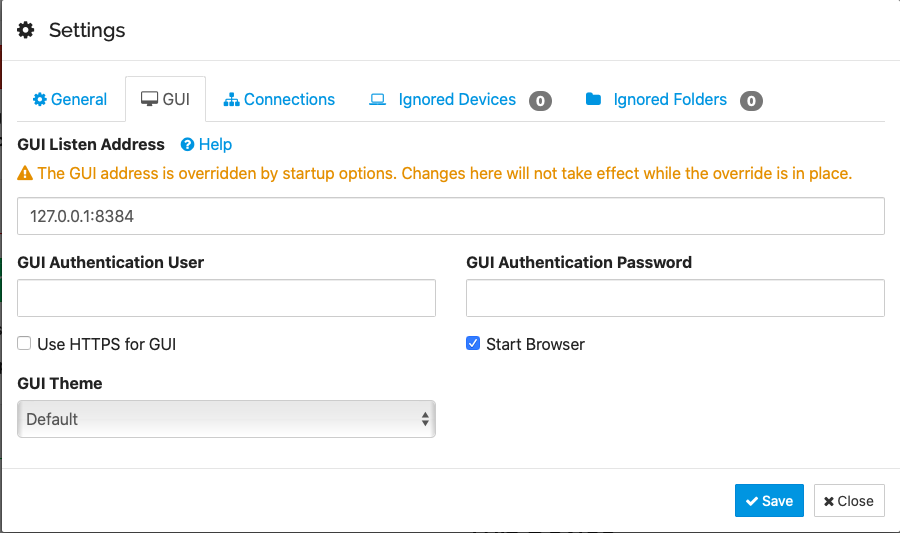
There will be a warning in the web interface on startup:
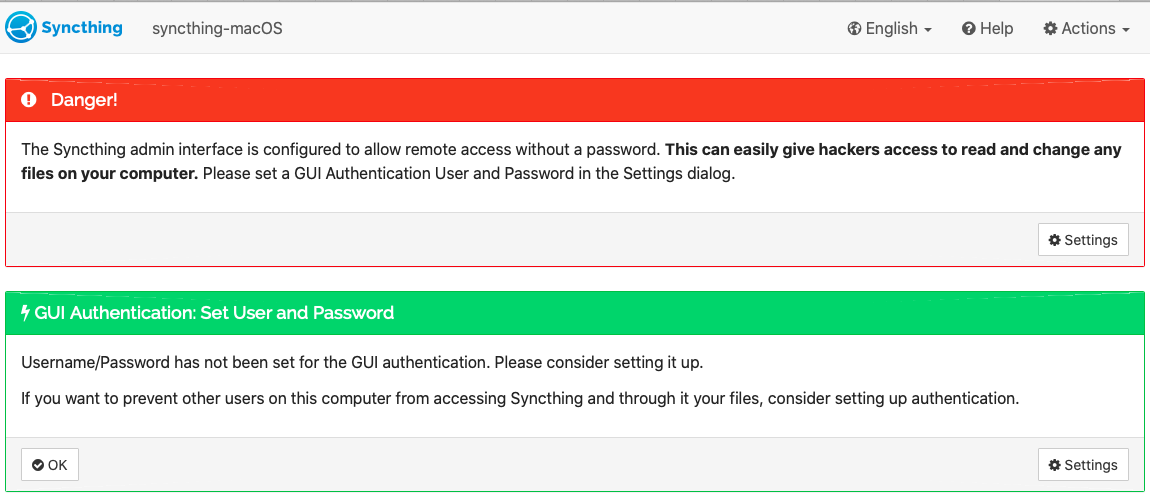
Click Settings to setup GUI Authentication User and
GUI Authentication Password then save, and do the same thing in server side.
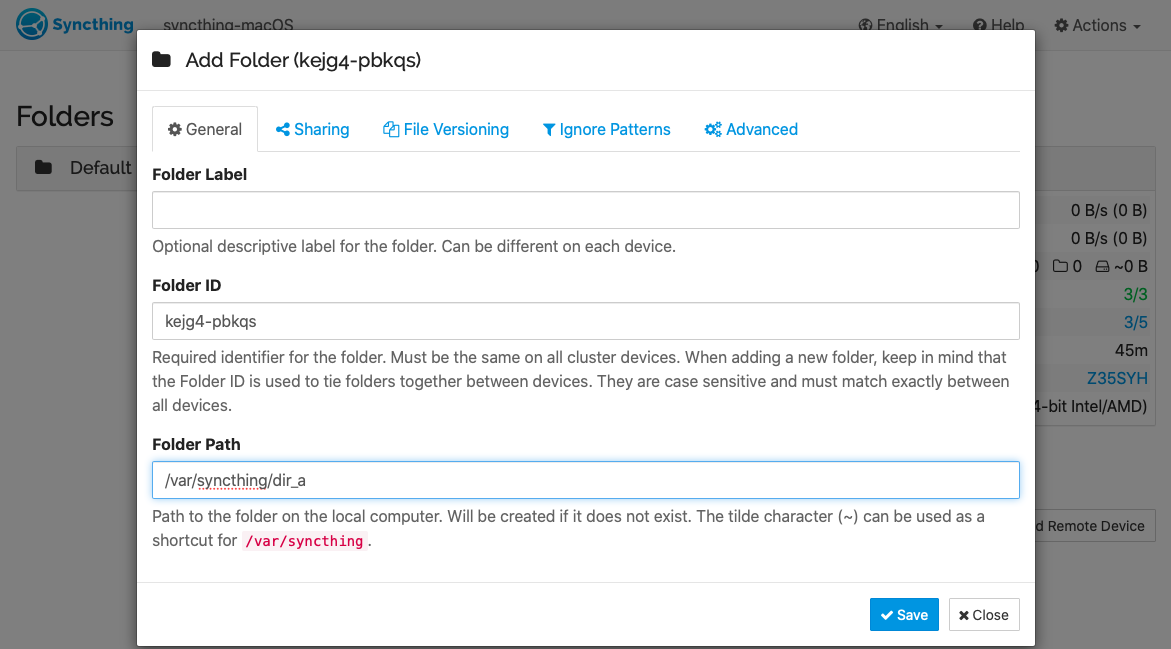
Add share folders
Click Add Folder in the left side under Folders and
add folder want to share with server:
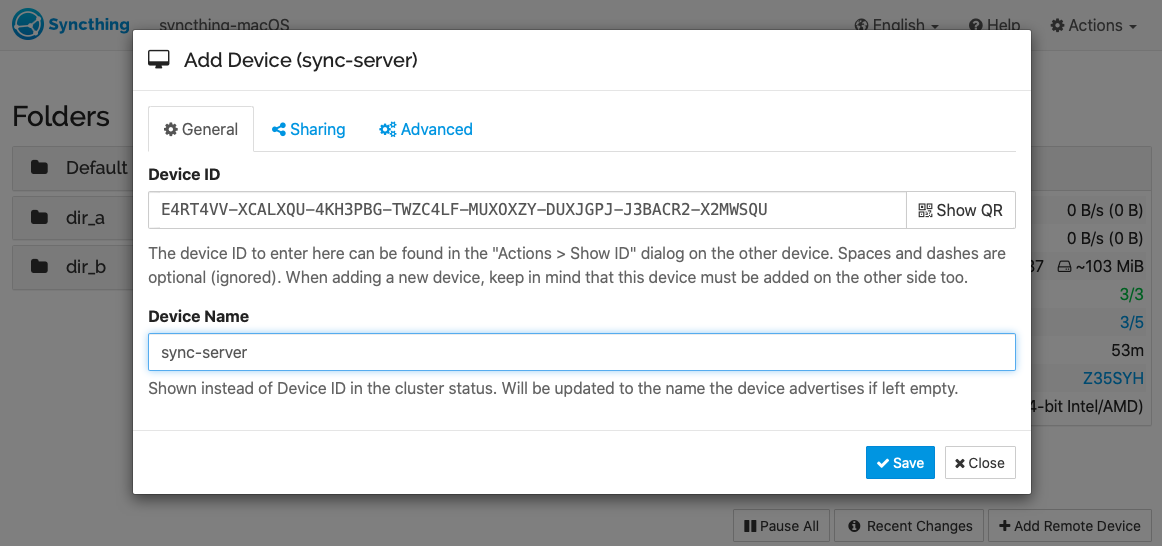
Add Remote Device
Click Add Remote Device in the right side under Remote Devices and add syncthing server’s ID, the ID can be found in logs:
docker-compose logs|grep 'My ID'
yncthing    | [E4RT4] 23:57:10 INFO: My ID: E4RT4VV-XCALXQU-4KH3PBG-TWZC4LF-MUXOXZY-DUXJGPJ-J3BACR2-X2MWSQU
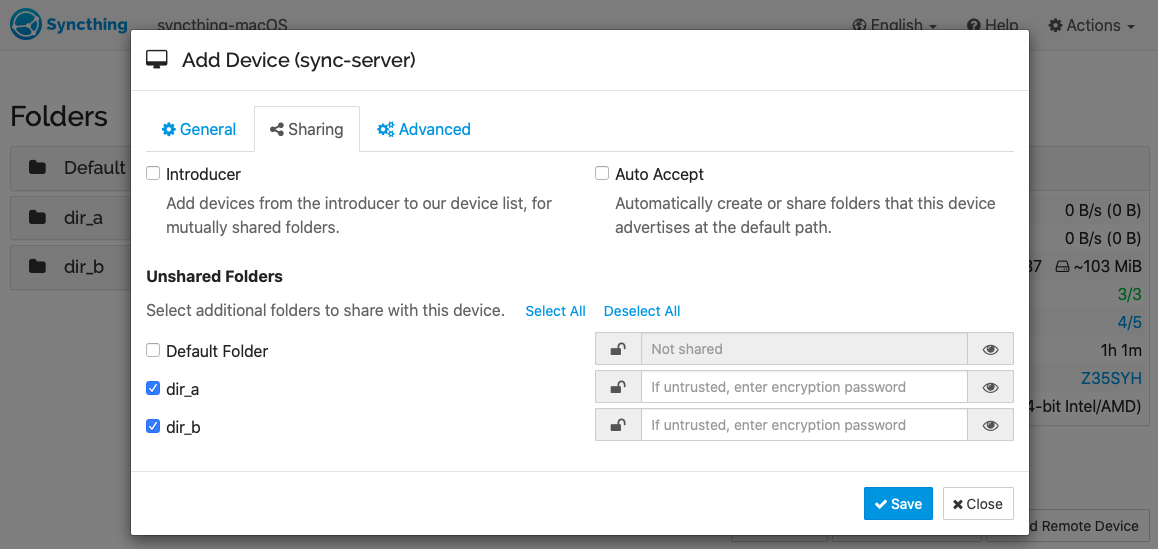
 Swich to Share tab, and enable folders want to
share with server:
Swich to Share tab, and enable folders want to
share with server:
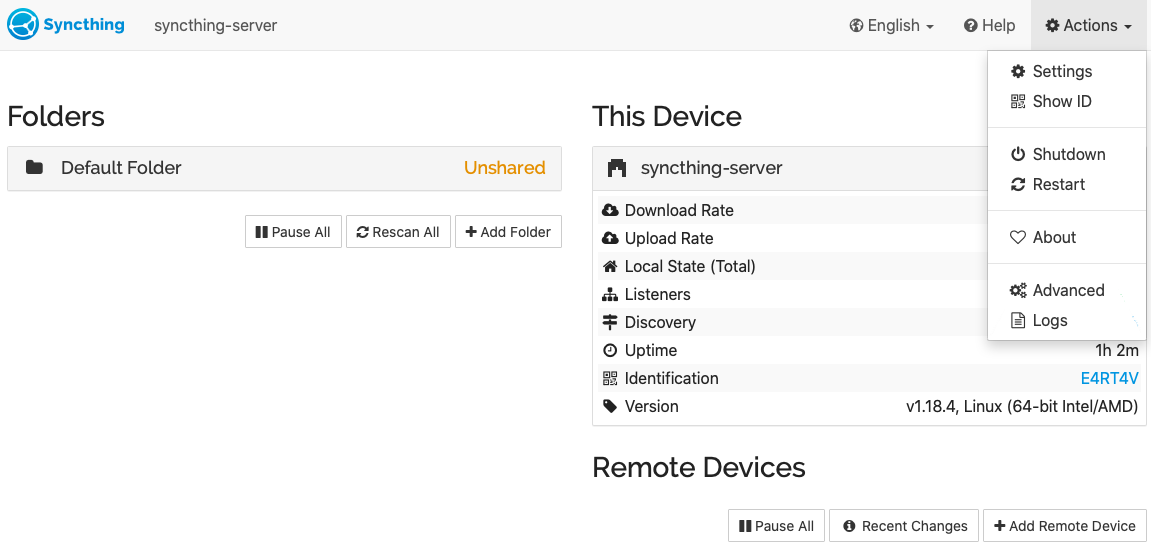
Another way to get server device ID is via web UI, Click
Actions » Click Show ID:
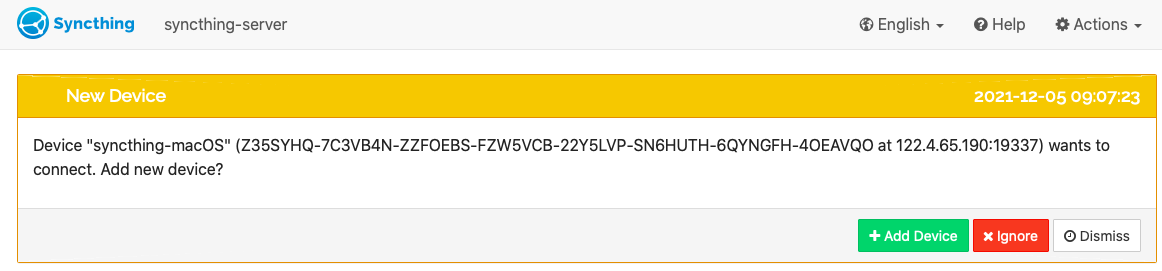
Allow Device Connection
The final step is to go to server side and confirm the New Device:
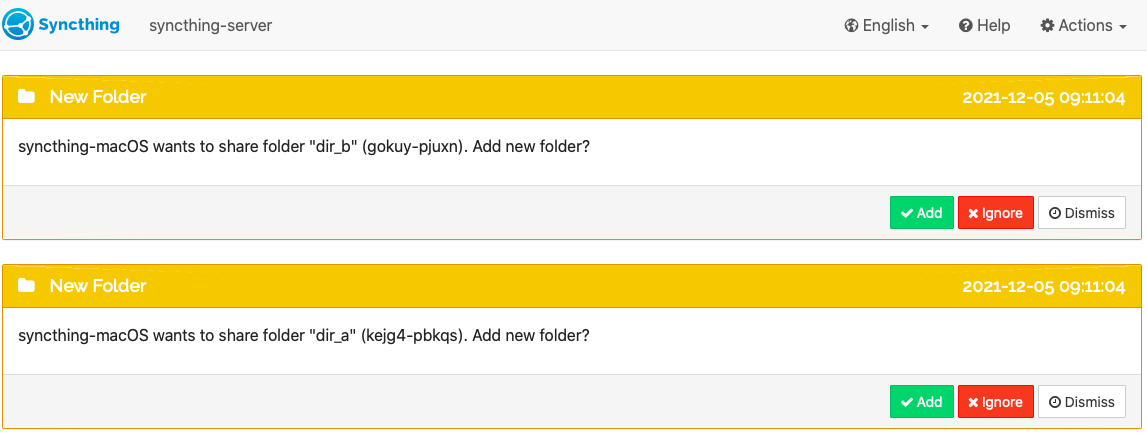
 Wait for a little while, the new folder messages will show up, confirm those two
folders we just shared in client side and we are done:
Wait for a little while, the new folder messages will show up, confirm those two
folders we just shared in client side and we are done:
Ignore folders
If you want some of the folders not synced to server, create a file .stignore
and put the folder name in it, this folder will be excluded from sync.