Bypass Censorship with v2ray
Server side of v2ray
There is a script from official website for installing v2ray:
wget -c https://install.direct/go.sh
sudo bash go.sh
This will install v2ray to /usr/bin/v2ray, v2ctl, geoip.dat, geosite.dat also
included.
V2ray uses json format for config file, and will be installed in above setup under /etc/v2ray/ directory, use default configuration will be ok, add kcp protocol if you are enduring poor quality of internet service, like this:
{
  "inbounds": [{
    "port": 28393,
    "protocol": "vmess",
    "settings": {
      "clients": [
        {
          "id": "4efd2d53-9442-47cd-8266-fe36615aab17",
          "level": 1,
          "alterId": 64
        }
      ]
    },
    "streamSettings": {
      "network": "mkcp",
      "kcpSettings": {
        "uplinkCapacity": 5,
        "downlinkCapacity": 100,
        "congestion": true,
        "header": {
          "type": "none"
        }
      }
    }
  }],
  "outbounds": [{
    "protocol": "freedom",
    "settings": {}
  },{
    "protocol": "blackhole",
    "settings": {},
    "tag": "blocked"
  }],
  "routing": {
    "rules": [
      {
        "type": "field",
        "ip": ["geoip:private"],
        "outboundTag": "blocked"
      }
    ]
  }
}
KCP was originally created by skywind3000 and integrated into v2ray by xiaokangwang.
After installation we can use service v2ray start|stop|status|reload|restart etc to manipulate v2ray.
root@vultr:~# service v2ray status
● v2ray.service - V2Ray Service
   Loaded: loaded (/etc/systemd/system/v2ray.service; enabled; vendor preset: enabled)
   Active: active (running) since Sun 2019-04-07 13:57:41 UTC; 6 days ago
 Main PID: 3955 (v2ray)
    Tasks: 9 (limit: 505)
   CGroup: /system.slice/v2ray.service
           └─3955 /usr/bin/v2ray/v2ray -config /etc/v2ray/config.json
Client side of v2ray
MacOS
Install v2ray with below commands:
brew tap v2ray/v2ray
brew install v2ray-core
Configure v2ray
Add v2ray server configuration in /usr/local/etc/v2ray/config.json, enable kcp
protocol:
{
  "log": {
    // By default, V2Ray writes access log to stdout.
    // "access": "/path/to/access/log/file",

    // By default, V2Ray write error log to stdout.
    "error": "/var/log/v2ray.log",

    // Log level, one of "debug", "info", "warning", "error", "none"
    "loglevel": "warning"
  },
  // List of inbound proxy configurations.
  "inbounds": [{
    // Port to listen on. You may need root access if the value is less than 1024.
    "port": 1080,

    // IP address to listen on. Change to "0.0.0.0" to listen on all network interfaces.
    "listen": "127.0.0.1",

    // Tag of the inbound proxy. May be used for routing.
    "tag": "socks-inbound",

    // Protocol name of inbound proxy.
    "protocol": "socks",

    // Settings of the protocol. Varies based on protocol.
    "settings": {
      "auth": "noauth",
      "udp": false,
      "ip": "127.0.0.1"
    },

    // Enable sniffing on TCP connection.
    "sniffing": {
      "enabled": true,
      // Target domain will be overriden to the one carried by the connection, if the connection is HTTP or HTTPS.
      "destOverride": ["http", "tls"]
    }
  }],
  // List of outbound proxy configurations.
  "outbounds": [{
    "protocol": "vmess",
    "settings": {
      "vnext": [
        {
          // v2ray server ipaddr
          "address": "123.123.123.123",
          "port": 27153,
          "users": [{
            "id": "4efd2d53-9442-47cd-8266-fe36615aab17",
            "alterId": 64
          }]
        }
      ]
    },
    "streamSettings": {
      "network": "mkcp",
      "kcpSettings": {
        "mtu": 1350,
        "tti": 20,
        "uplinkCapacity": 5,
        "downlinkCapacity": 100,
        "congestion": true,
        "header": {
          "type": "none"
        }
      }
    }
  }, {
    // Protocol name of the outbound proxy.
    "protocol": "freedom",

    // Settings of the protocol. Varies based on protocol.
    "settings": {},

    // Tag of the outbound. May be used for routing.
    "tag": "direct"
  }, {
    "protocol": "blackhole",
    "settings": {},
    "tag": "blocked"
  }],

  // Transport is for global transport settings. If you have multiple transports with same settings
  // (say mKCP), you may put it here, instead of in each individual inbound/outbounds.
  //"transport": {},

  // Routing controls how traffic from inbounds are sent to outbounds.
  "routing": {
    "domainStrategy": "IPOnDemand",
    "rules":[
      {
        // Blocks access to private IPs. Remove this if you want to access your router.
        "type": "field",
        "ip": ["geoip:private"],
        "outboundTag": "blocked"
      },
      {
        // Blocks major ads.
        "type": "field",
        "domain": ["geosite:category-ads"],
        "outboundTag": "blocked"
      },
      {
        // Blocks access to private IPs. Remove this if you want to access your router.
        "type": "field",
        "outboundTag": "direct",
        "domain": ["geosite:cn"]
      }
    ]
  },

  // Dns settings for domain resolution.
  "dns": {
    // Static hosts, similar to hosts file.
    "hosts": {
      // Match v2ray.com to another domain on CloudFlare. This domain will be used when querying IPs for v2ray.com.
      "domain:v2ray.com": "www.vicemc.net",

      // The following settings help to eliminate DNS poisoning in mainland China.
      // It is safe to comment these out if this is not the case for you.
      "domain:github.io": "pages.github.com",
      "domain:wikipedia.org": "www.wikimedia.org",
      "domain:shadowsocks.org": "electronicsrealm.com"
    },
    "servers": [
      "1.1.1.1",
      {
        "address": "114.114.114.114",
        "port": 53,
        // List of domains that use this DNS first.
        "domains": [
          "geosite:cn"
        ]
      },
      "8.8.8.8",
      "localhost"
    ]
  },

  // Policy controls some internal behavior of how V2Ray handles connections.
  // It may be on connection level by user levels in 'levels', or global settings in 'system.'
  "policy": {
    // Connection policys by user levels
    "levels": {
      "0": {
        "uplinkOnly": 0,
        "downlinkOnly": 0
      }
    },
    "system": {
      "statsInboundUplink": false,
      "statsInboundDownlink": false
    }
  }
}
Setup Proxy
After v2ray setup completed, you need to do the final step: setup proxy.
Go to Network Preferences » Wi-Fi » Advanced... » Proxies and select
SOCKS Proxy, Then press OK, Apply to make it take effect.
Stop v2ray service with brew services stop v2ray-core if needed.
upgrade v2ray
brew upgrade v2ray-core
for Ubuntu
V2ray binary serves as both server and client with different config file, so,
we can install client side of v2ray with the same script go.sh. or dowload
from official release.
For iOS
Download Kitsunebi from Appstore(US), or install with online tools. Kitsunebi support four methods to import v2ray configuration:
- Manual
- QR Code
- URI
- Subscribe
Free V2Ray is an awsome website providing free v2ray service, it reset configuration every 12 hour, you can import its configuration by scanning the qr code or import with the URI provided by this website.
Add outbound manually could be tedious, but once completed, you can share this configuration between your iOS devices by exporting as QR code.
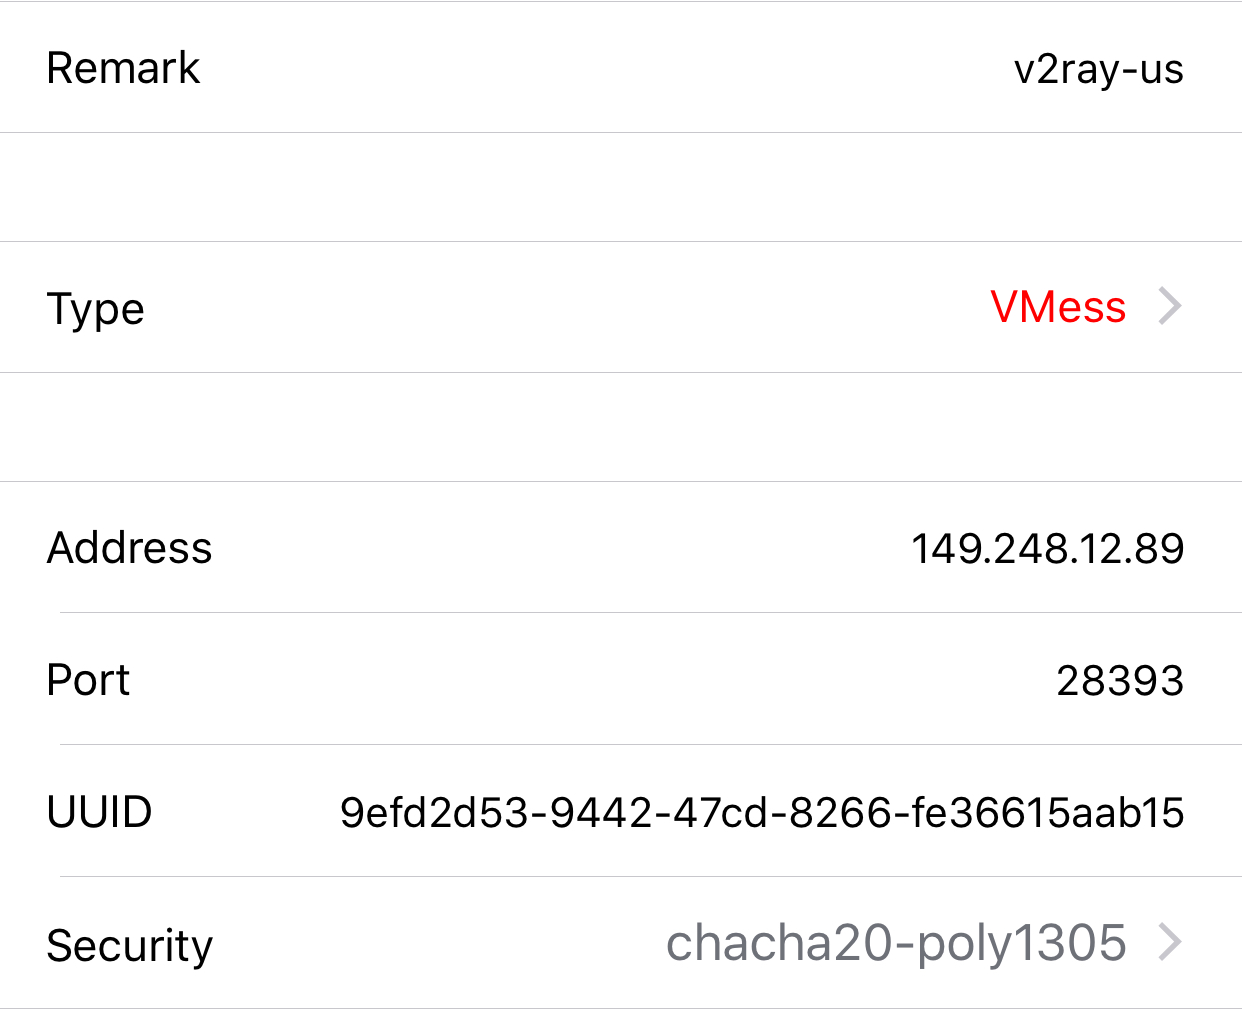
QR code follows the format FOV001 -Endpoint Sepcification can be recognized
by Kitsunebi, take the following config for example:

Follow these steps to generate qr code:
# base64 encoding
kits=`echo -n 'auto:4efd2d53-9442-47cd-8266-fe36615aab17@149.248.12.43:28393' | base64`

# append urlencoded parameters to make final string
kits_all="vmess://"$kits"?network=kcp&kcpHeader=none&uplinkCapacity=5&downlinkCapacity=100&aid=64&tls=0&allowInsecure=1&mux=1&muxConcurrency=8&remark=v2ray-us"

# make QR code
qr $kits_all
QR code generation need qrcode package to be installed, install it with:
pip install --user qrcode
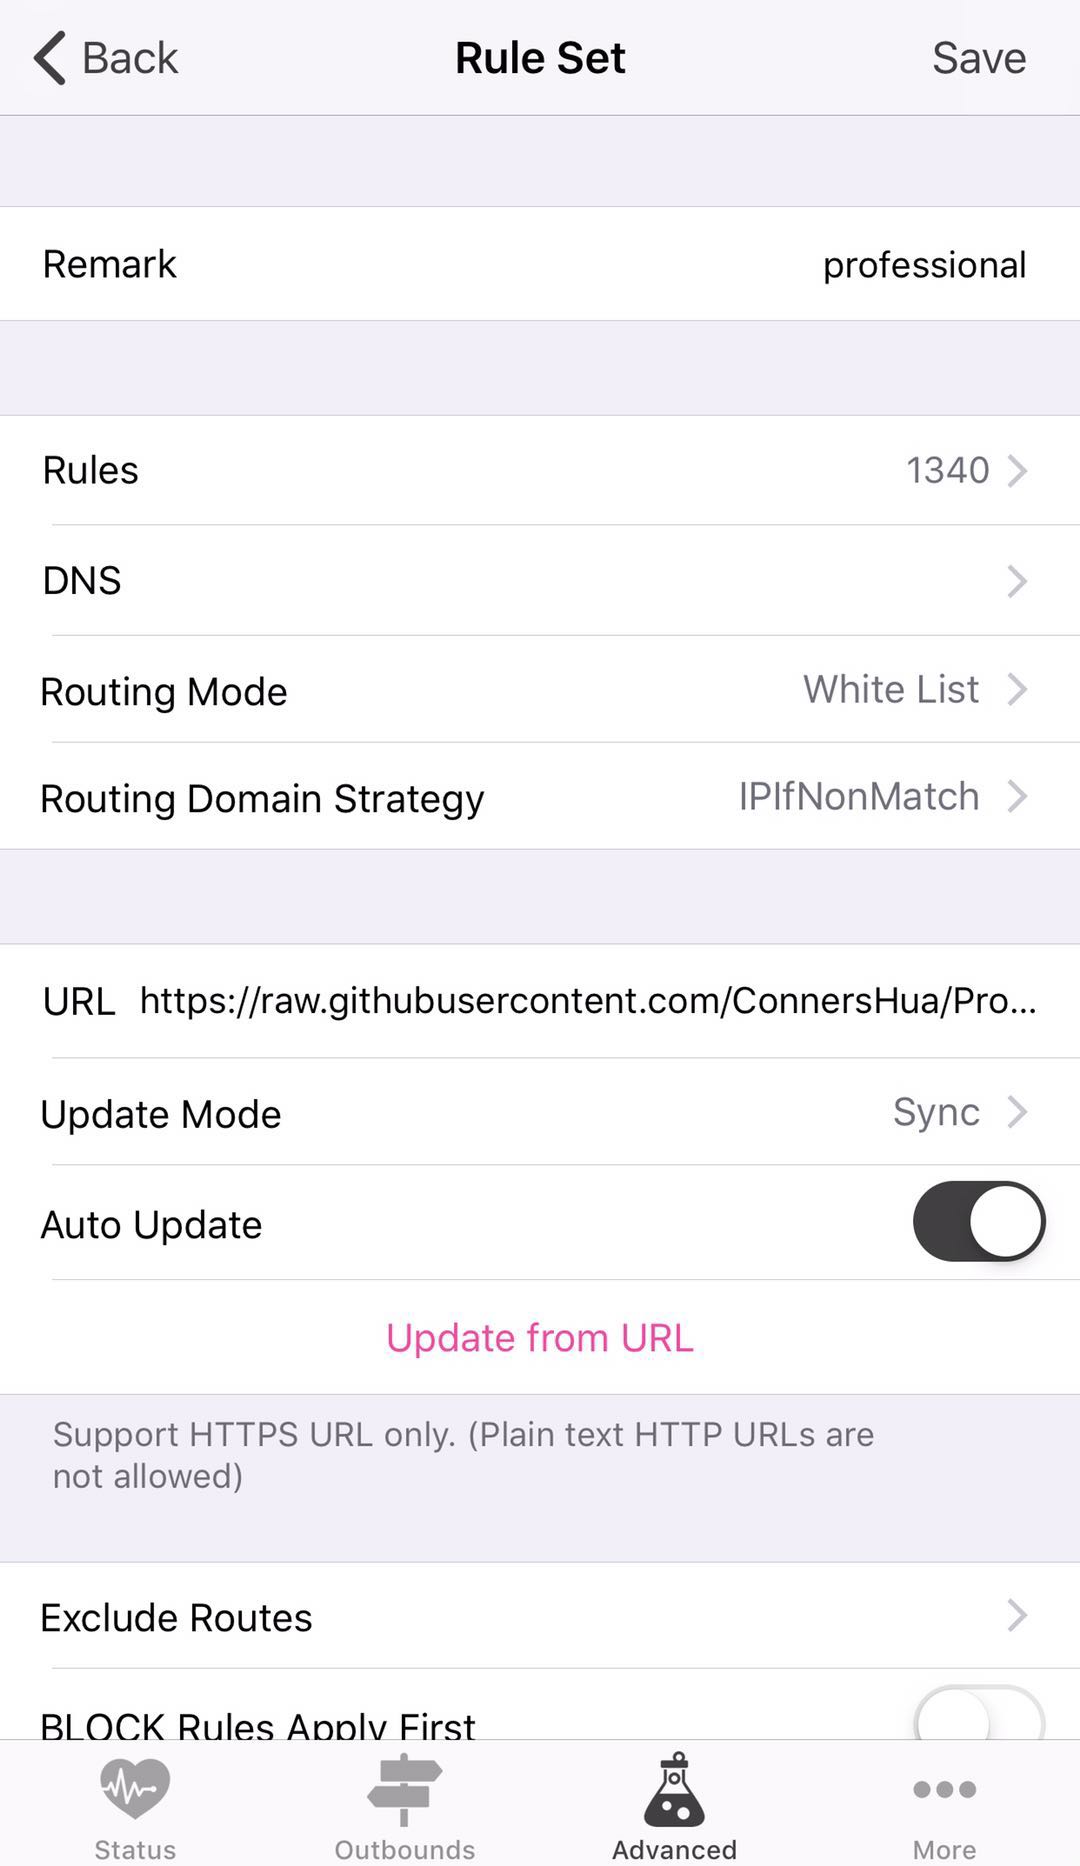
Kitsunebi support ad blockling via Rule Set, this can be set in the ROUTING
section under Advanced tab.
- Press the
+button. - Put below URL in the
URLtextbox:https://raw.githubusercontent.com/ConnersHua/Profiles/master/Kitsunebi/Pro.conf - Press
Update form URL, then Save, done
If you wanna add your own rule, go to kitsunebi-android and ConnersHua’s Profile project pages.
Besides Kitsunebi, you can also use shadowrocket or Quantumult as v2ray client.
For Android
I do not use Android phone very often, refer to kitsunebi-android for details.
For Windows
Try v2rayN if you are running windows OS, download v2rayN-Core.zip,
just download, unzip to any directory will be OK, configure manaunly or by QR code,
then enable it by right click v2rayN icon in system tray, then select Http proxy
(PAC Mode), if everything works fine, you can surf the net now, try google to
confirm if it works properly.
If not, update you system time with NTP, if you have the wrong time set, v2ray server will report the following error message:
2019/10/18 21:50:19 27.223.200.202:51388 rejected v2ray.com/core/proxy/vmess/encoding: invalid user
Check this out in log file: /var/log/v2ray/debug.log.
After the system time updated, the error message will be vanished
