
Smart Home: Motion Detection with Android IP Webcam
Home security is always the most import part for smart home system, in this blog post, I will show you how to turn an old android phone into a webcam, and with android_ip_webcam integration’s motion binary_sensor, you can detect any movement and send you notification to your phone, first things first, let’s setup android IP webcam.
Setup Android IP Webcam
This part involves three steps:
-
Download and install the Android IP Webcam apk from Google Play or alternatively download from here.
-
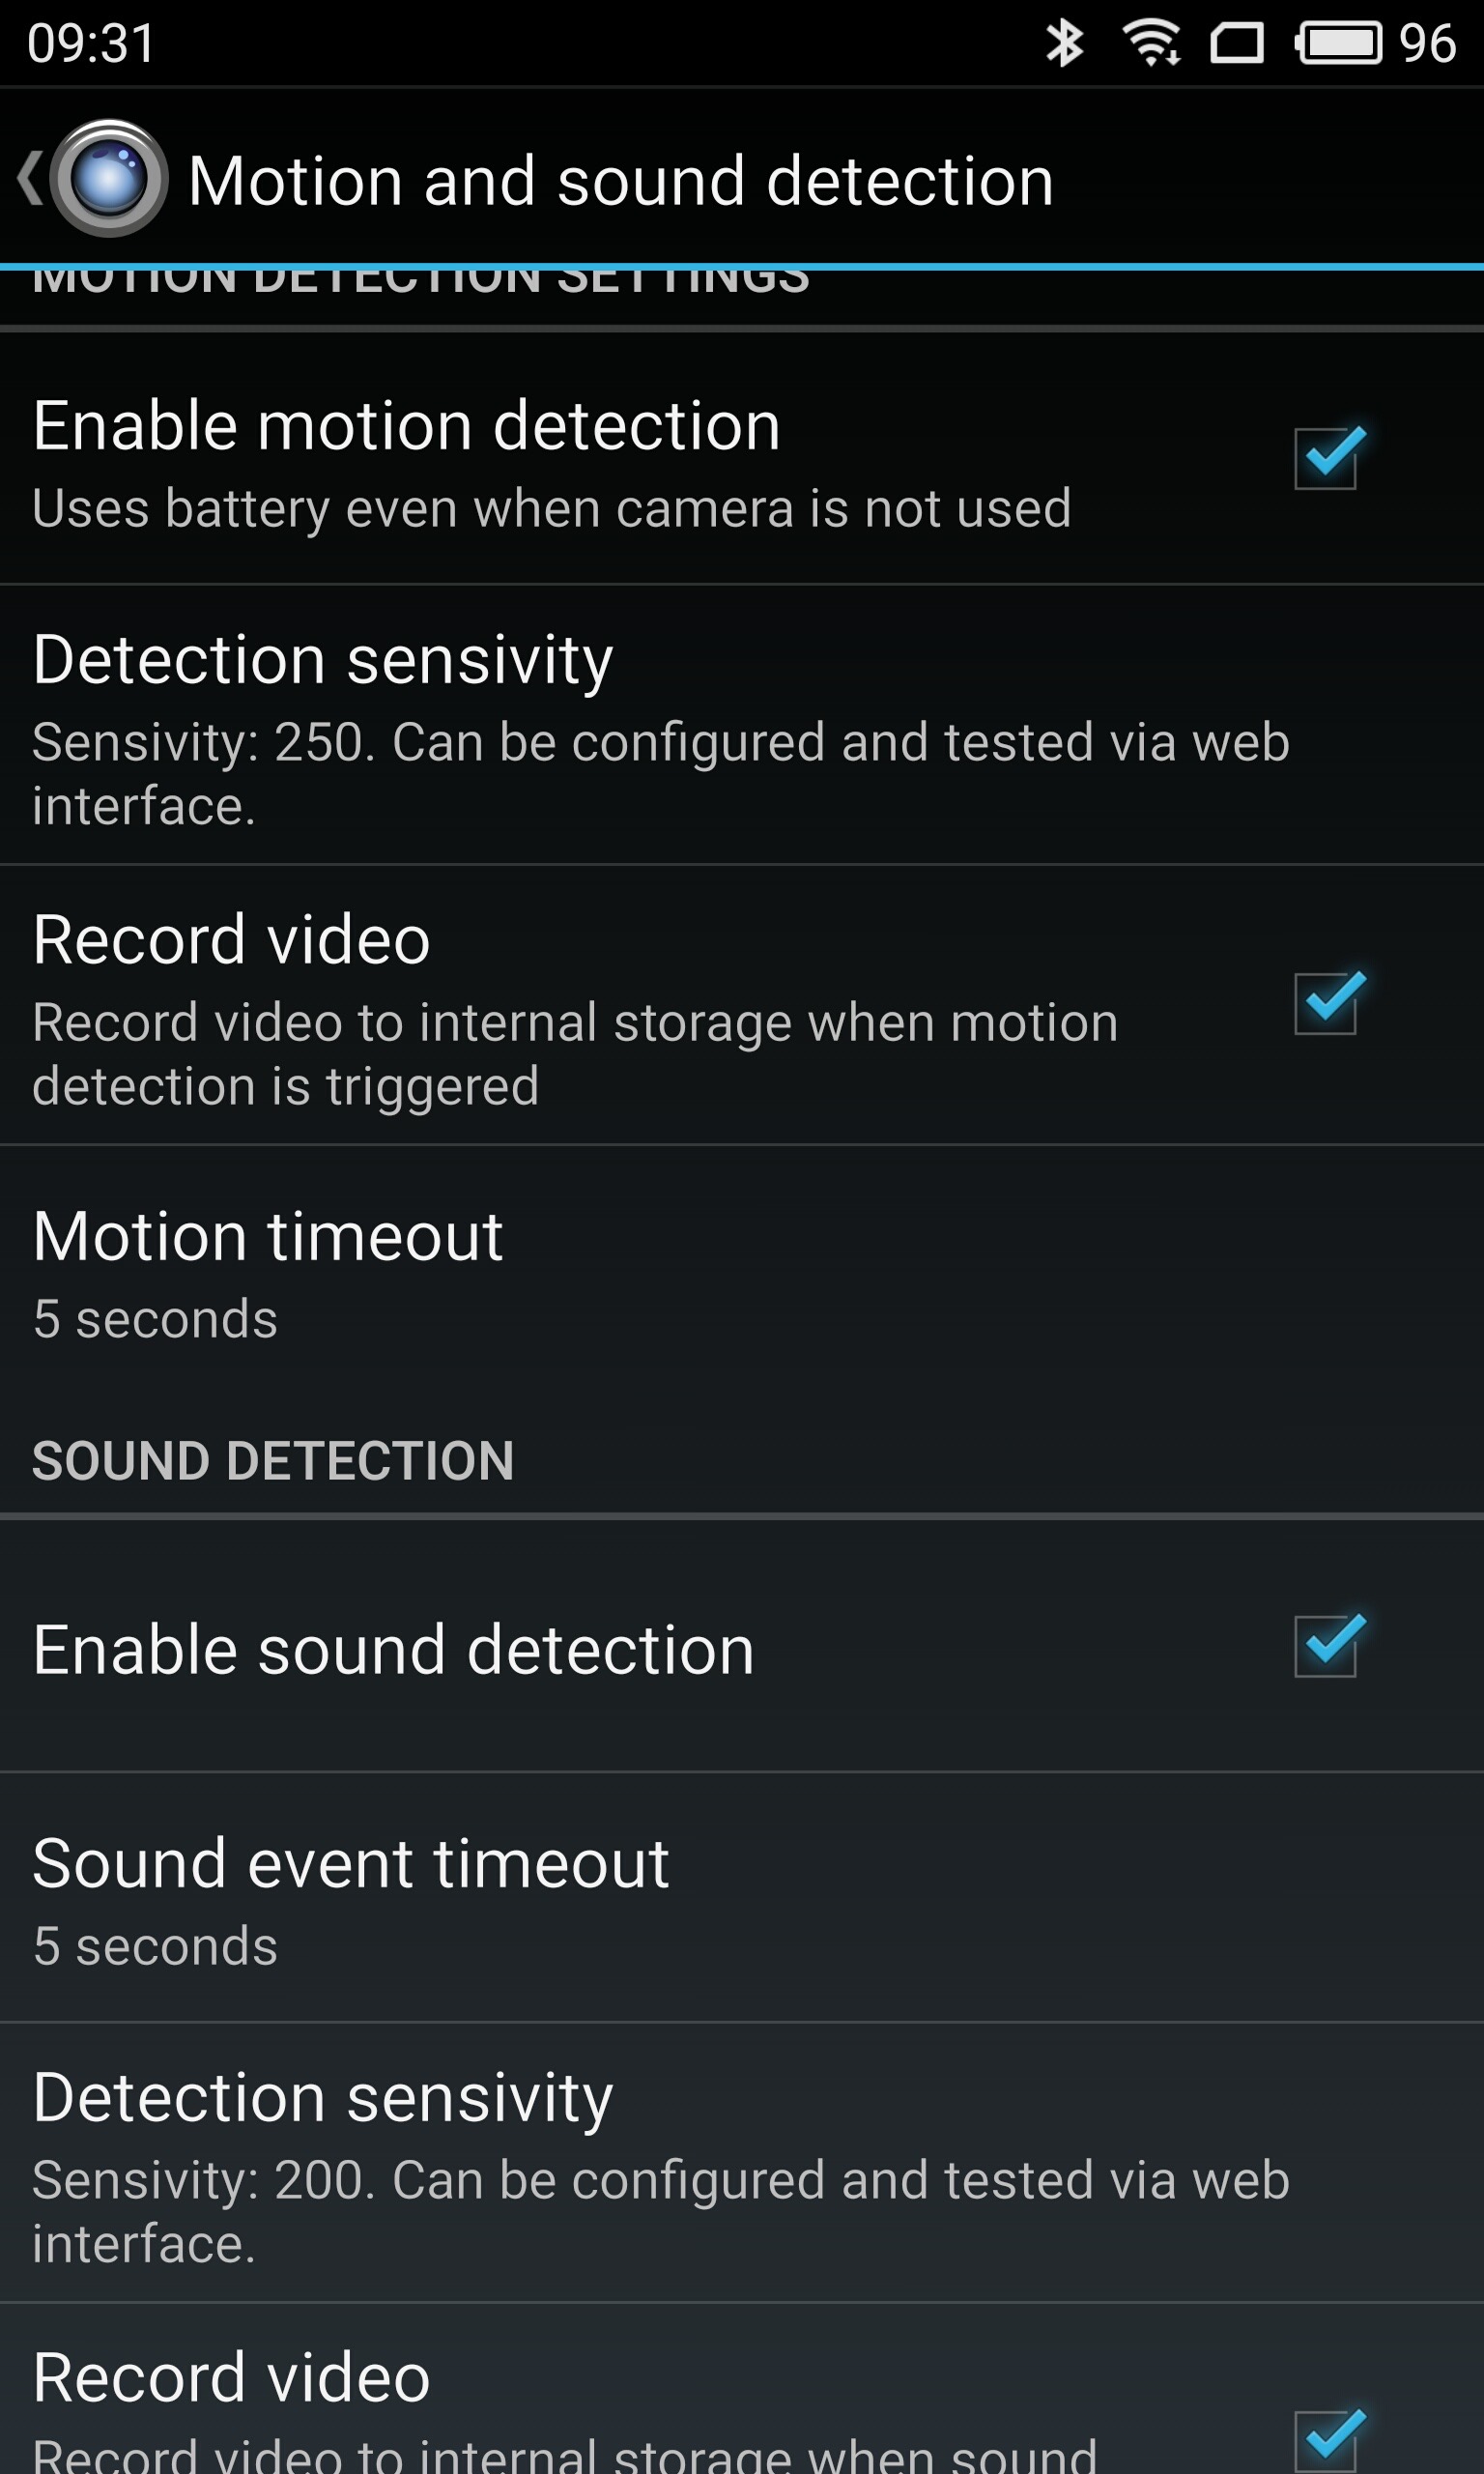
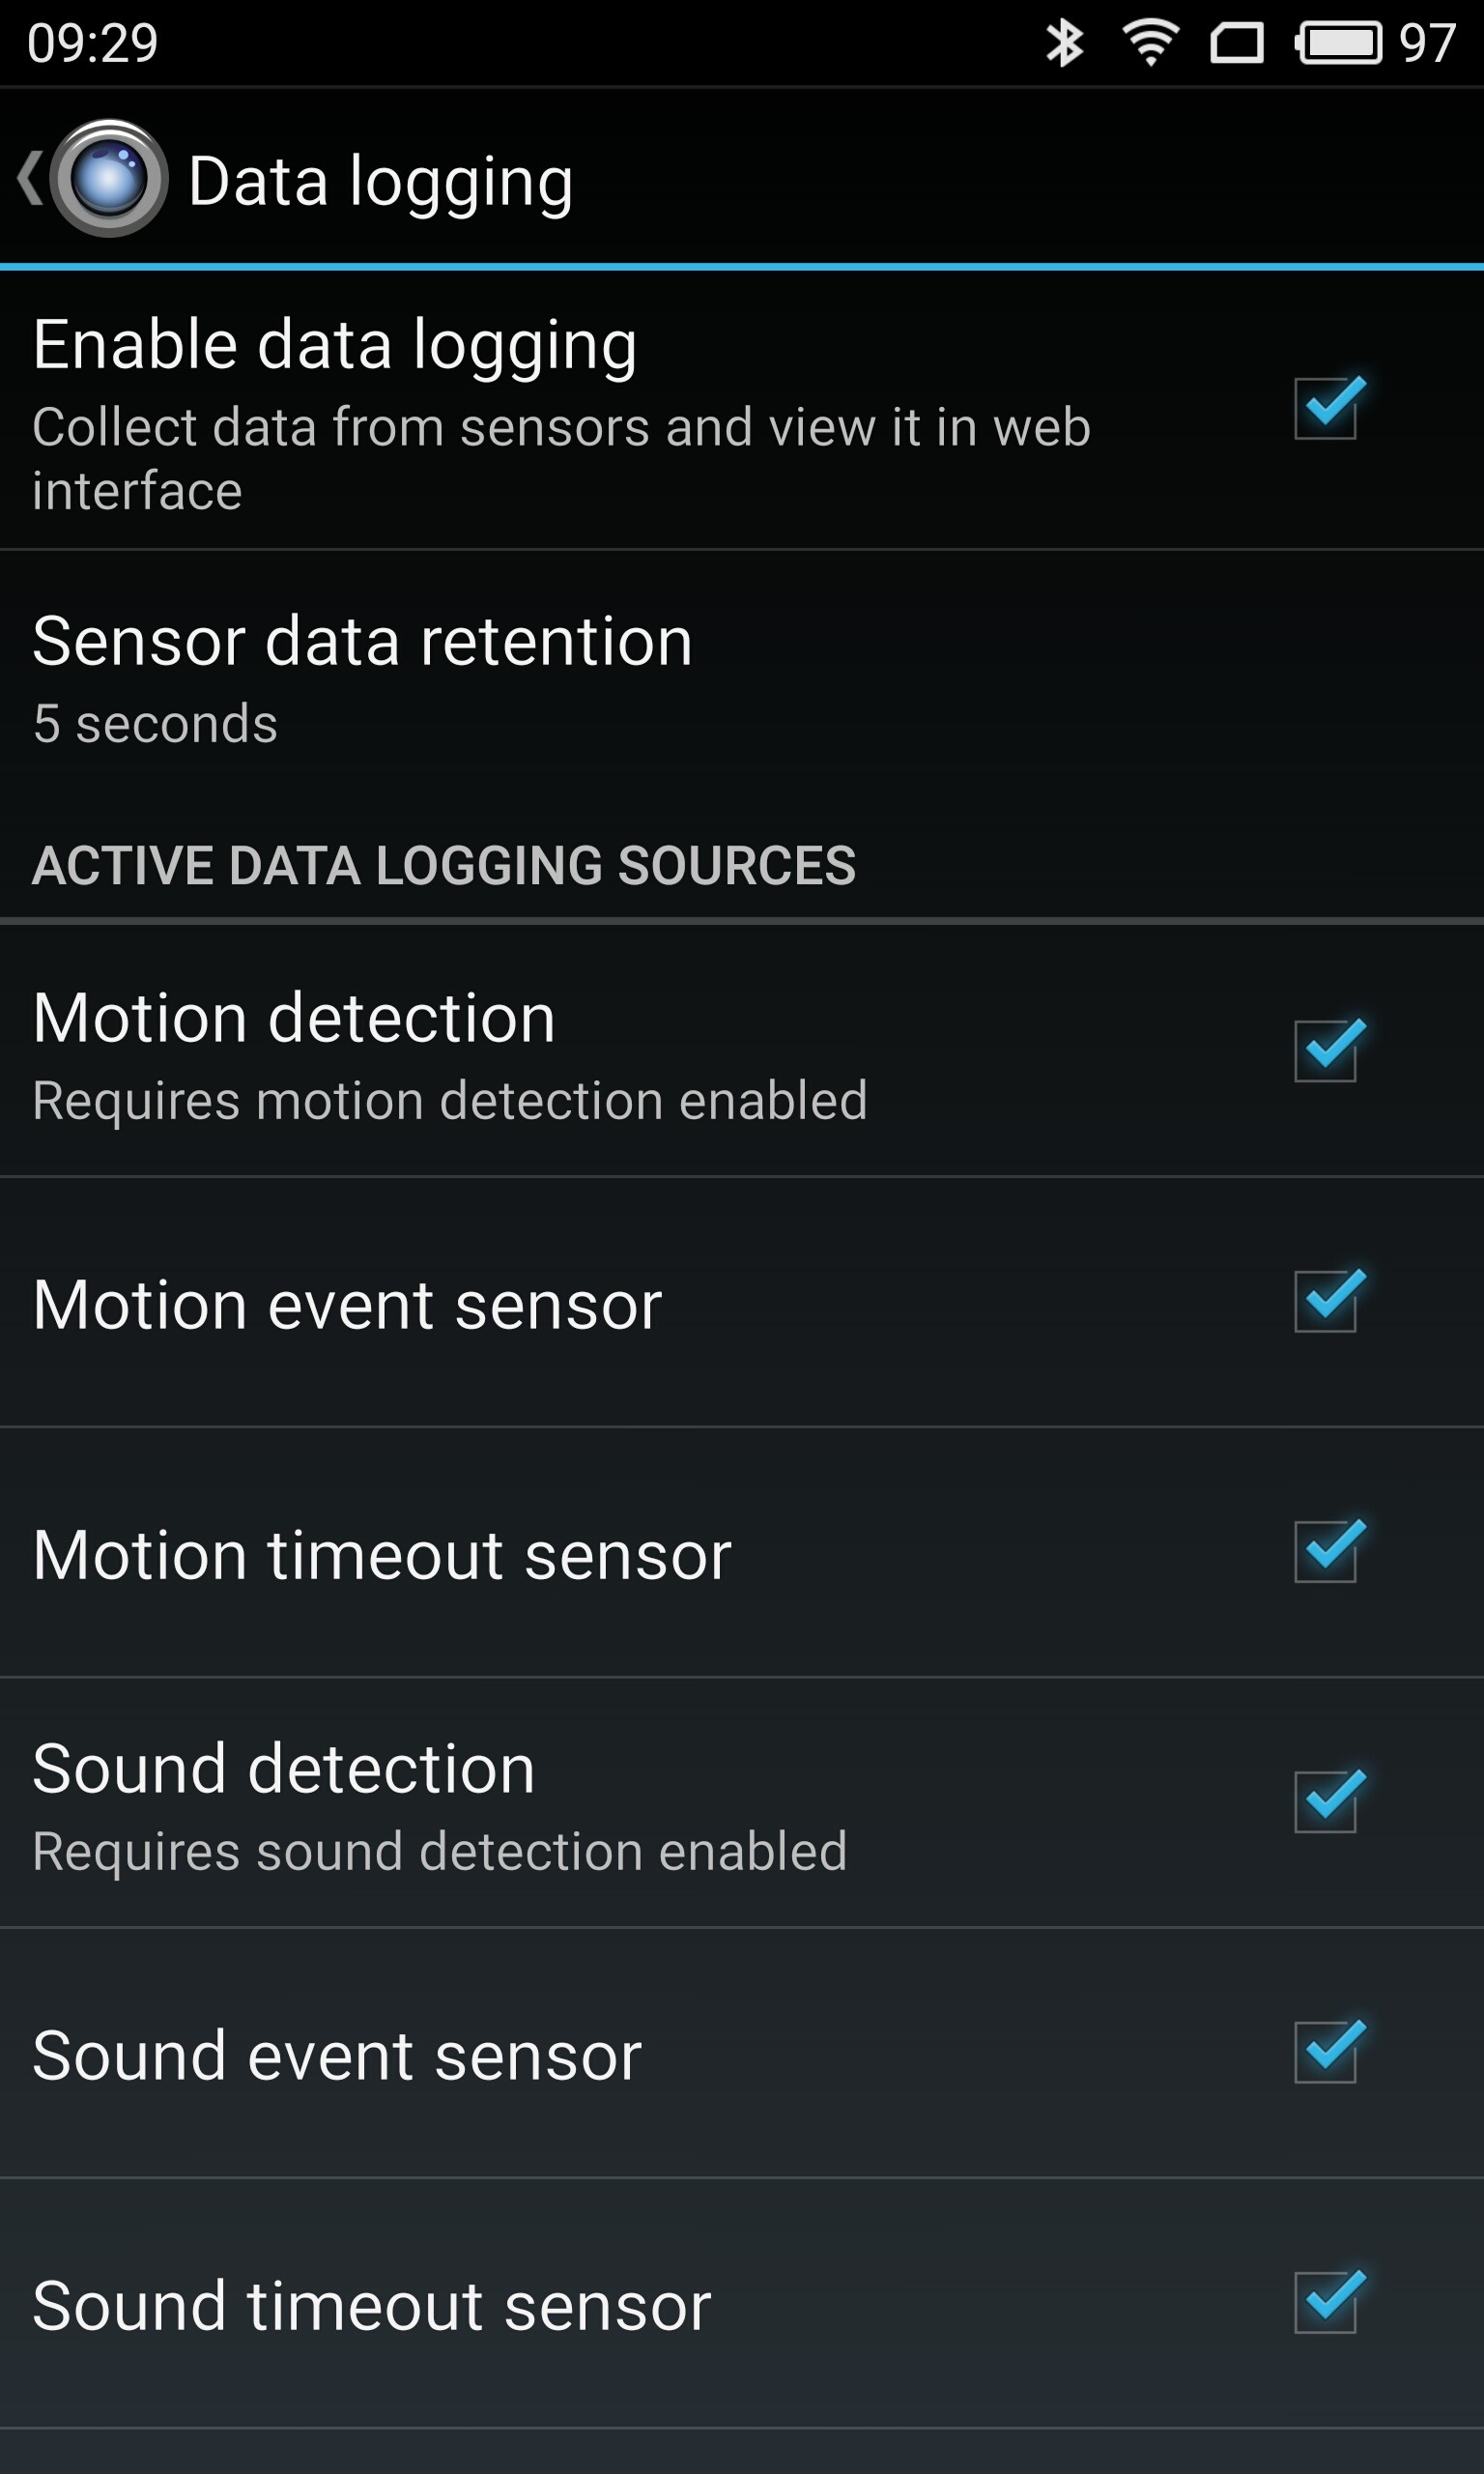
Launch the app, enable motion detection and data logging
-
Start server
The app will serve MJPEG stream through port 8080, the server IP will be shown at the bottom of the screen.
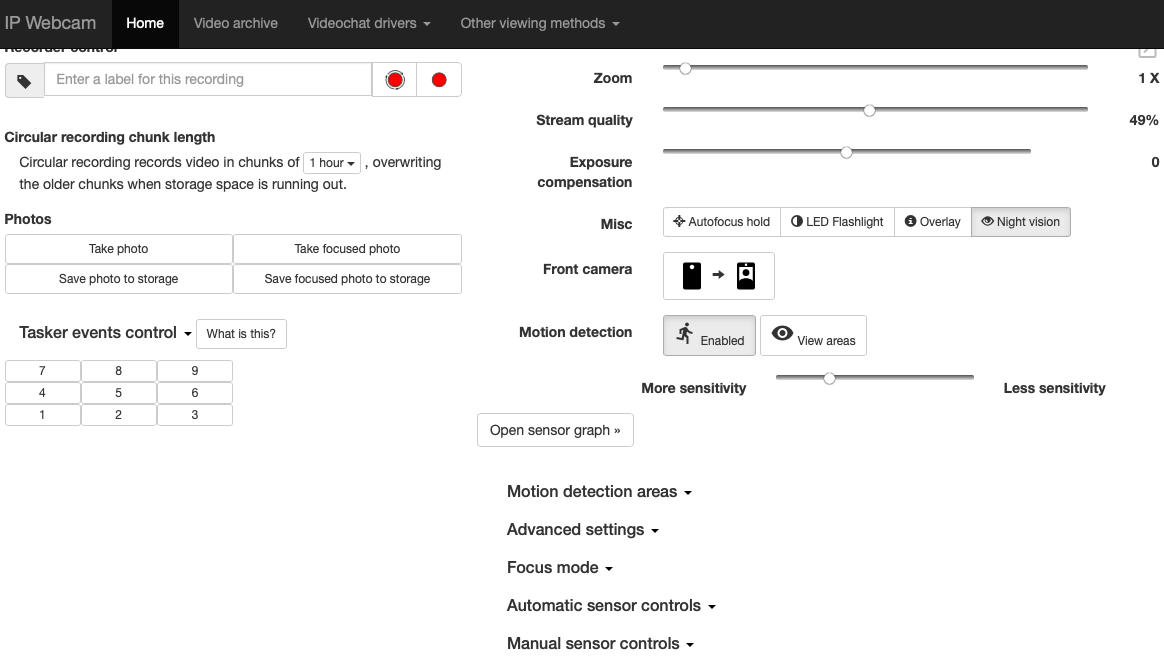
Now launch browser and enter http://192.168.1.8:8080, to see webcam
settings:
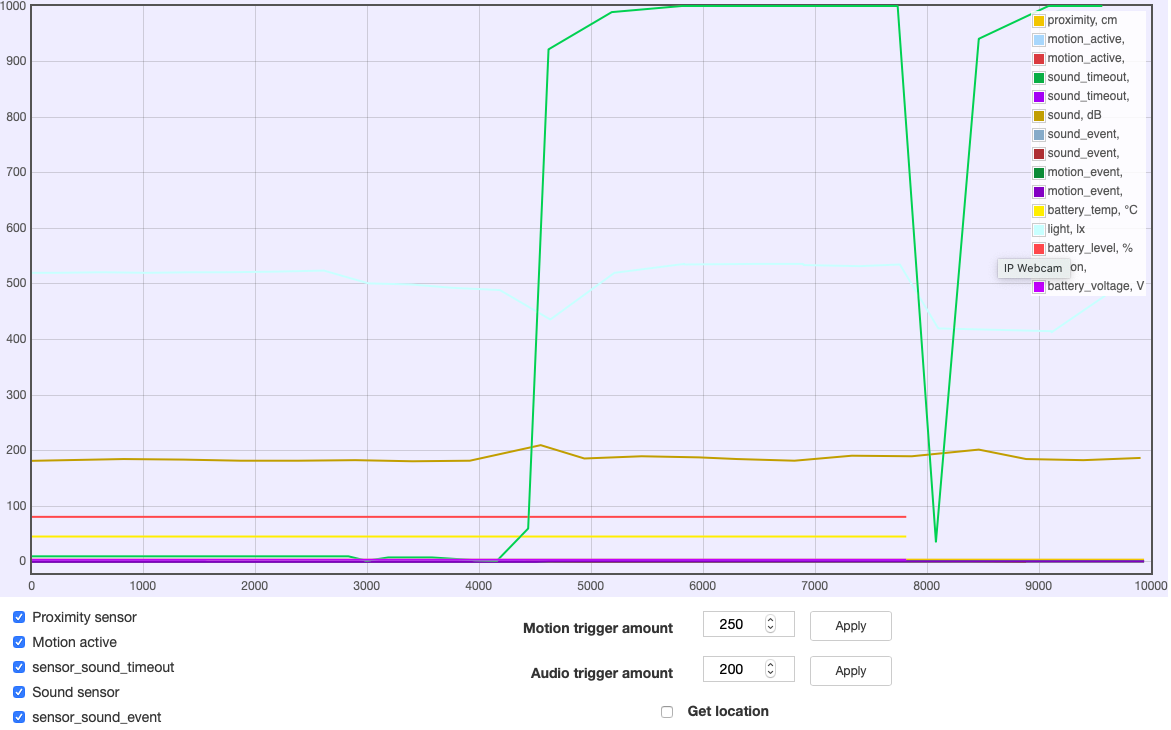
Webcam sensors can be accessed with this URL:
The video server part is done, next we will configure Home Assistant, to make use of motion detect feature of webcam.
HA Configuration
This can be as easy as put the following into /config/configuration.yaml:
android_ip_webcam:
  - host: 192.168.1.8
But this doesn’t make any sense for our purpose.
Append the following to your configuration file for motion detection:
android_ip_webcam:
  - host: 192.168.1.8
    name: living_room_webcam
    port: 8080
    sensors:
      - audio_connections
      - battery_level
      - battery_temp
      - battery_voltage
      - light
      - motion
      - pressure
      - proximity
      - sound
      - video_connections
    switches:
      - exposure_lock
      - ffc
      - focus
      - gps_active
      - motion_detect
      - night_vision
      - overlay
      - torch
      - whitebalance_lock
      - video_recording
    motion_sensor: true
Make sure we have not make any mistake by checking the configuration with:
ha core check
If there is nothing wrong, reboot system with:
ha host reboot
NOTE: There is a mistake in the official doc:
motion_detection
Control the motion detector.
All the switches listed in this component are:
SWITCHES = [
    "exposure_lock",
    "ffc",
    "focus",
    "gps_active",
    "motion_detect",
    "night_vision",
    "overlay",
    "torch",
    "whitebalance_lock",
    "video_recording",
]
So, this should be motion_detect.
Add IP Webcam to Dashboard
After reboot completed, you are ready to do some cool stuff.
- In the Overview page, click top-right three dot and select Configure UI
- Select Unused entities and search for camera.living_room_webcam and binary_sensor.living_room_webcam_motion_active, click the checkbox to select these two entity.
- Click
 button in
the bottom-right corner and select PICK DIFFERENT CARD.
button in
the bottom-right corner and select PICK DIFFERENT CARD. - Scroll down find and pick Picture Glance card.
- In the Picture Glance Card Configuration window:
- Change Title to Living Room
- Select living_room_webcam in Camera Entity.
- Only keep binary_sensor.living_room_webcam_motion_active entity in Entities.
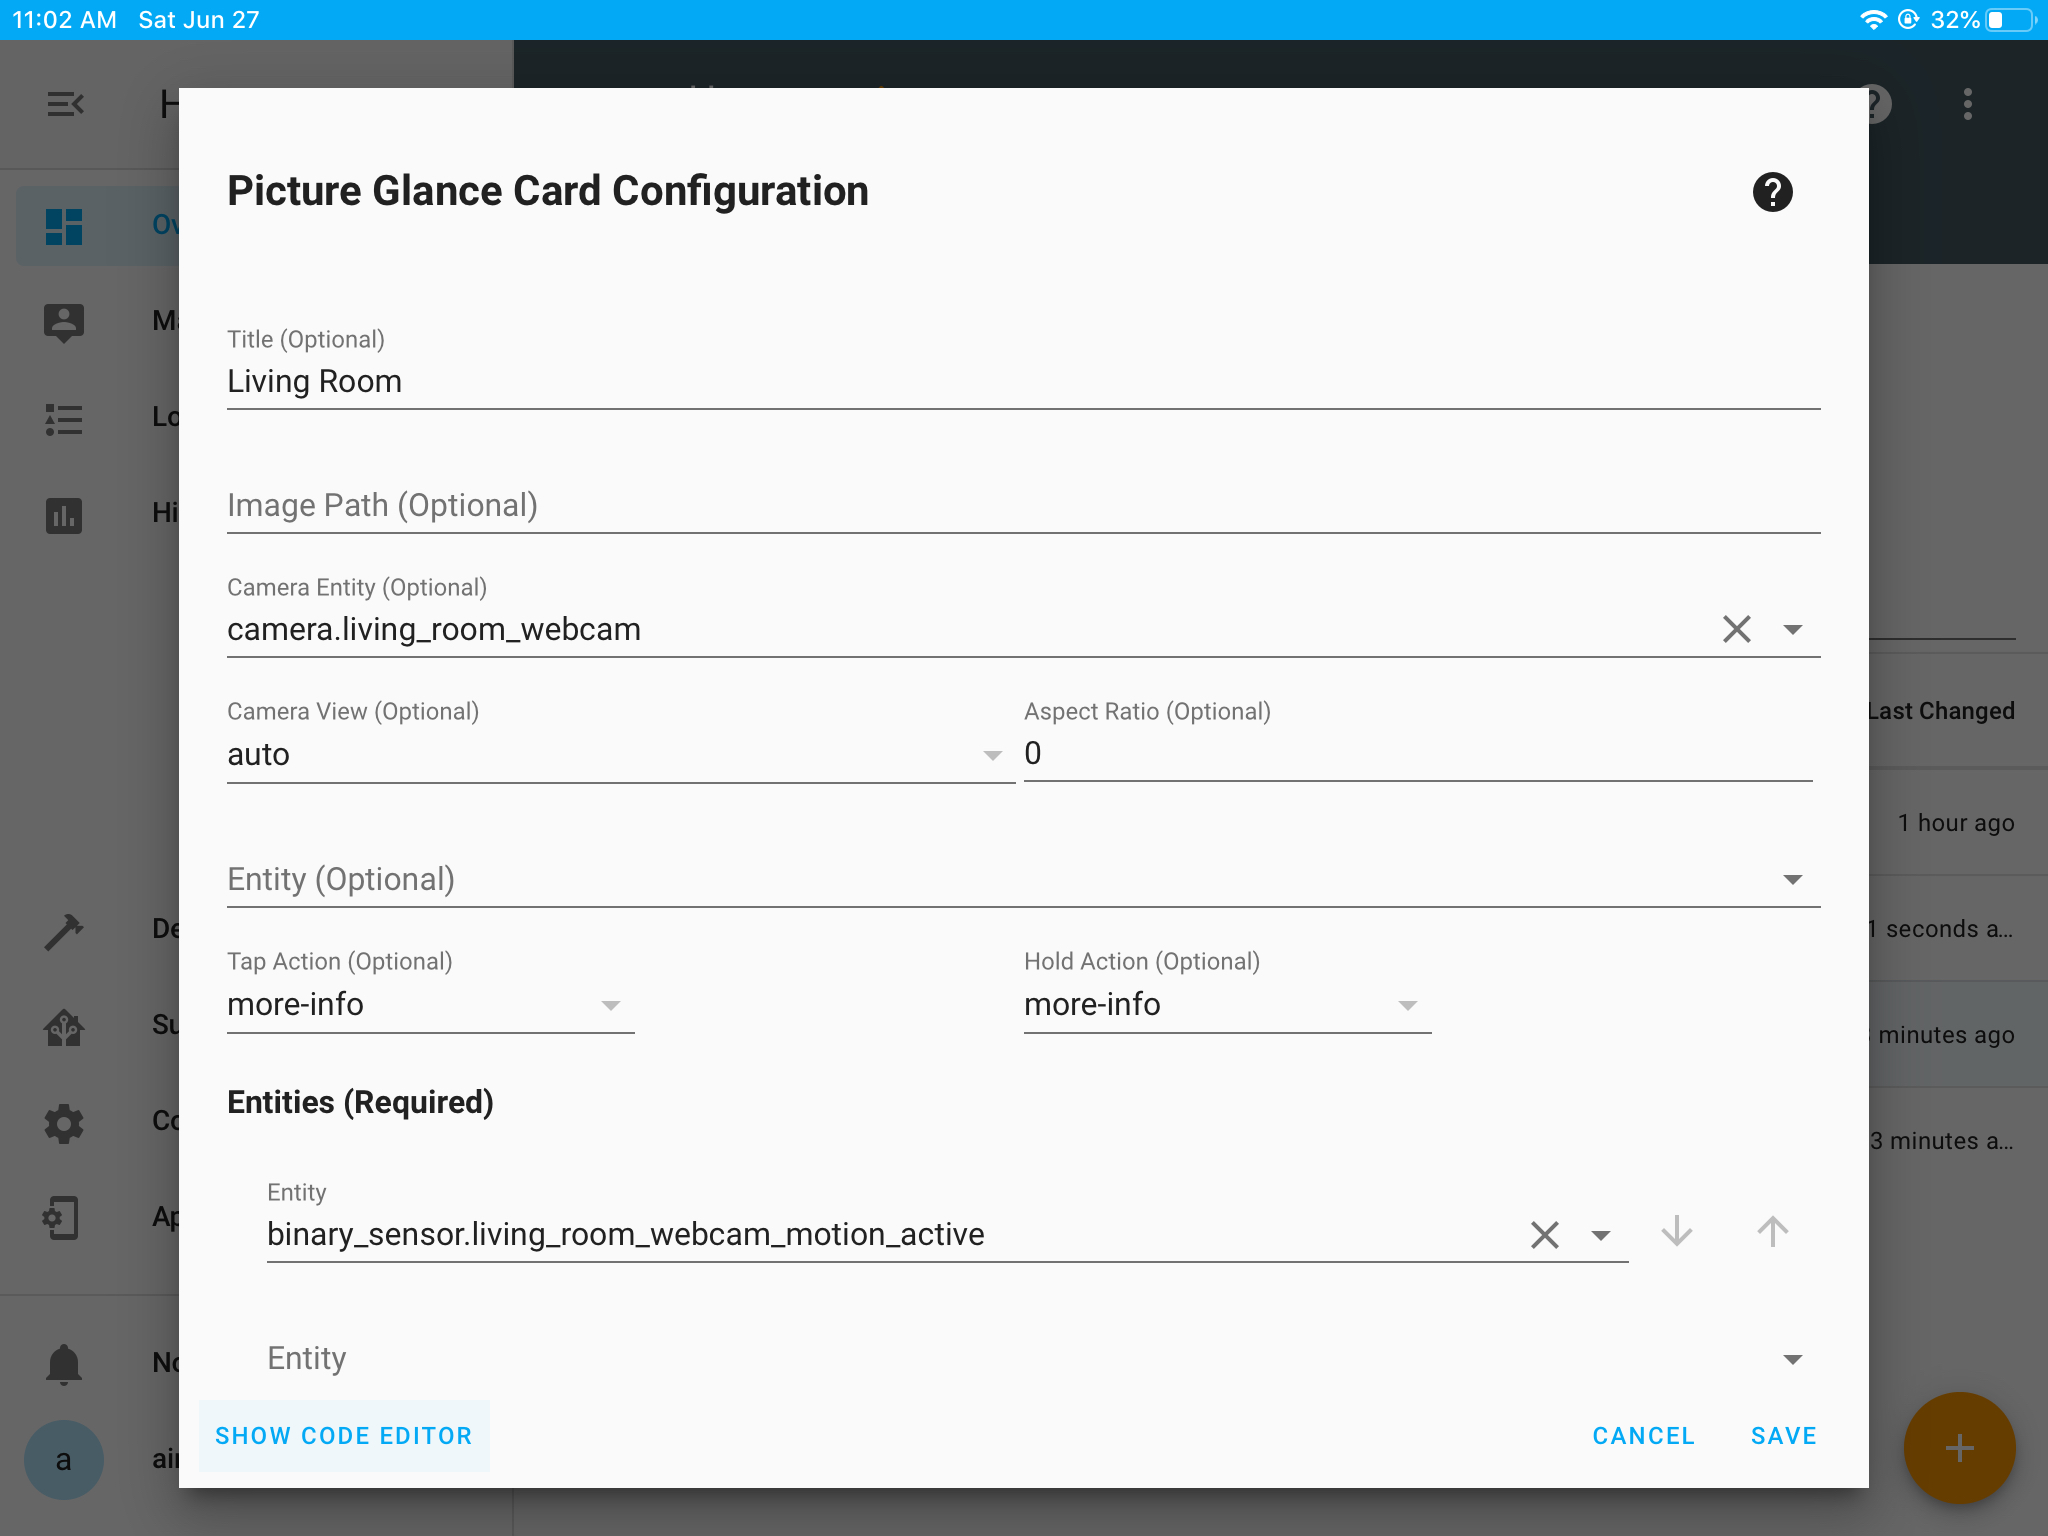
- Click SHOW CODE EDITOR, the code should be similar to this:
type: picture-glance
image: 'https://demo.home-assistant.io/stub_config/kitchen.png'
entities:
  - entity: binary_sensor.living_room_webcam_motion_active
aspect_ratio: 0%
camera_image: camera.living_room_webcam
title: Living Room
Click SAVE to finish adding card, the camera was added to the overview page:

If there are any movements detected, the icon in the card will become running
state:

Sending Notification if Motion Detected
Motion detection doesn’t make any sense unless notify us when motion was detected, this section will guide you how to setup automation to send us notification when motion is active:
Configuration
- Append
ios:to /config/configuration.yaml -
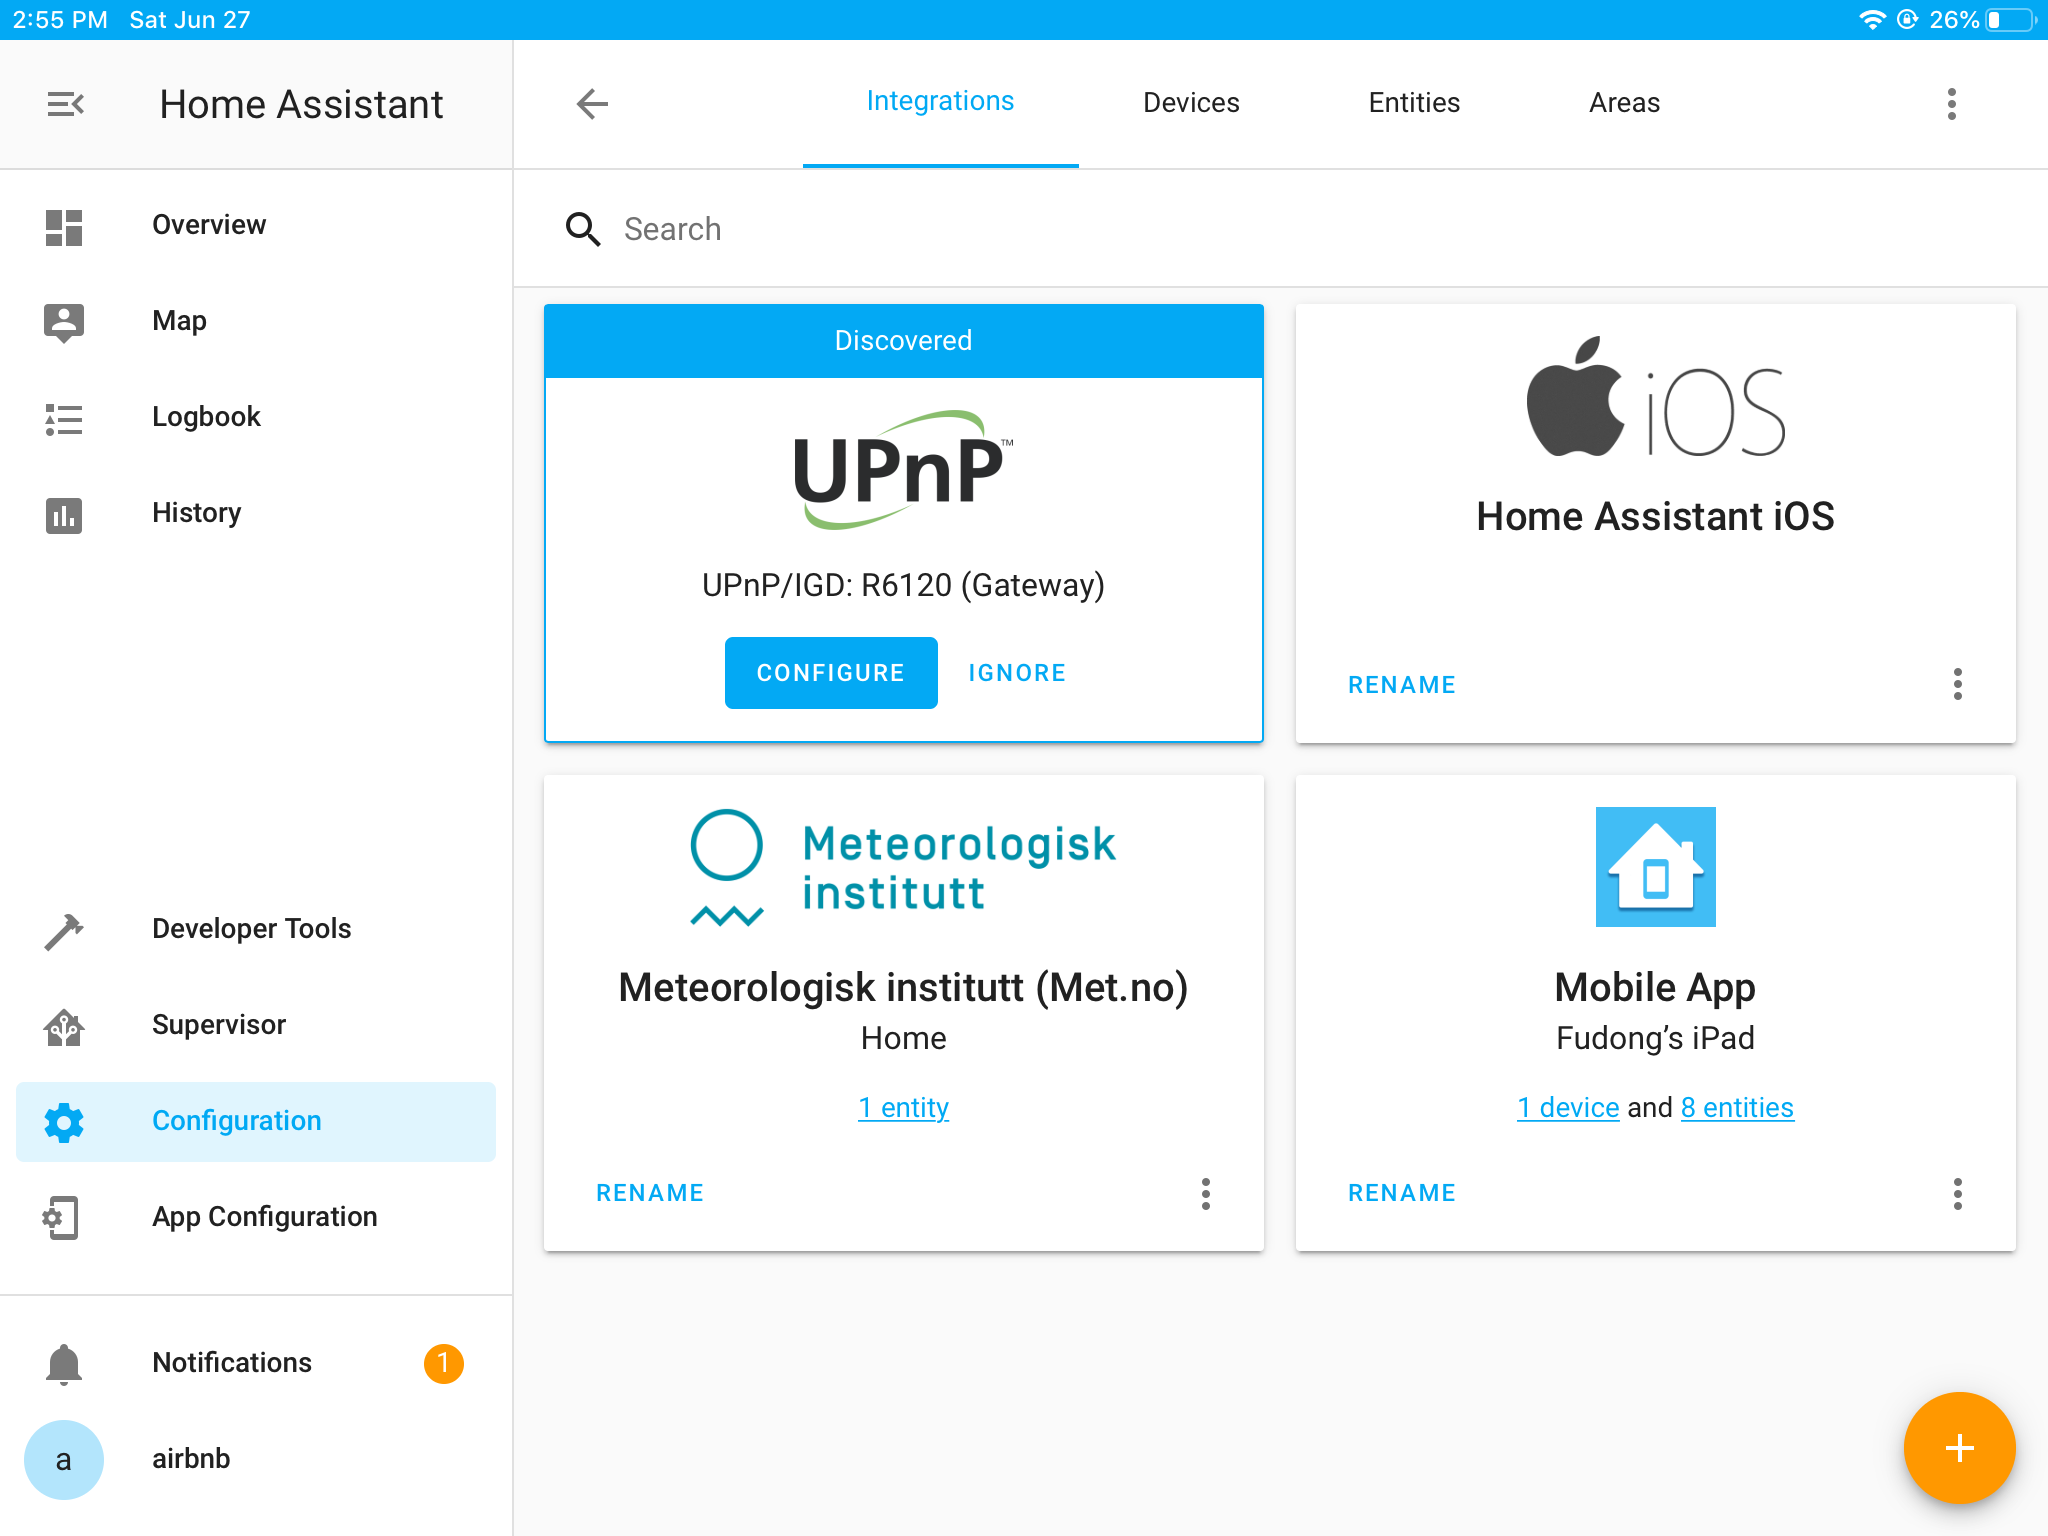
Restart Home Assistant, after system boot up, there should be an notification in Notifications menu.
Click check it out to go to page Configuration » Integration, in this page you will see Home Assistant iOS:
-
Select App Configuration » Notifications, make sure Permission was enabled, and the PUSH ID is not empty.
- Restart Home Assistant again.
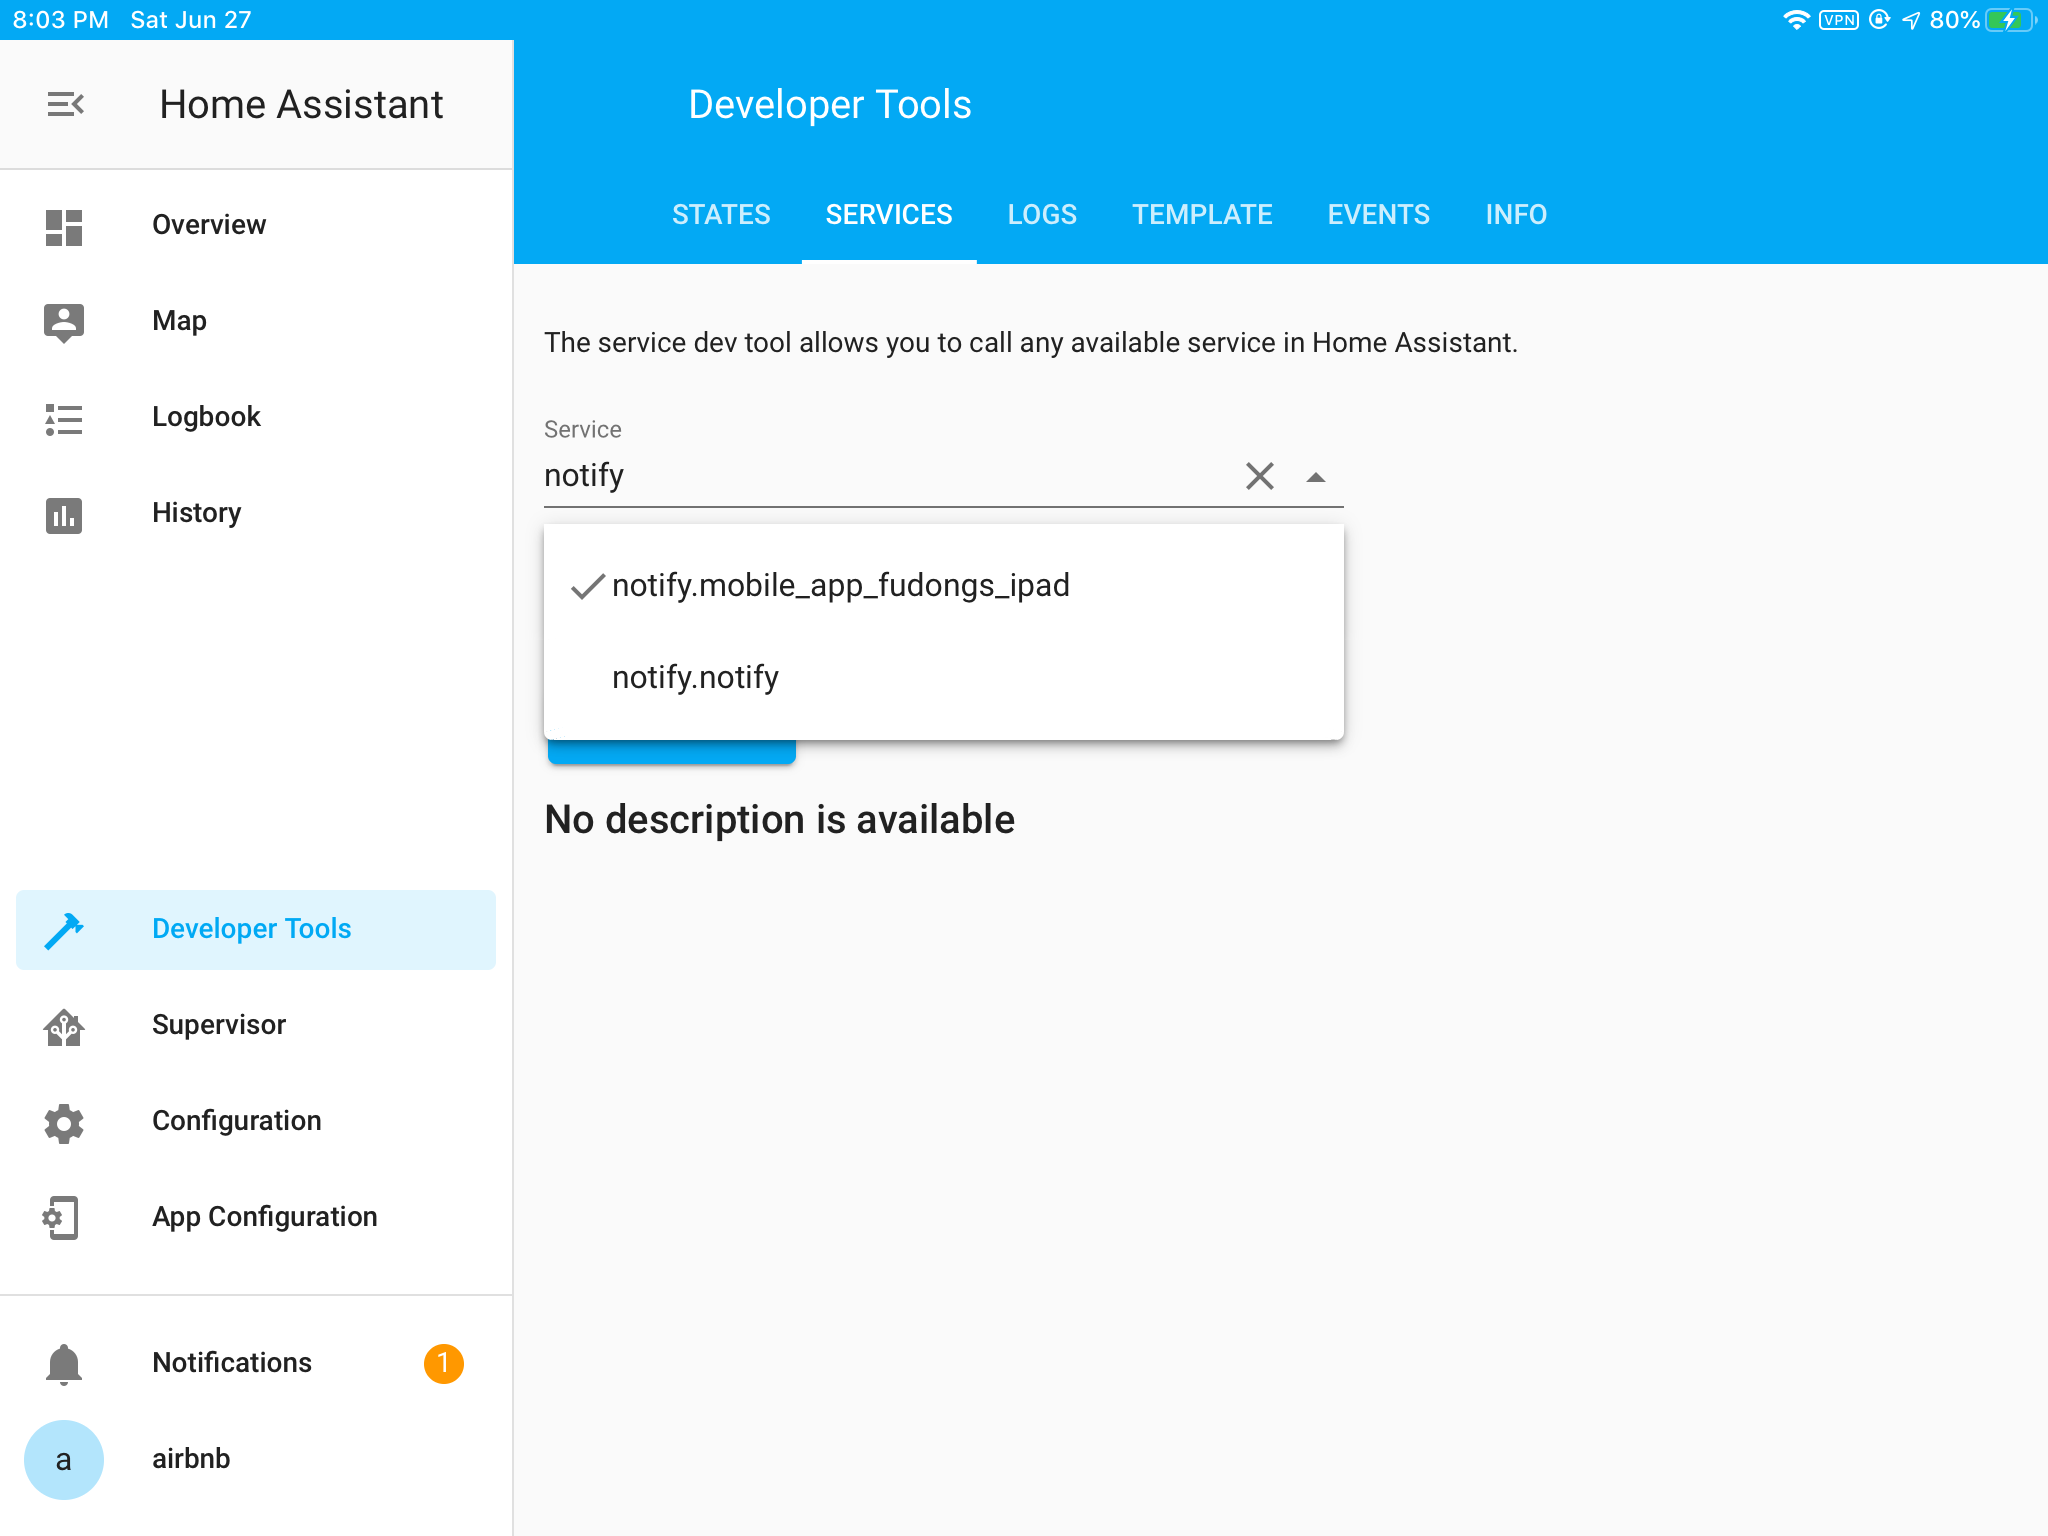
This time you should find notfy.mobile_app_xxx in Developer Tools » SERVICES:
Try to test if notification works by calling service directly, paste the following into Service Data, and click CALL SERVICE:
{"title":"Normal Notification","message":"Motion Detected in the Living Room"}
The title part can be omitted:
{"message": "Motion Detected in the Living Room"}
An notification will be sent to iOS app:

Automation
Follow this guide to send normal notification to iOS app, add below to /config/automations.yaml:
  - id: living_room_motion_detected
    alias: 'Normal Notification'
    trigger:
      platform: state
      entity_id: binary_sensor.living_room_webcam_motion_active
      to: 'on'
    action:
      service: notify.mobile_app_fudongs_ipad
      data:
        message: 'Motion Detected in the Living Room'
Then run ha core check, if check passed, then do ha host reboot to restart
system, if a motion was detected, the notification will sent to app automatically.
With above notification, the only thing we know is motion was detected, nothing more, what if it is just a cat passed by, if an snapshot image can be attached, this could be a big improvement, with dynamic attachments, we can add camera stream into the attachment:
  - id: motion_detecte_dynamic
    alias: 'Notification with Dynamic Content'
    trigger:
      platform: state
      entity_id: binary_sensor.living_room_webcam_motion_active
      to: 'on'
    action:
      service: notify.mobile_app_fudongs_ipad
      data:
        message: 'Motion Detected in the Living Room'
        data:
          attachment:
            content-type: jpeg
          push:
            category: camera
            hide-thumbnail: false
          entity_id: camera.living_room_webcam
Do ha core check and ha host reboot to see the results.
Troubleshooting
I cannot find notify.mobile_app service for my device in dev-services panel
I followed the direction in the troubleshooting page, but to no avail:
If the “PUSH ID” box is empty, tap the Reset button below it.
I got The operation couldn’t be completed. error:
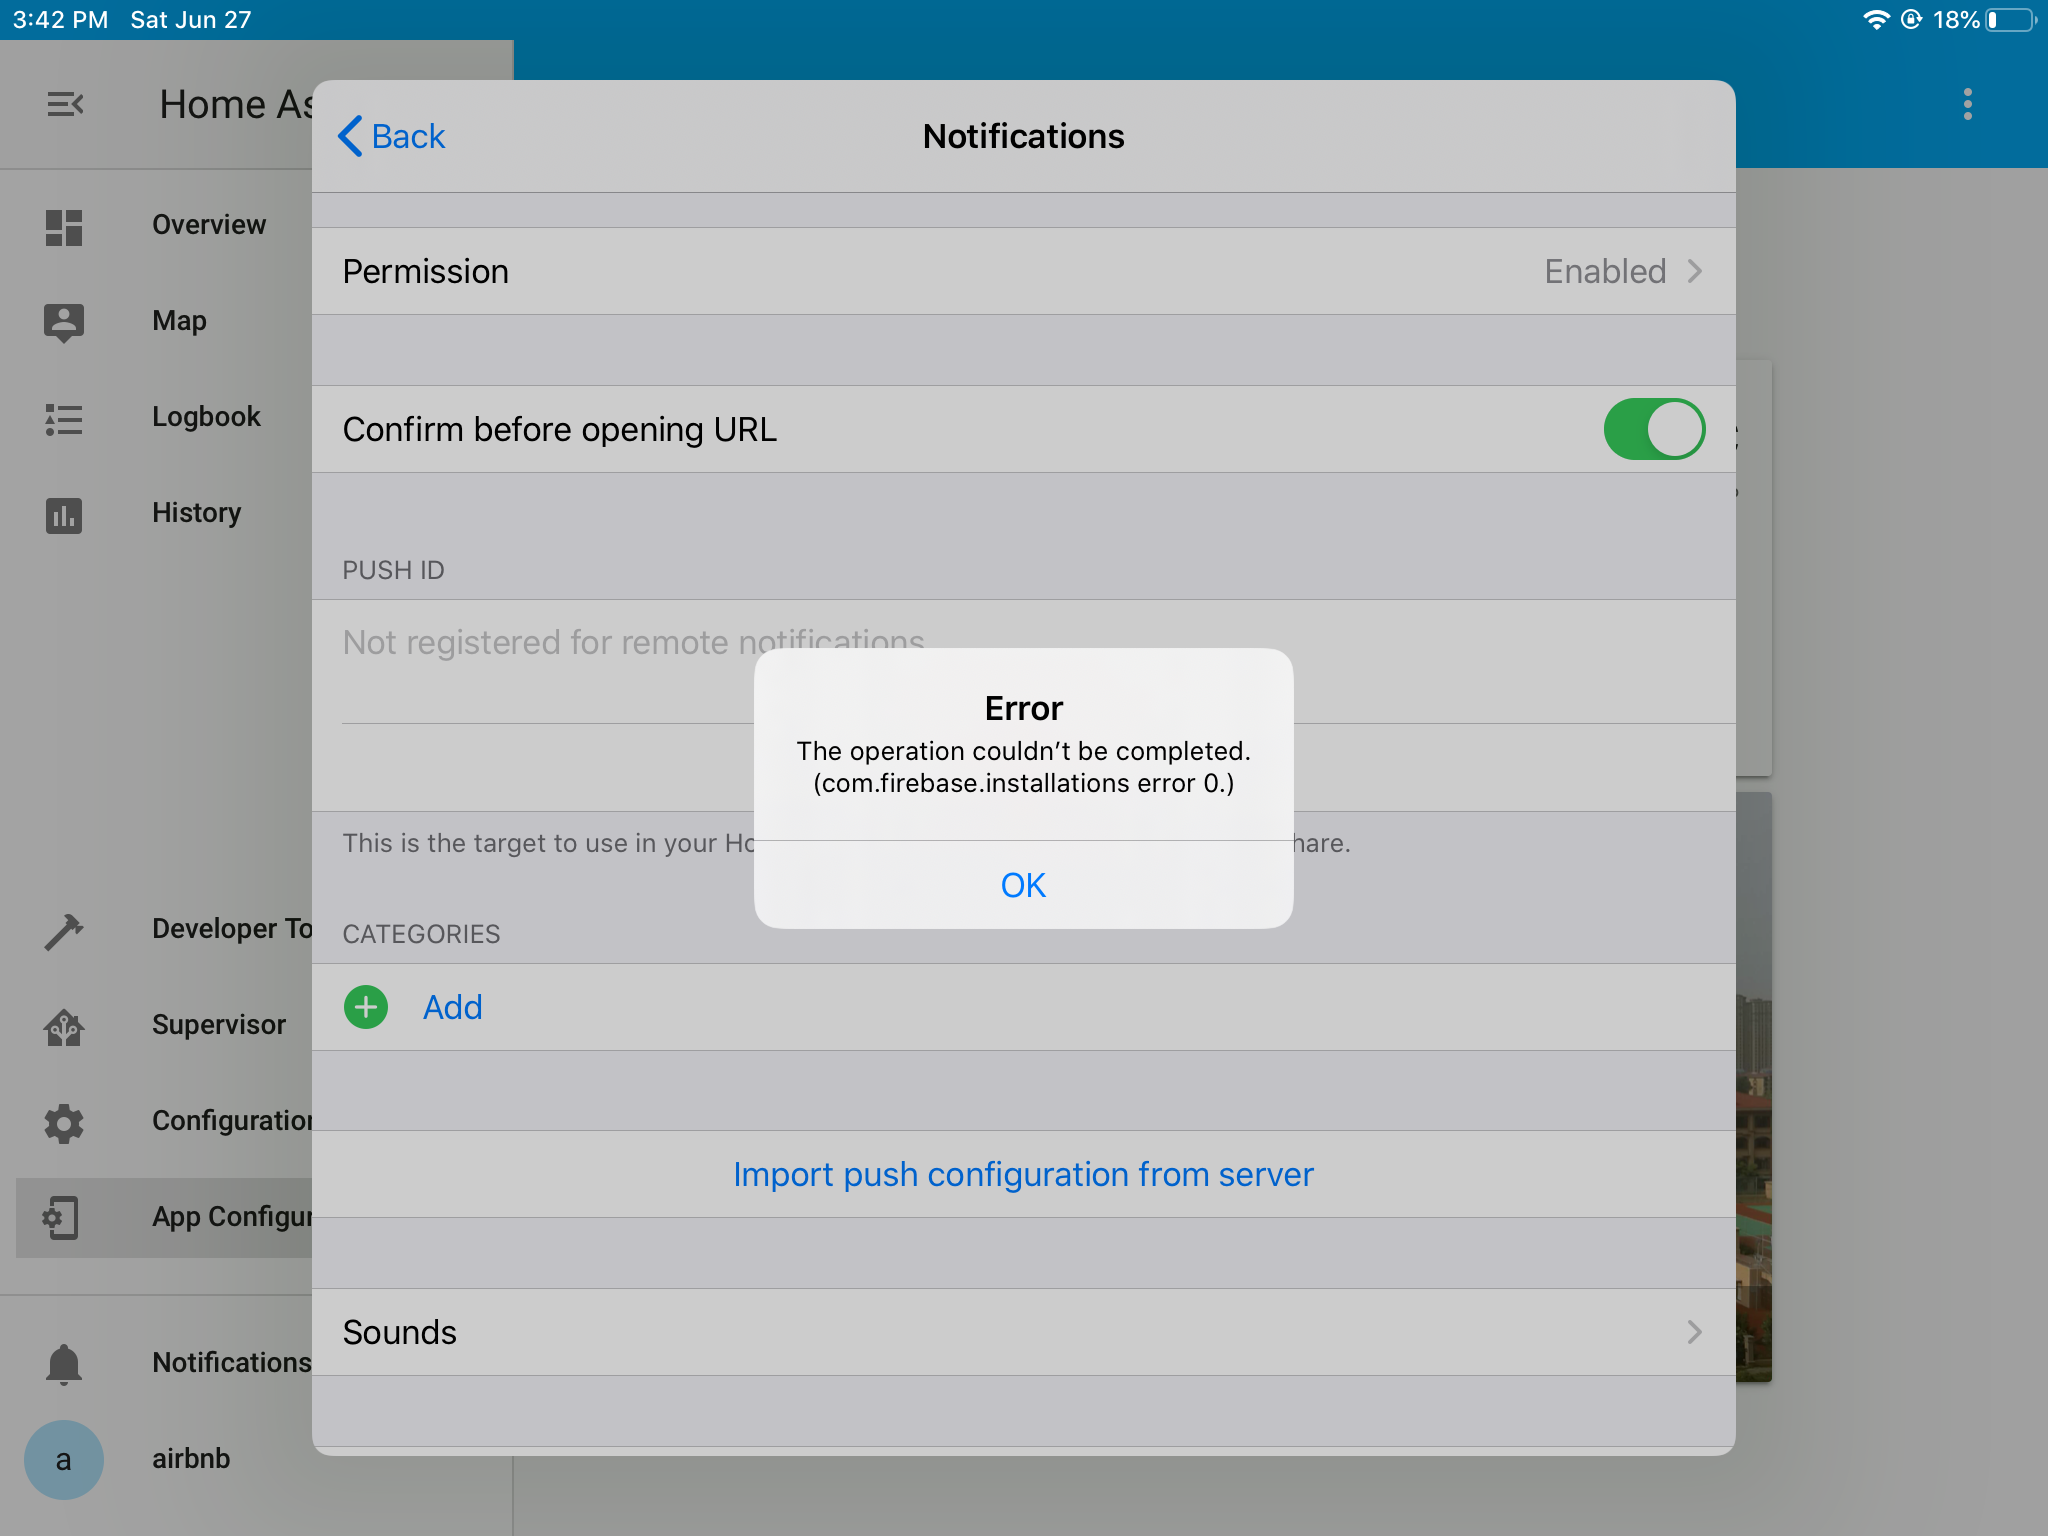
huangqingchao found the root cause of this problem:
After registering push Id successfully, a message will be sent.
After the send and server have processed the token, they will call back from
the following code.
extension AppDelegate: MessagingDelegate {
    func messaging(_ messaging: Messaging, didReceiveRegistrationToken fcmToken: String) {
        Current.Log.info("Firebase registration token refreshed, new token: \(fcmToken)")

        Current.settingsStore.pushID = fcmToken

        guard let api = HomeAssistantAPI.authenticatedAPI() else {
            Current.Log.warning("Could not get authenticated API")
            return
        }

        _ = api.UpdateRegistration()
    }
    // swiftlint:disable:next file_length
}
It seems to be receiving a message from Firebase
In China, communication with Firebase requires VPN…….
After opening the VPN, restart the APP and get the Push Id.