
Smart Home: Control Android TV with esphome and androidtv
For a very long time, I want to setup an system that can turn on the TV every morning when I get up and play some video files for English learning, I know I can power TV up by wake on LAN, but unfortunately, my Andriod TV does not support this feature.
I don’t know how to turn on TV, until I found nodemcu devkit, now, with Home Assistant component esphome and androidtv, everything got resolved.
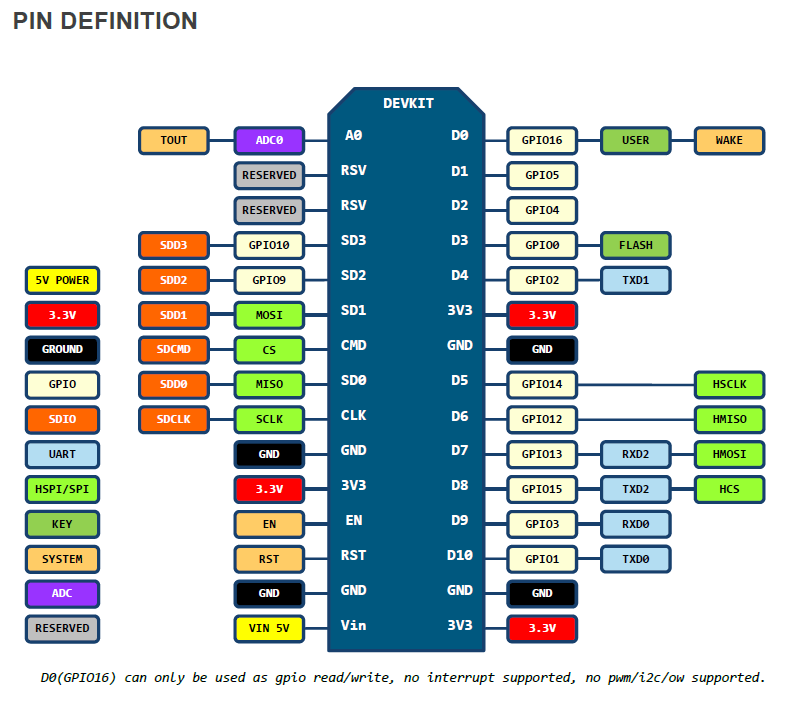
NodeMcu devkit is an open-source hardware which is based on ESP8266 wifi soc.
ESPHome is a system to control ESP8266/ESP32 by simple yet powerful configuration files and control them remotely through Home Automation systems.
Android TV is an integration which you can use to manipulate android TV with adb connections.
Build IR Remote Control
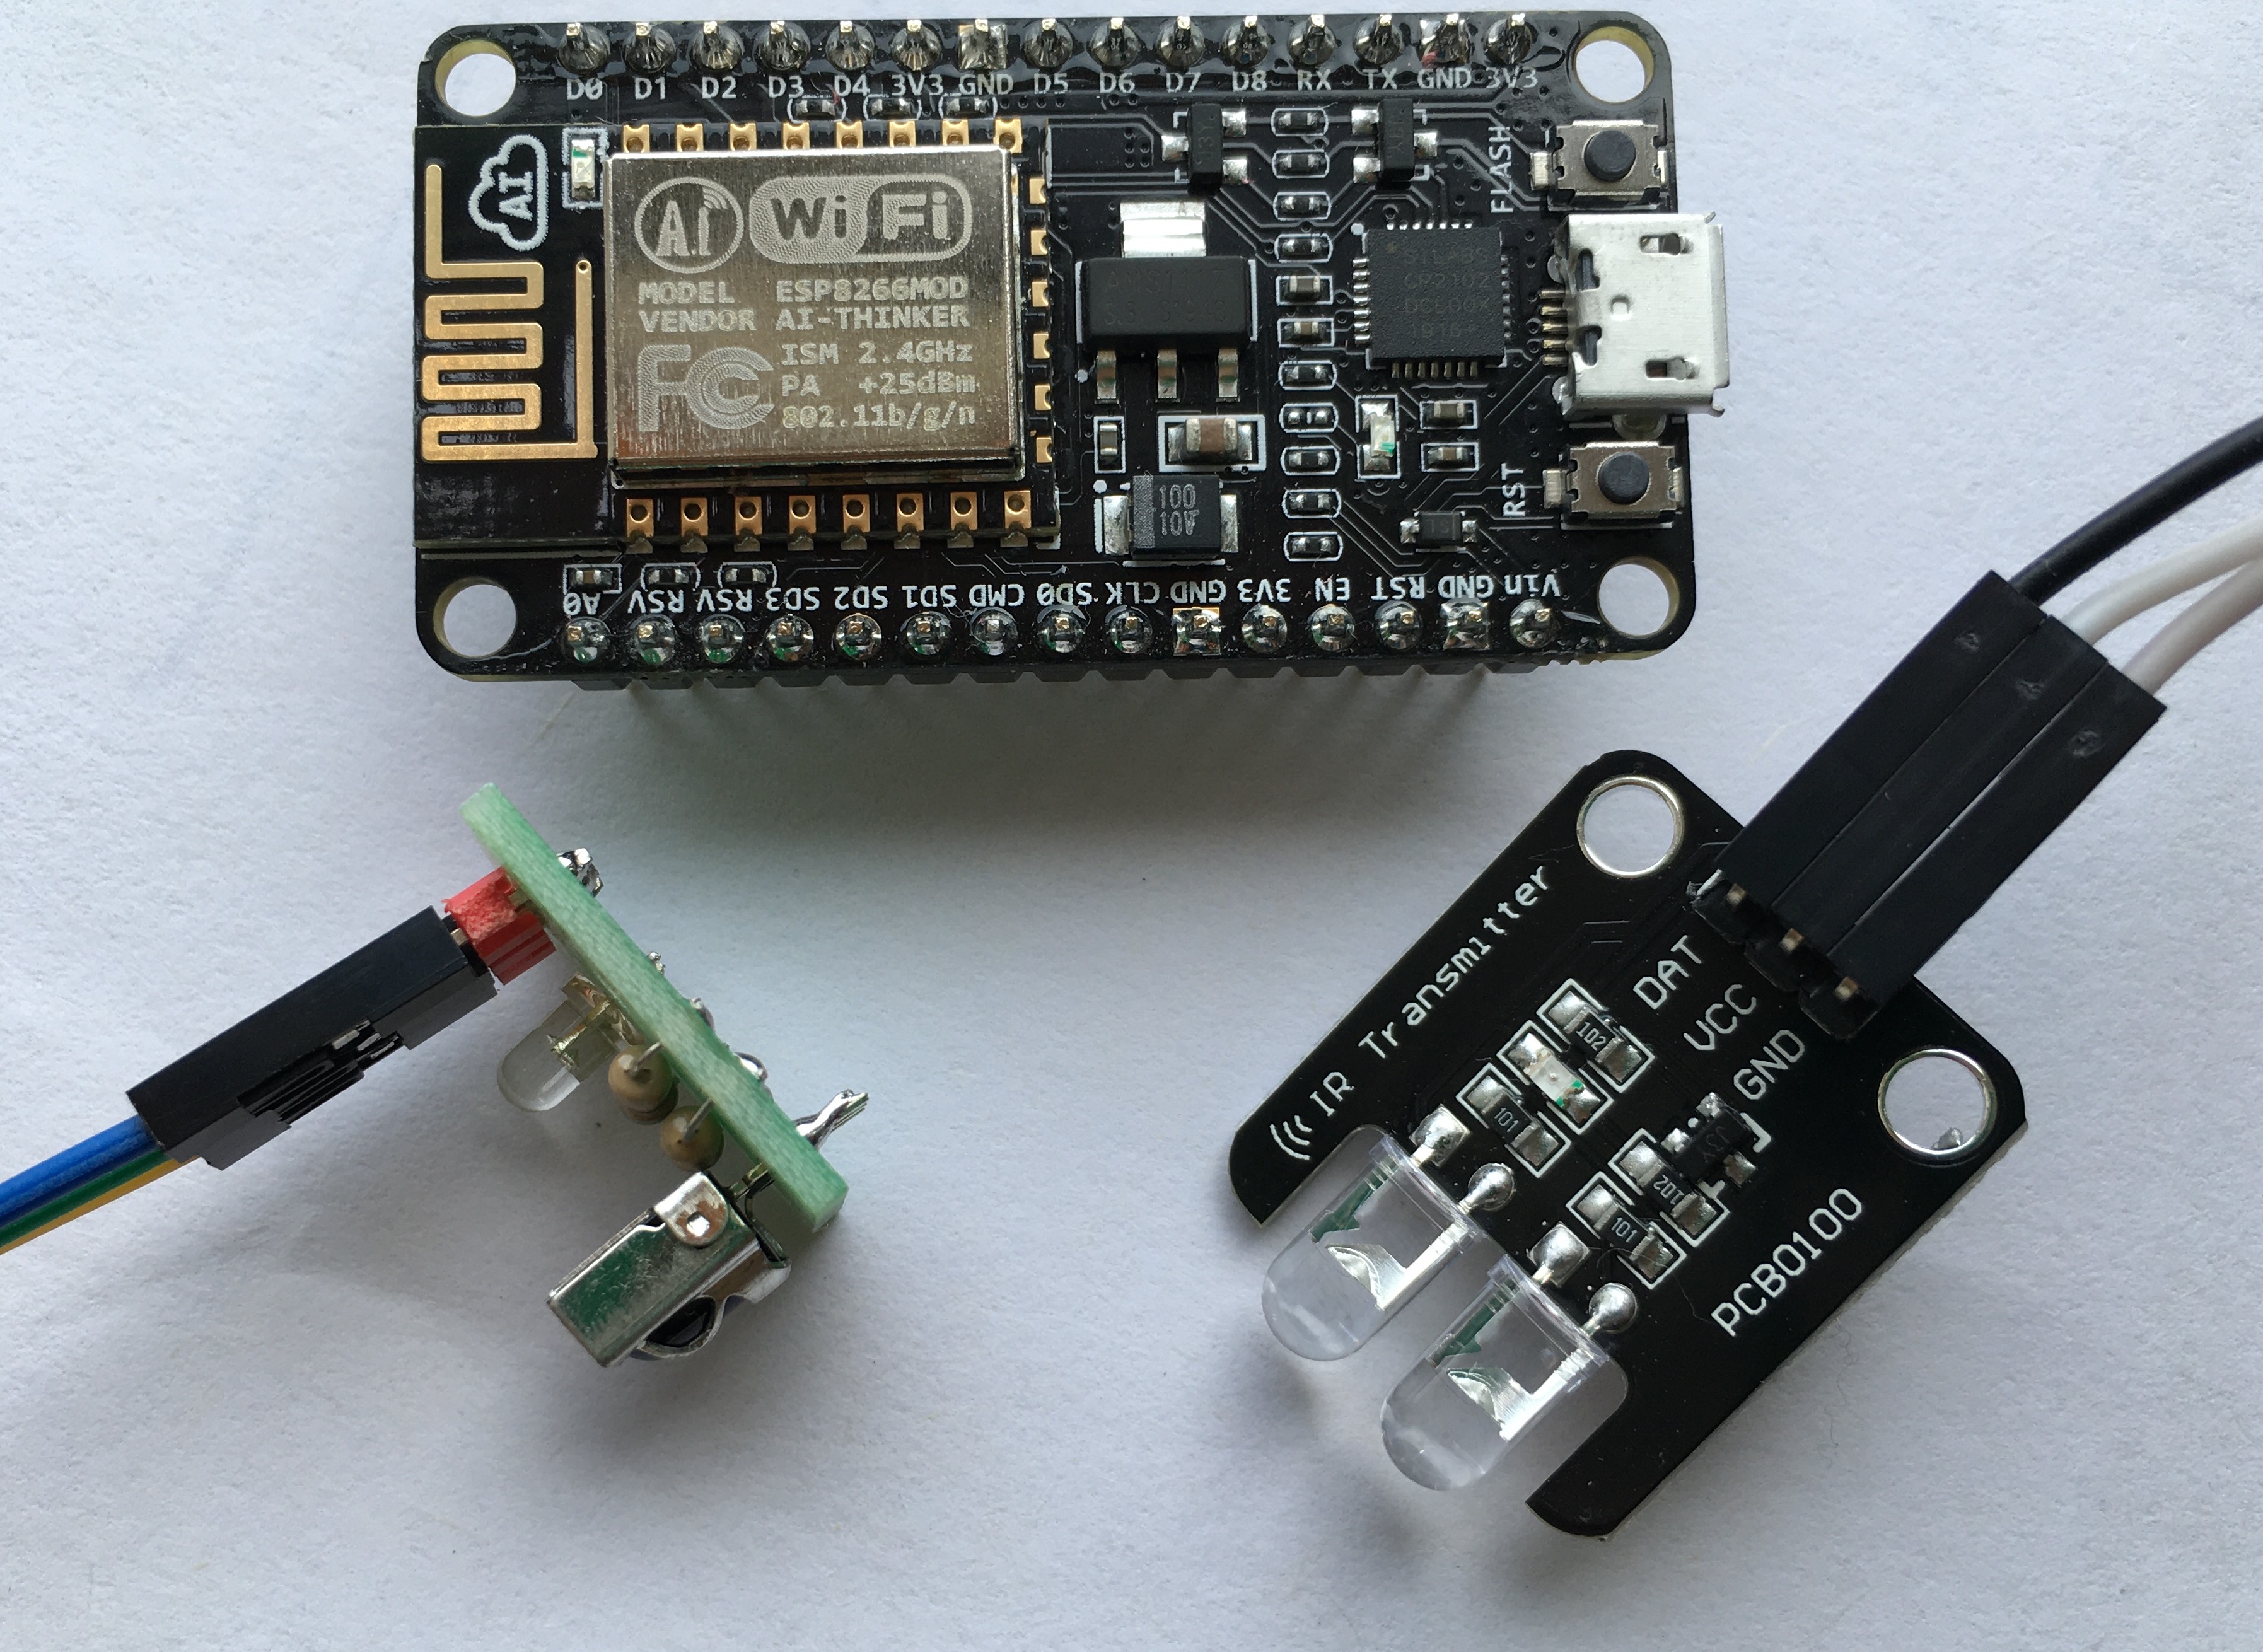
Here are the hardware components needed for controlling Android TV:
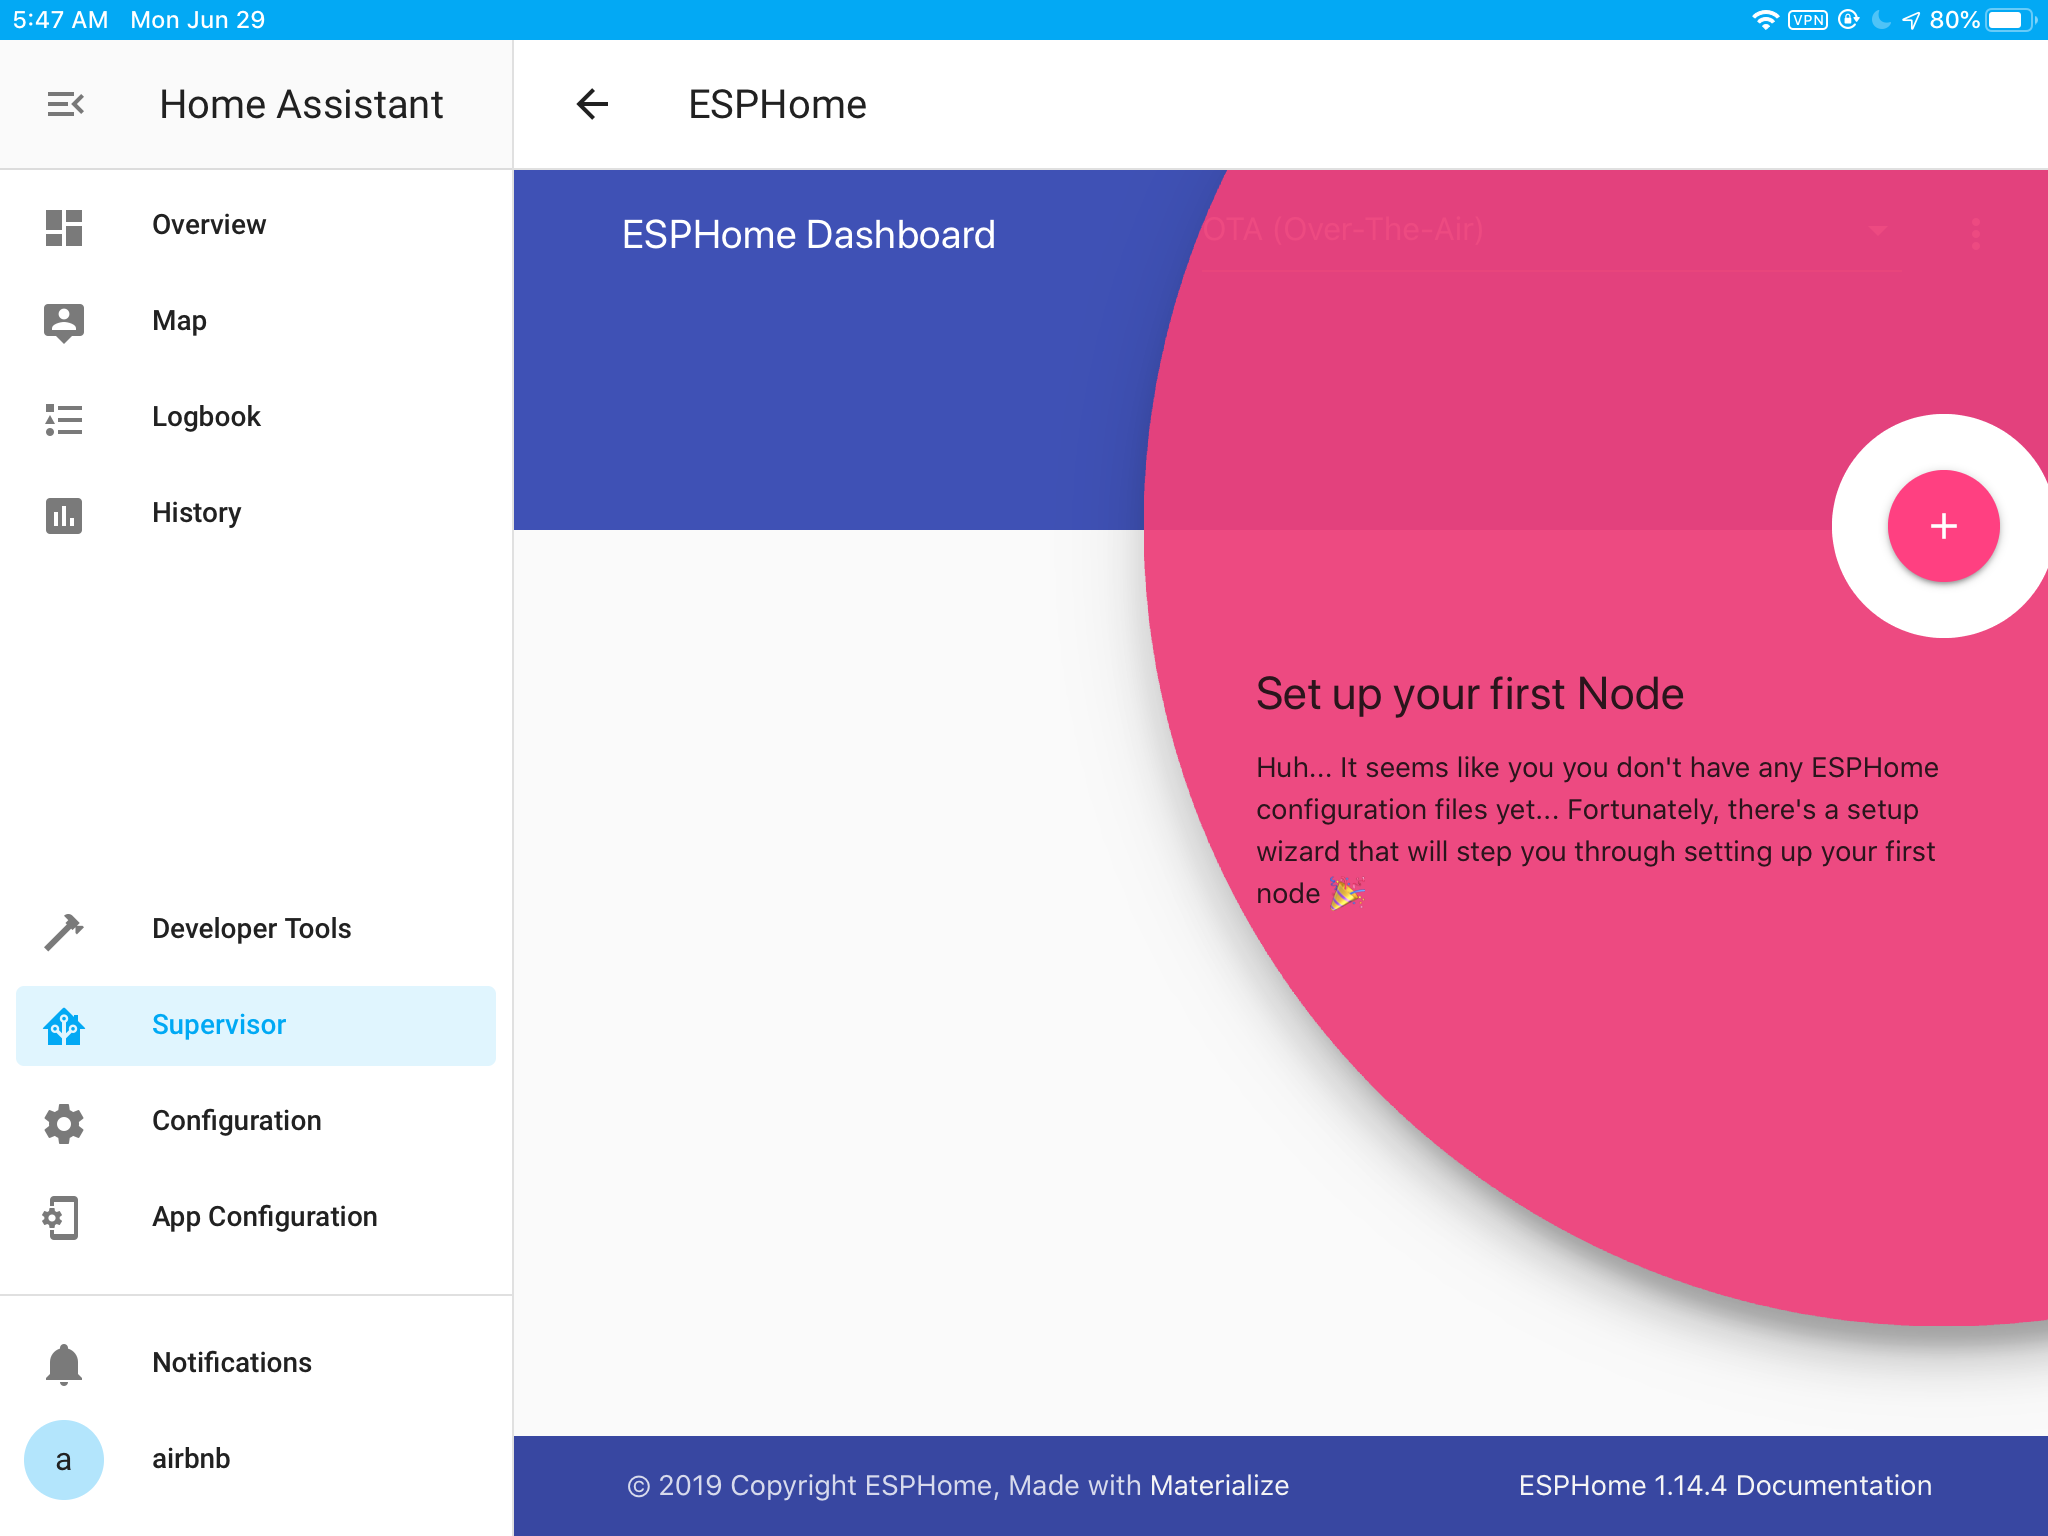
Install ESPHome Add-on
-
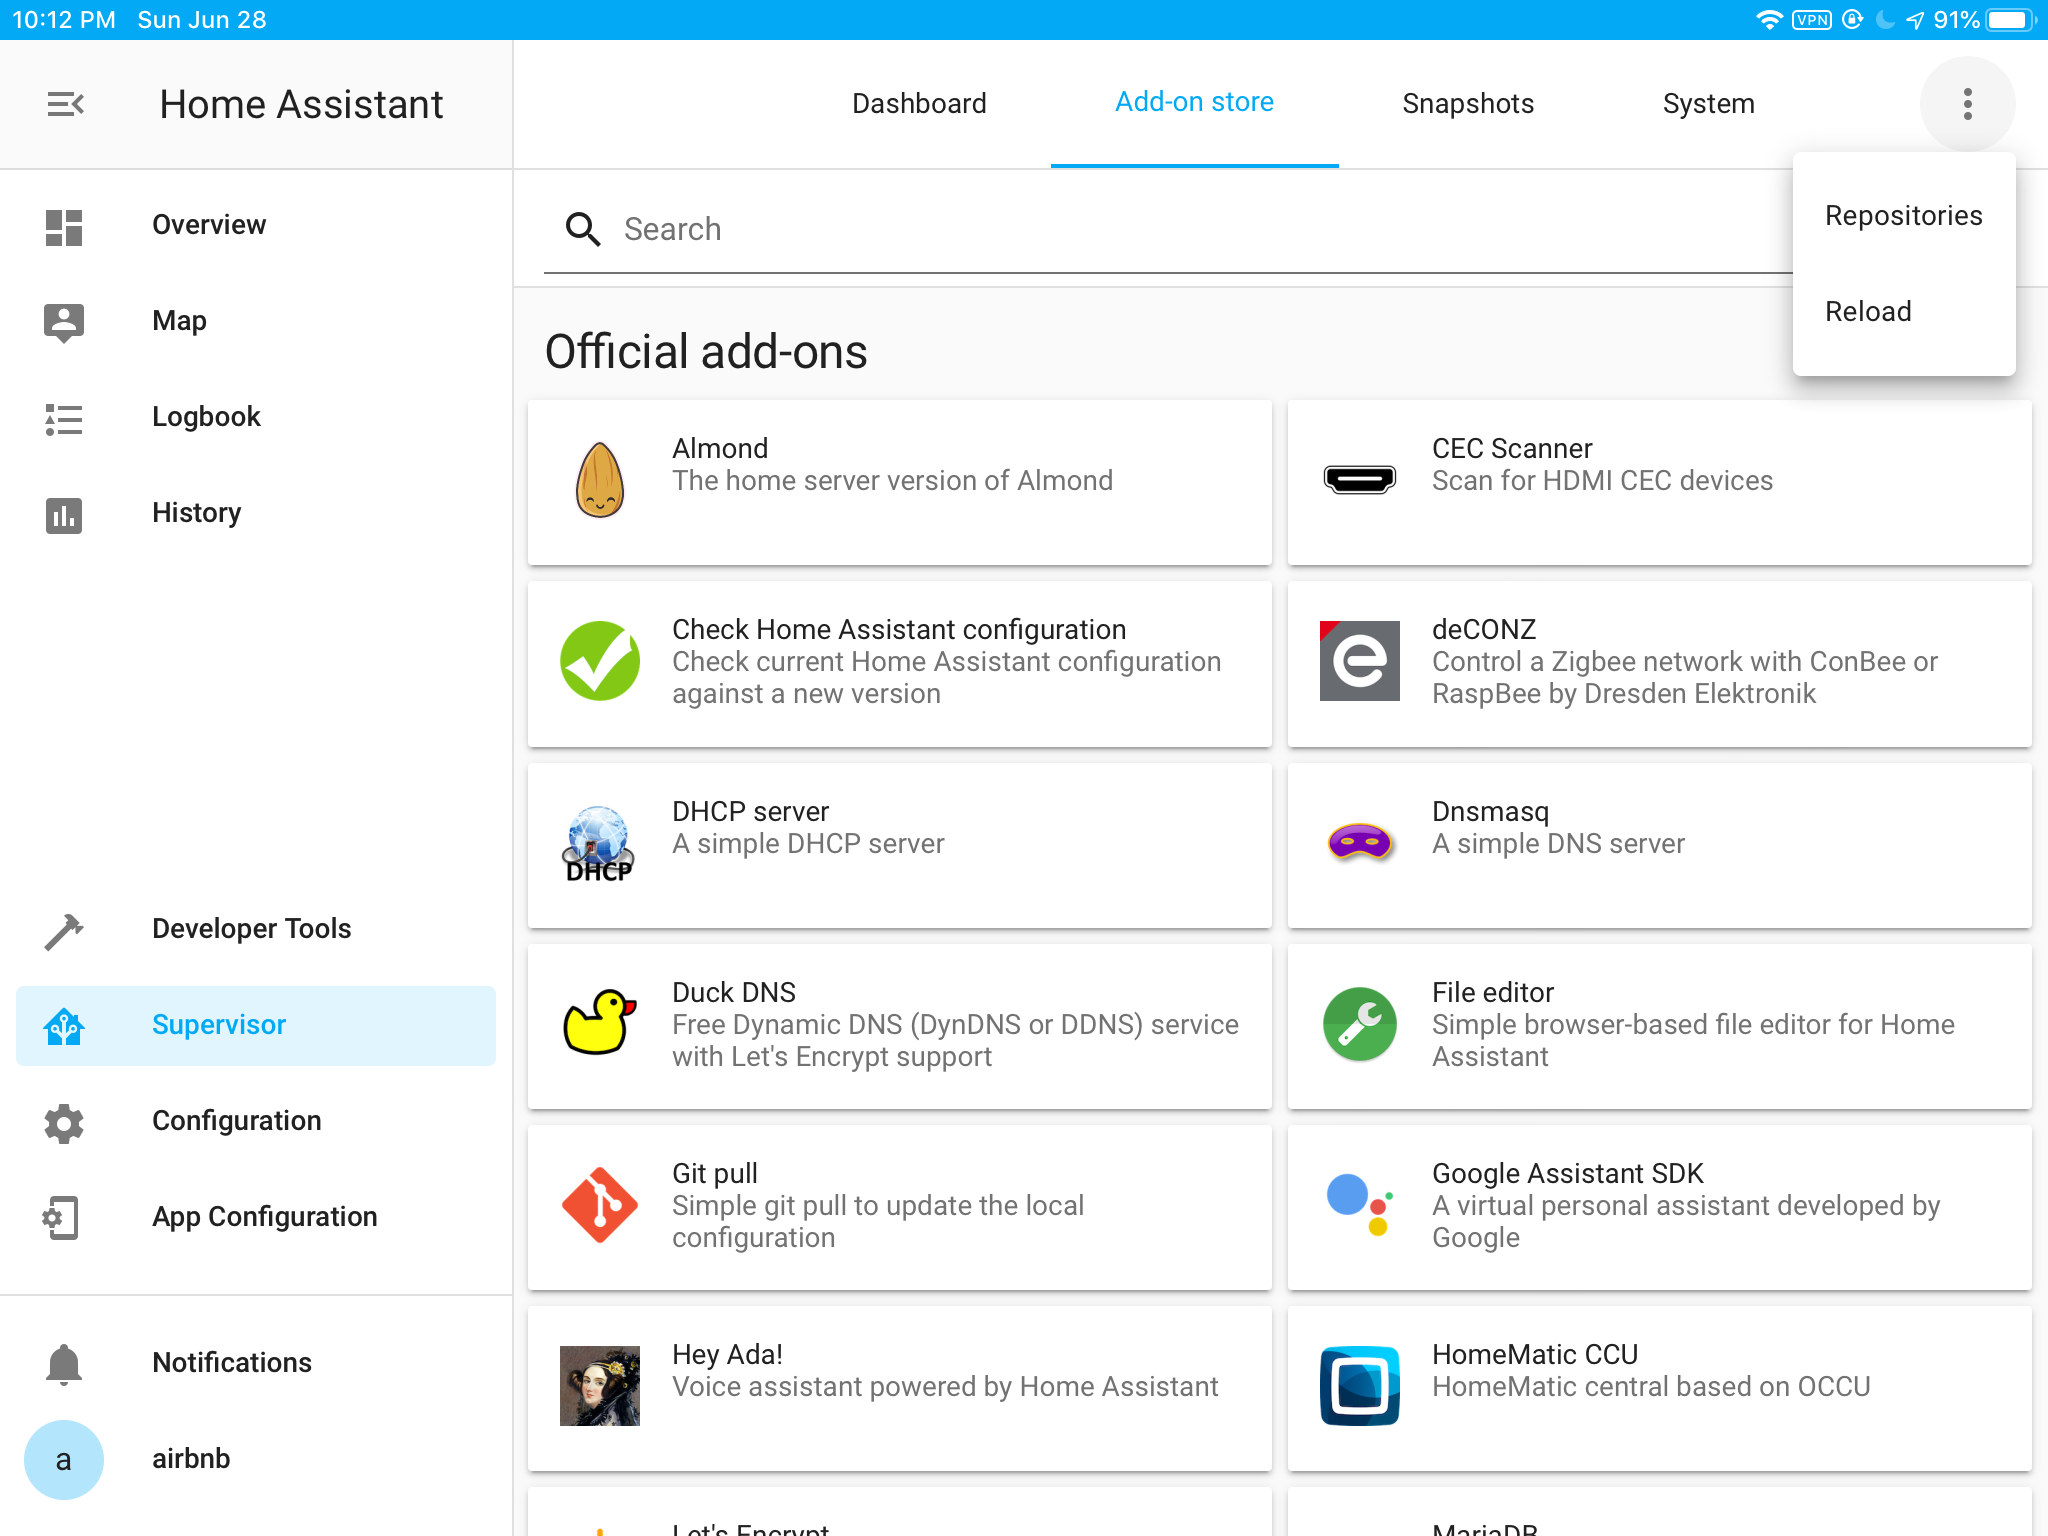
launch companion app, go to Supervisor » Add-on store, click the three dot icon at the top-right corner and select Repositories to add esphome:
-
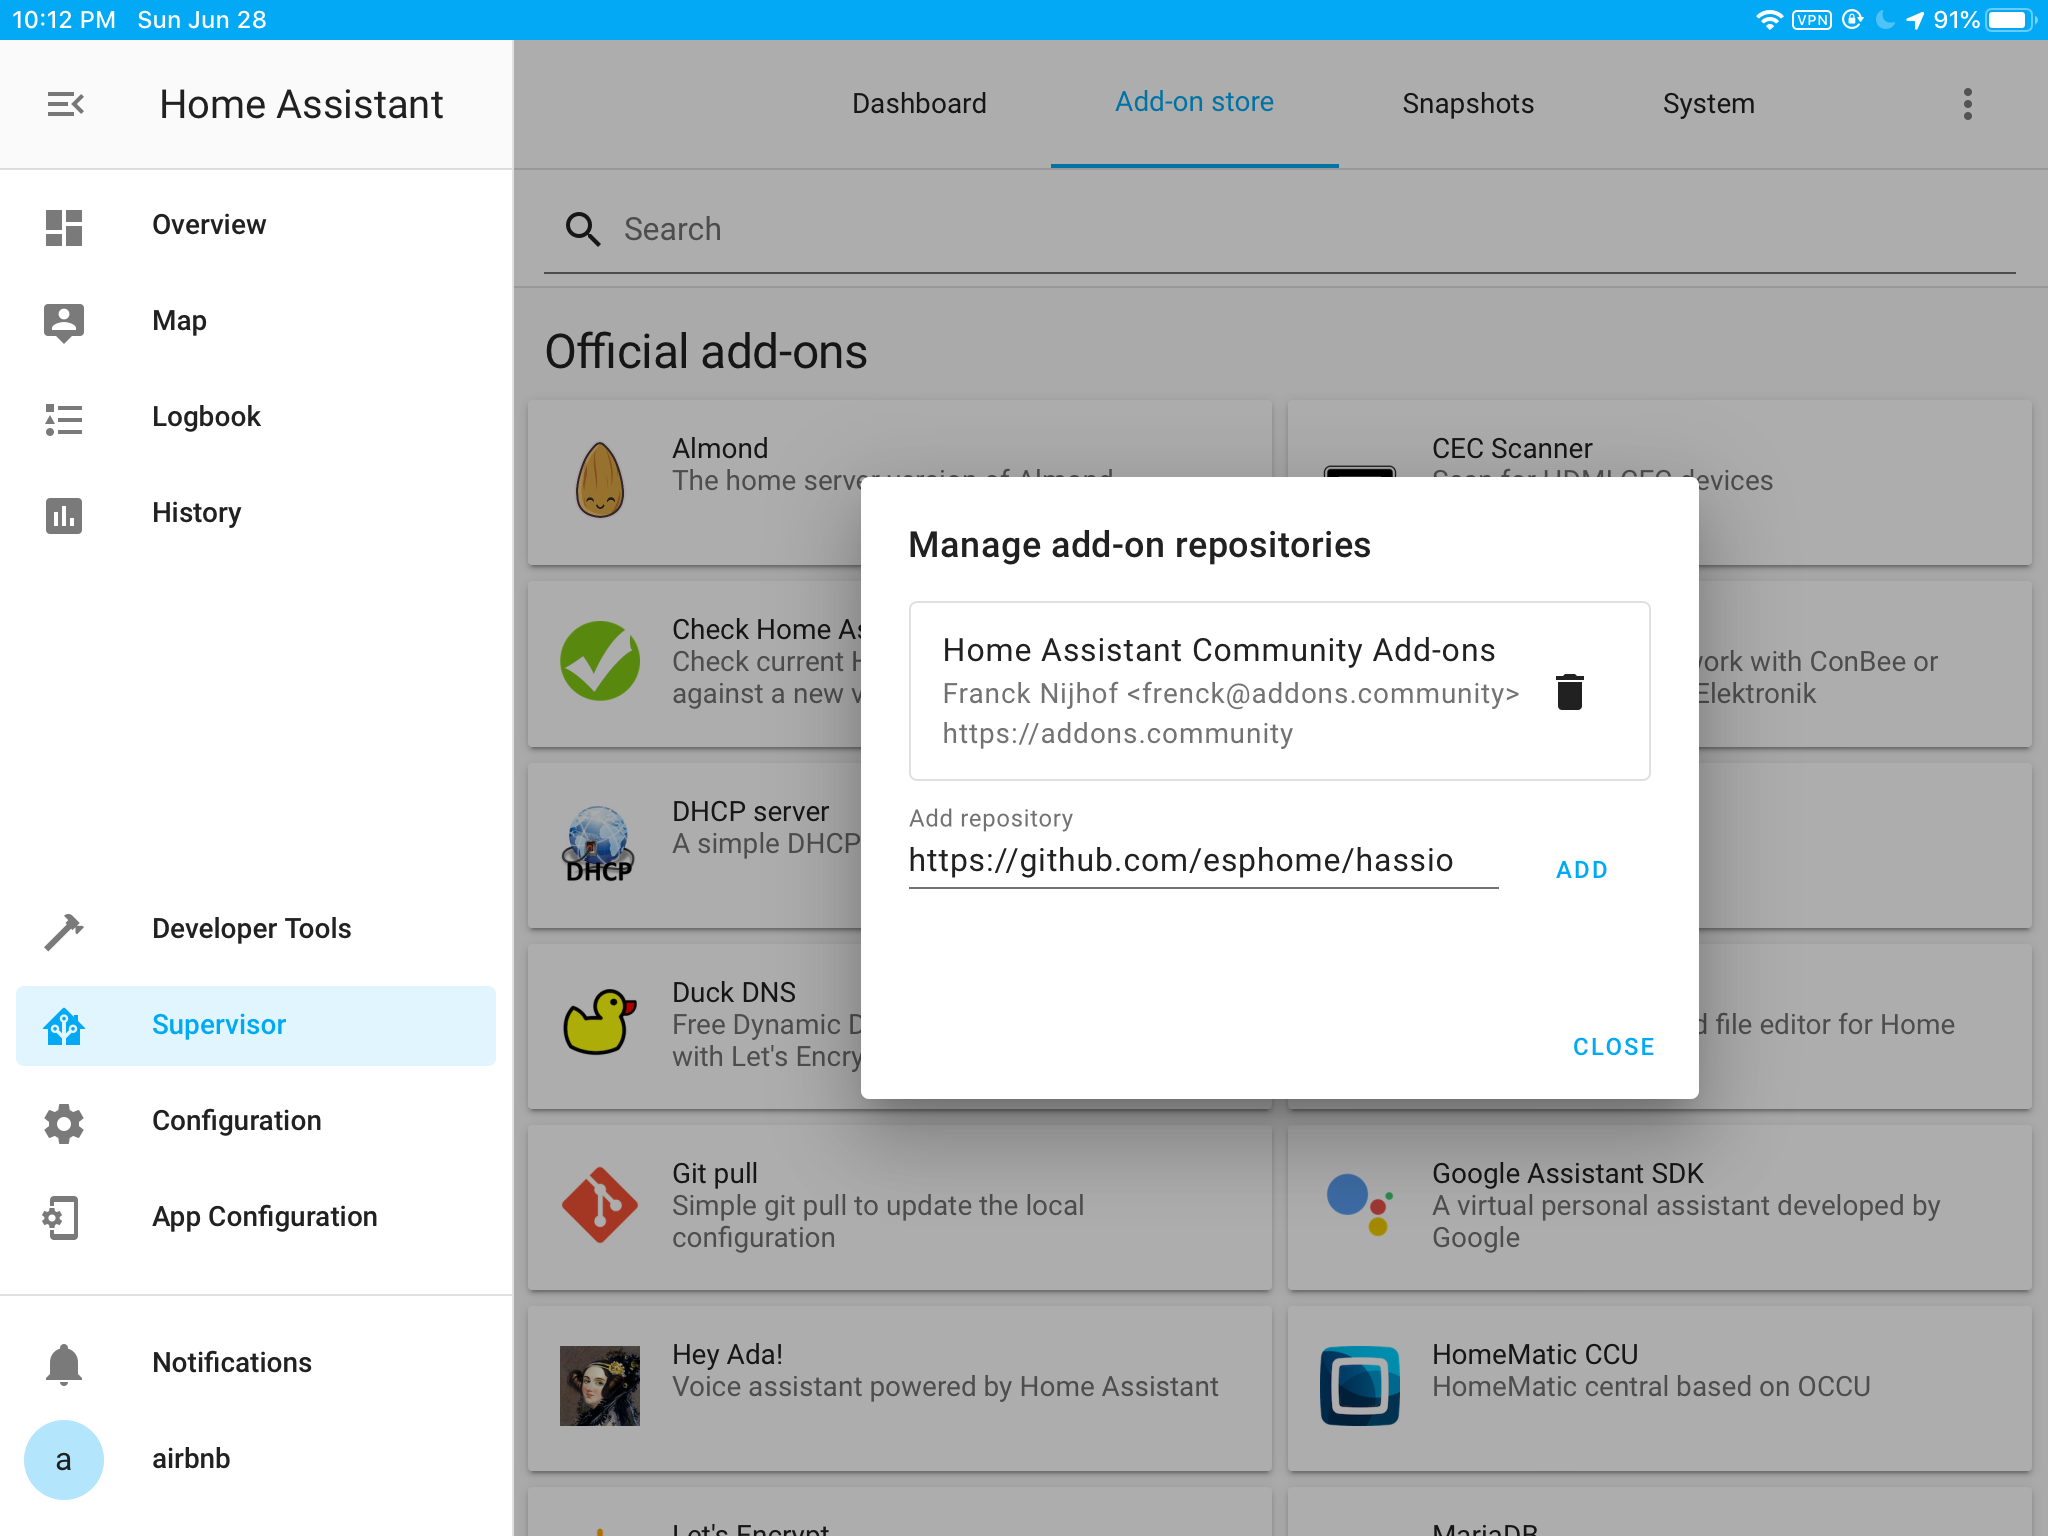
Enter https://github.com/esphome/hassio in the next window, then click ADD to finish adding esphome repo:
-
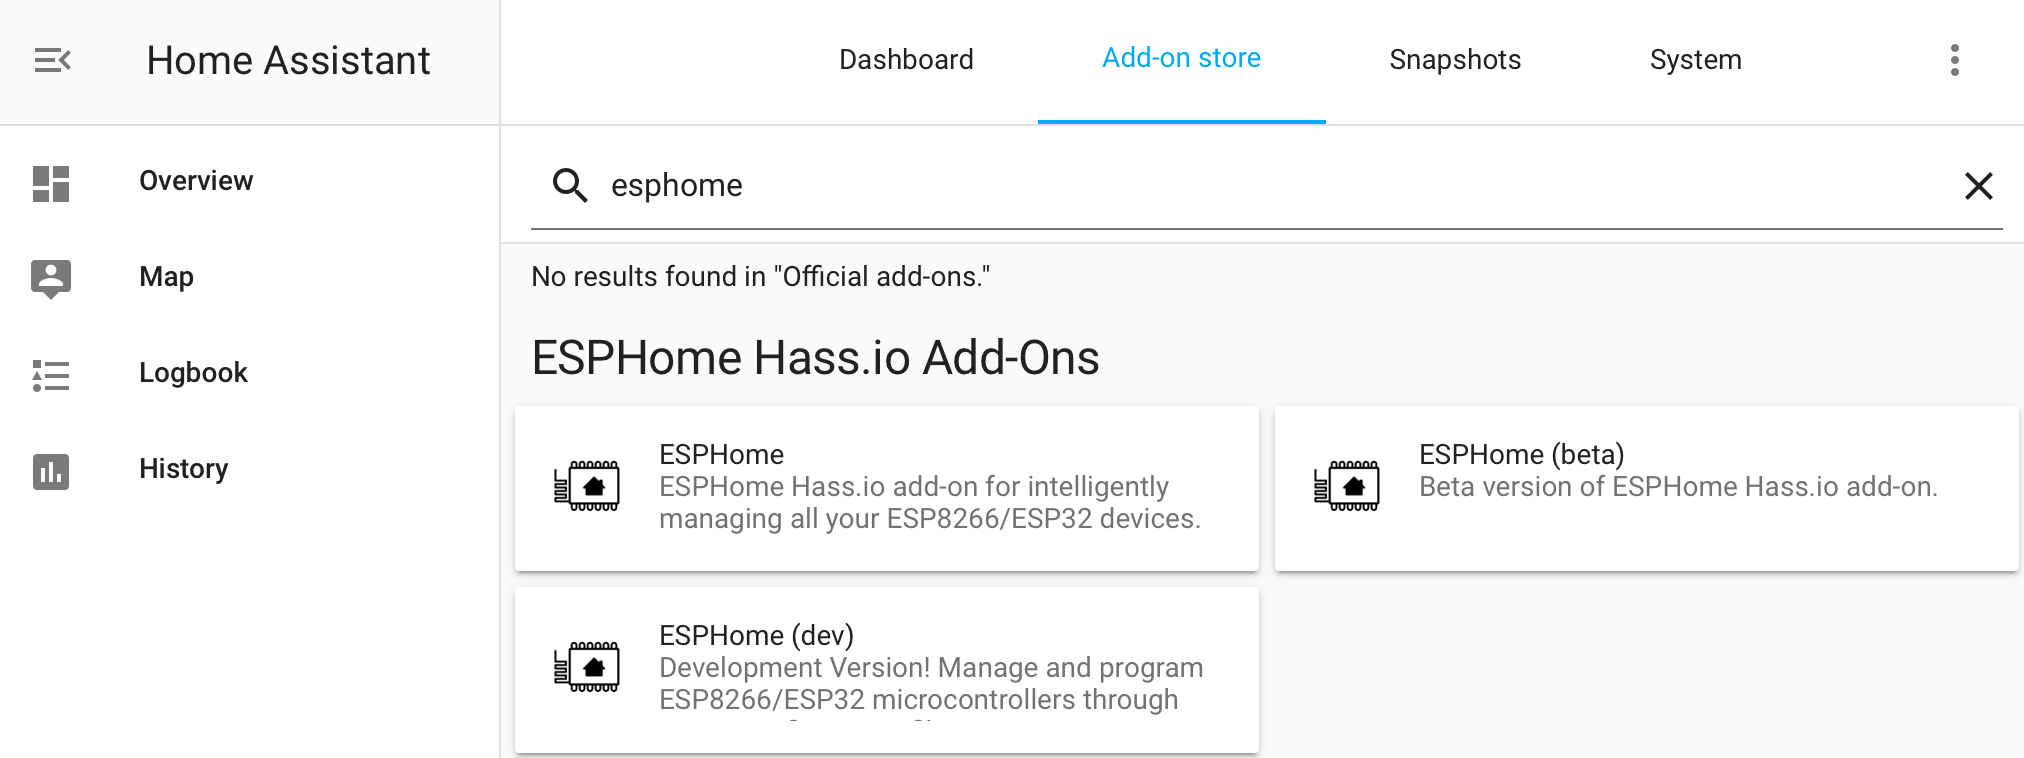
Scroll down for ESPHome add-on or search for esphome:
-
Pick the first one to proceed, click INSTALL, this can take few minutes, after installation, click OPEN WEB UI to enter the following page:
 You can add esphome to sidebar for quick access.
Creating Firmware for NodeMcu Board
-
Click the
+sign to add new hardware, add name for this hardware,livingroomfor example: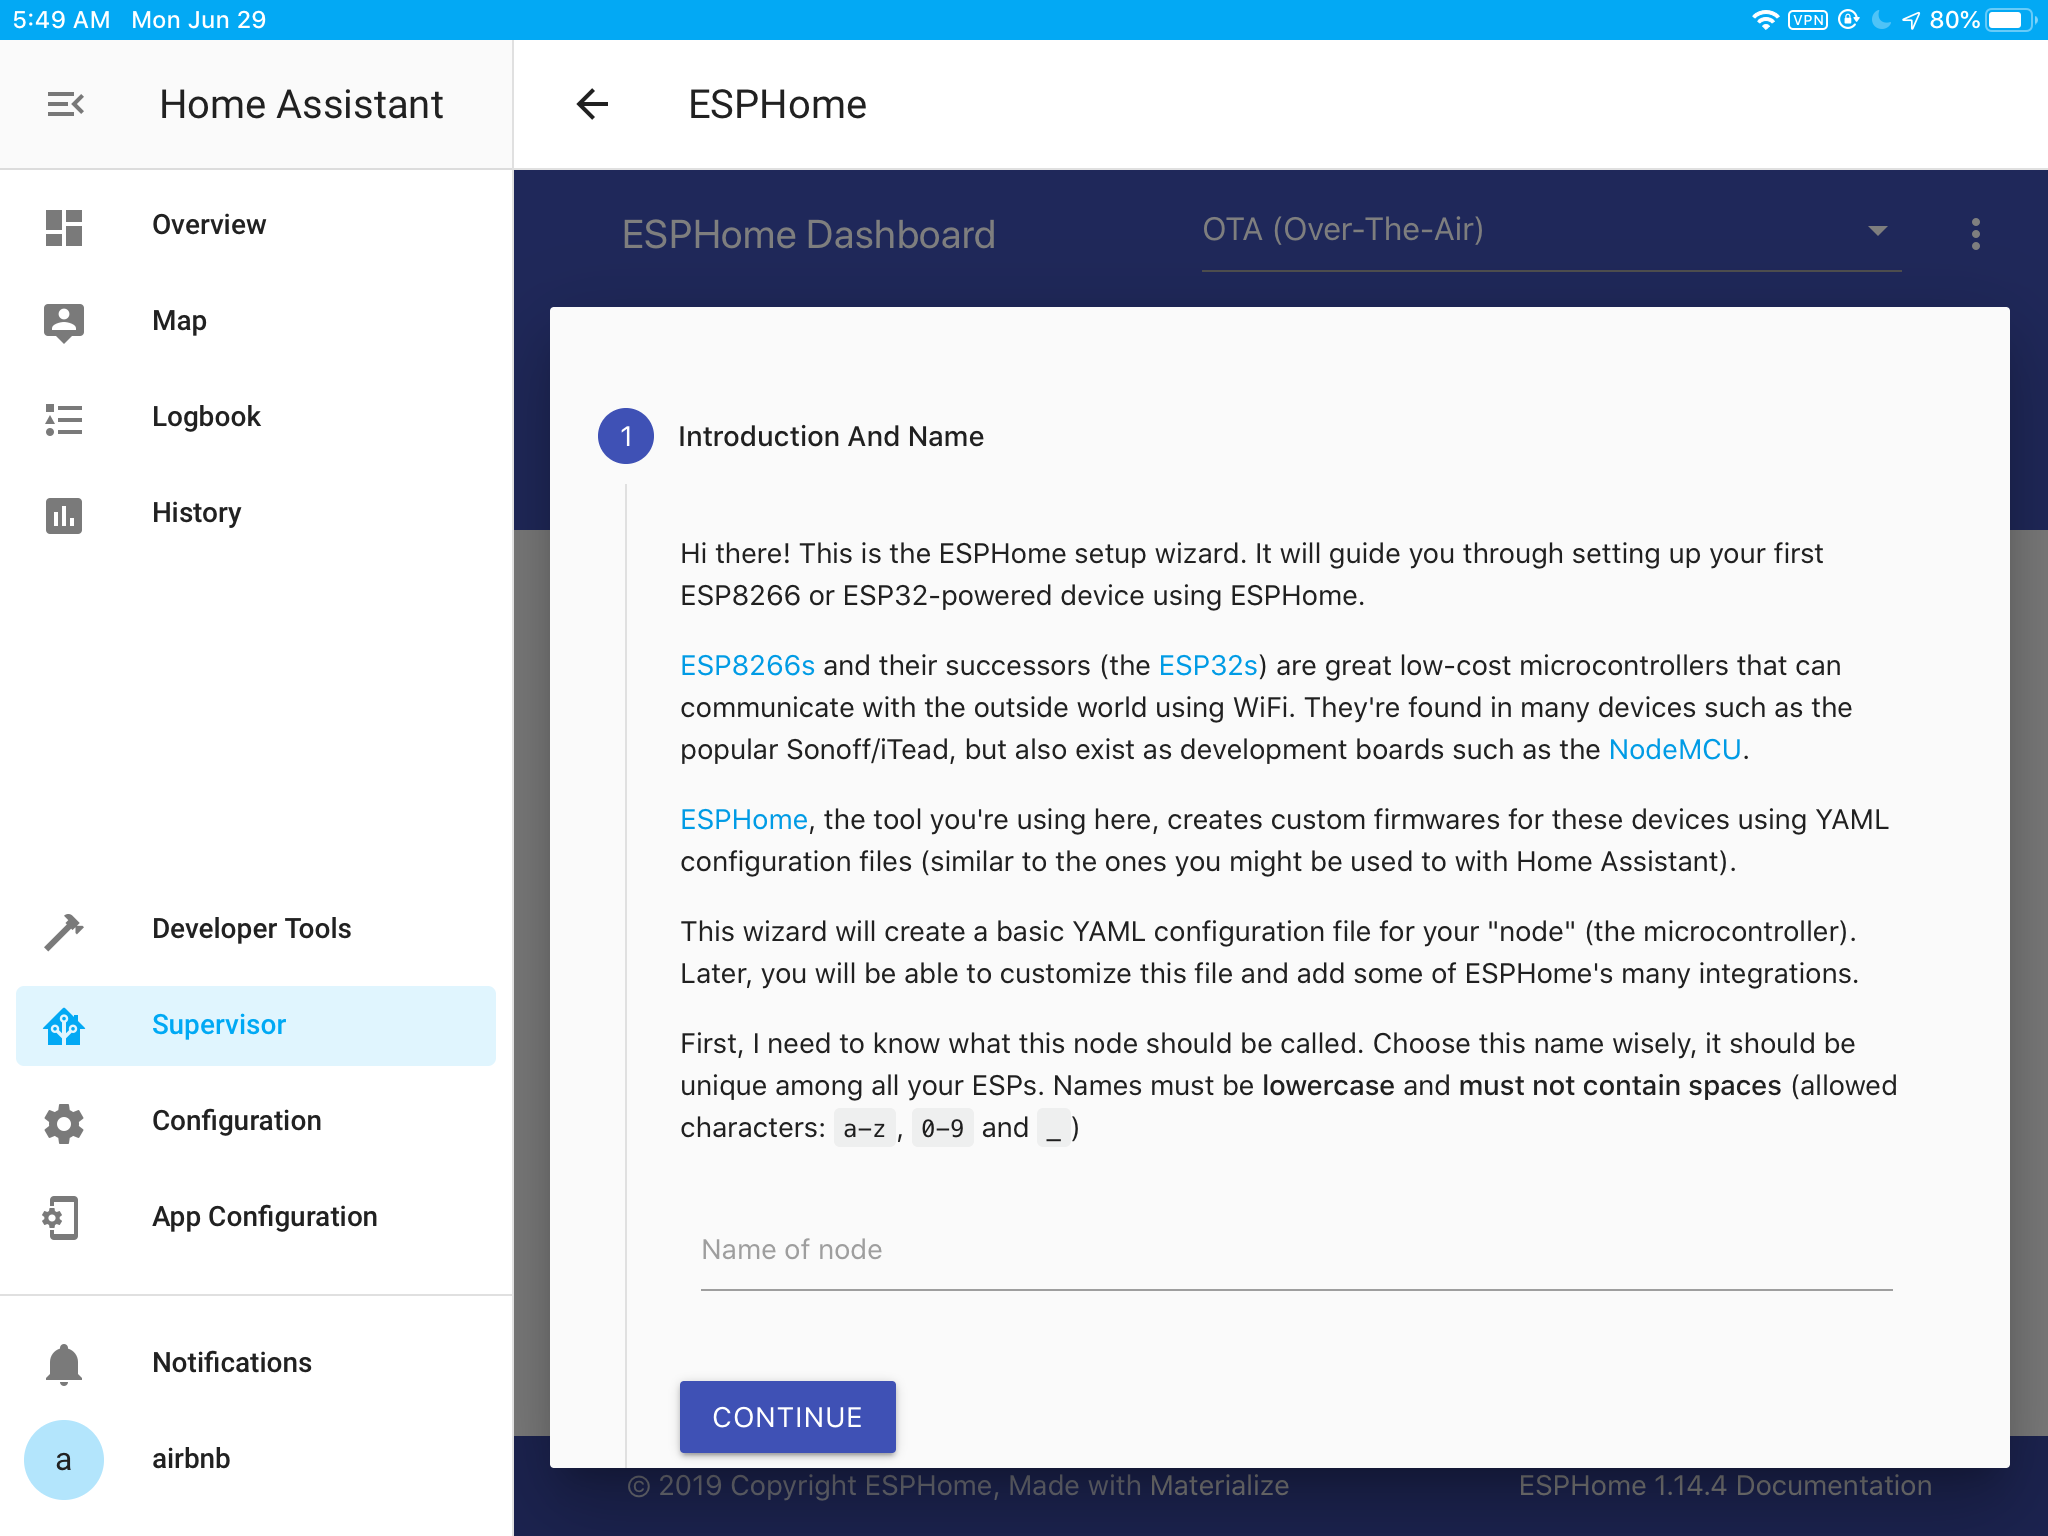
-
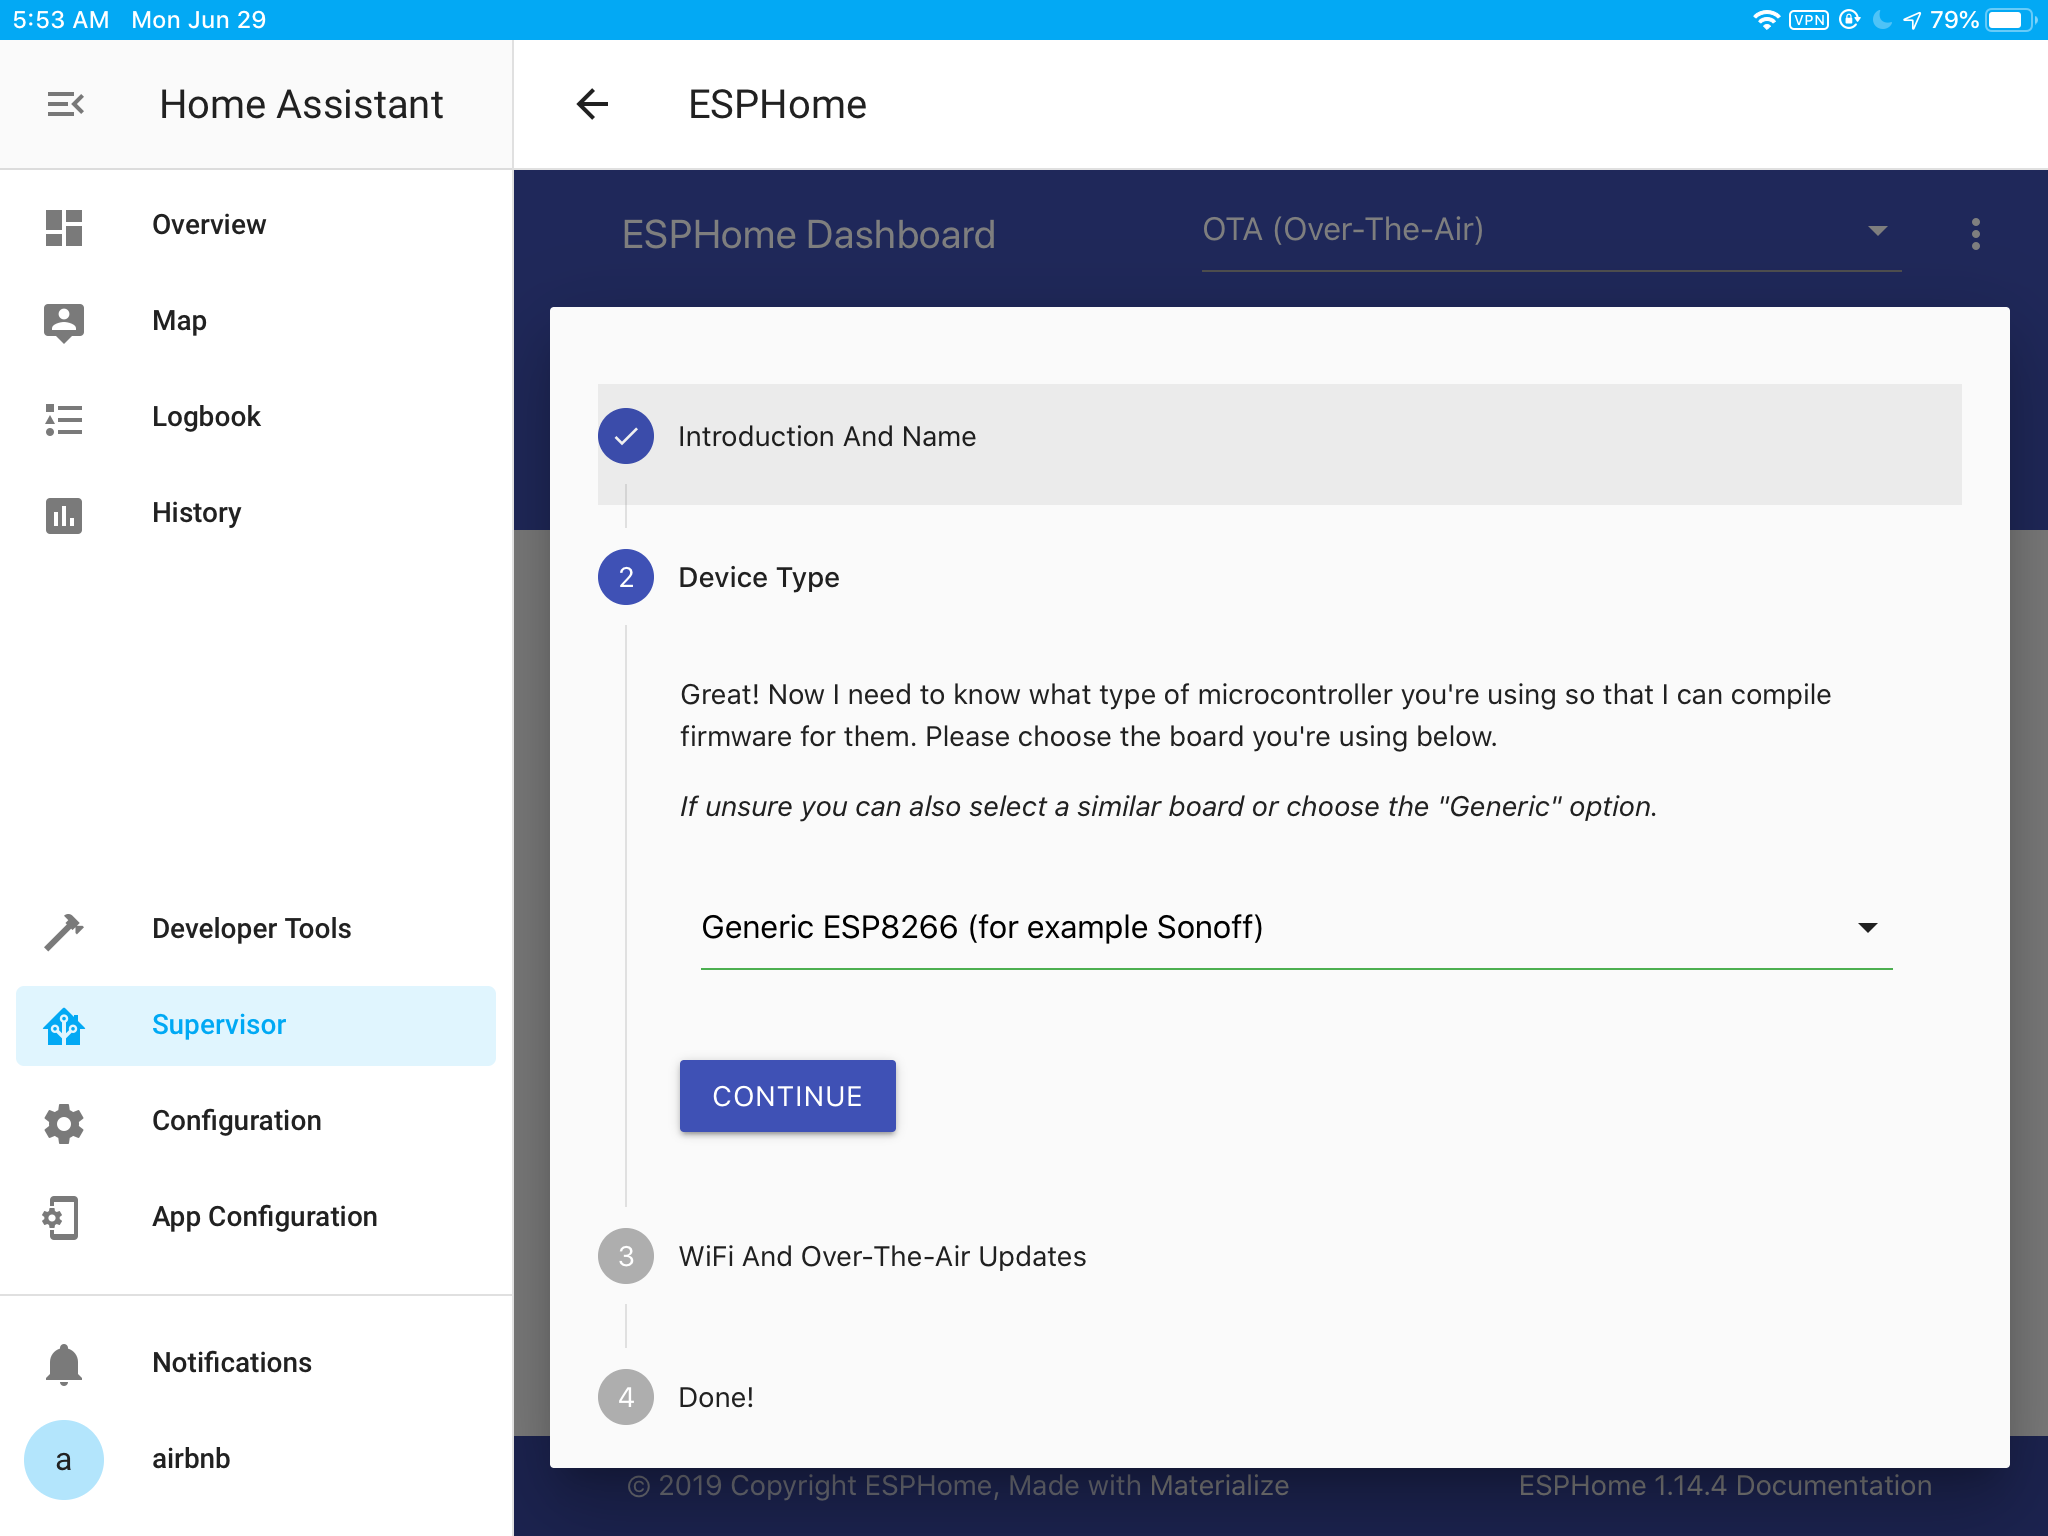
Click CONTINUE and select “Generic ESP8266 (for example Sonoff)” if unsure:
-
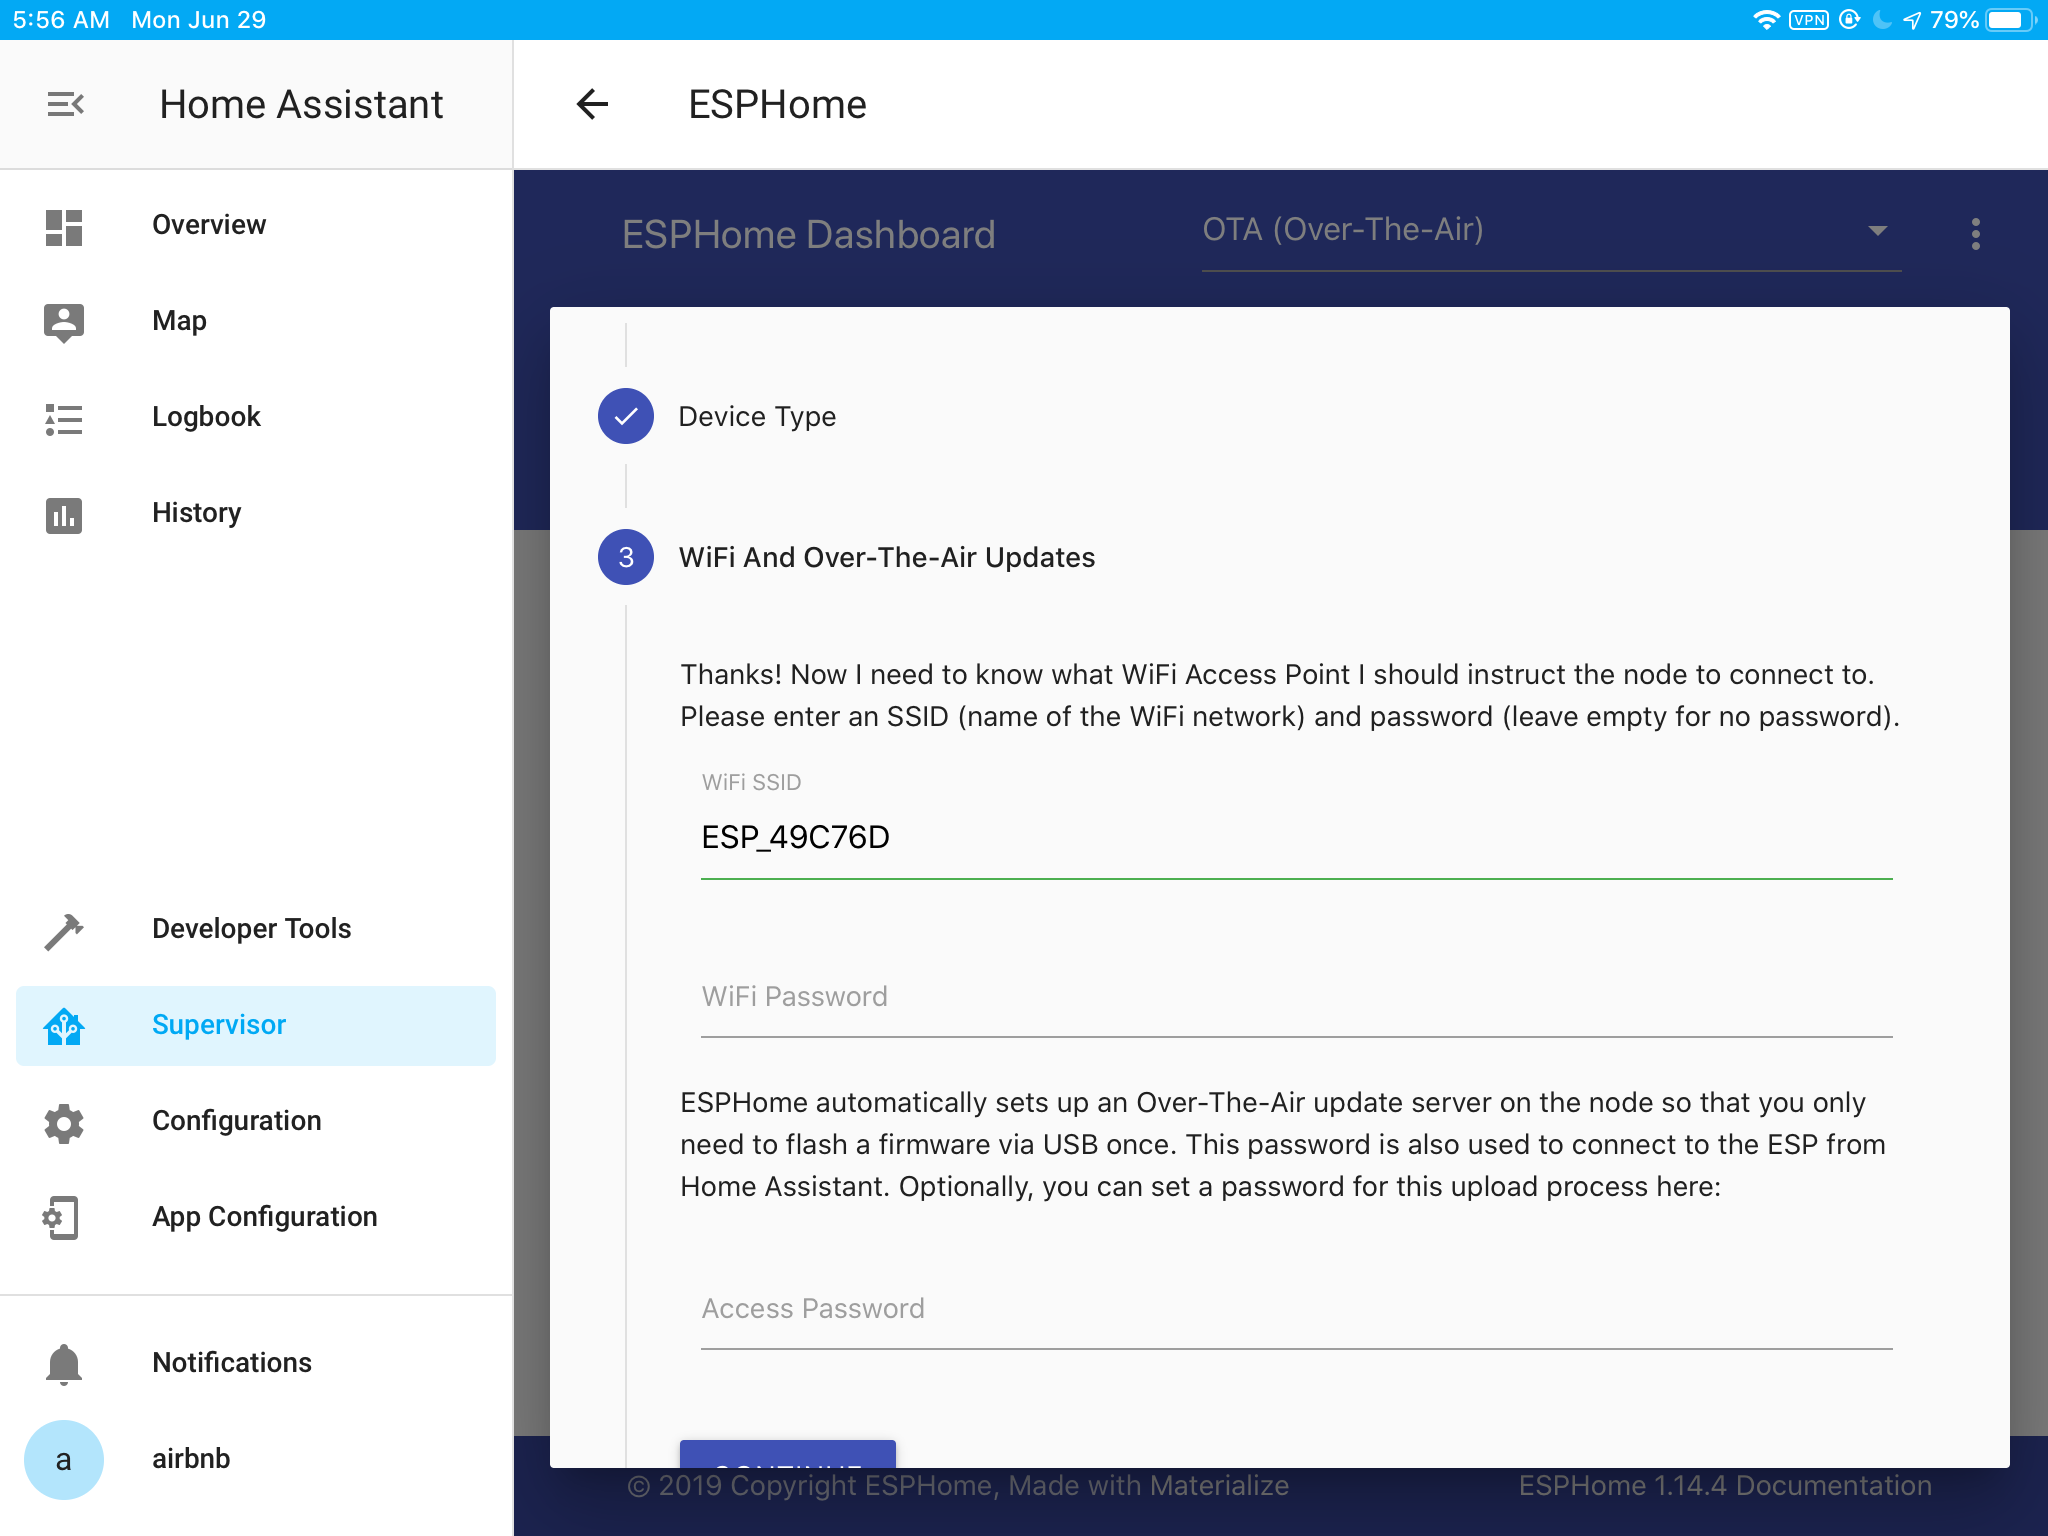
Input WiFi credentials (Router SSID and password used for OTA Updates):
-
Done, click SUBMIT to create hardware firmware configuration:
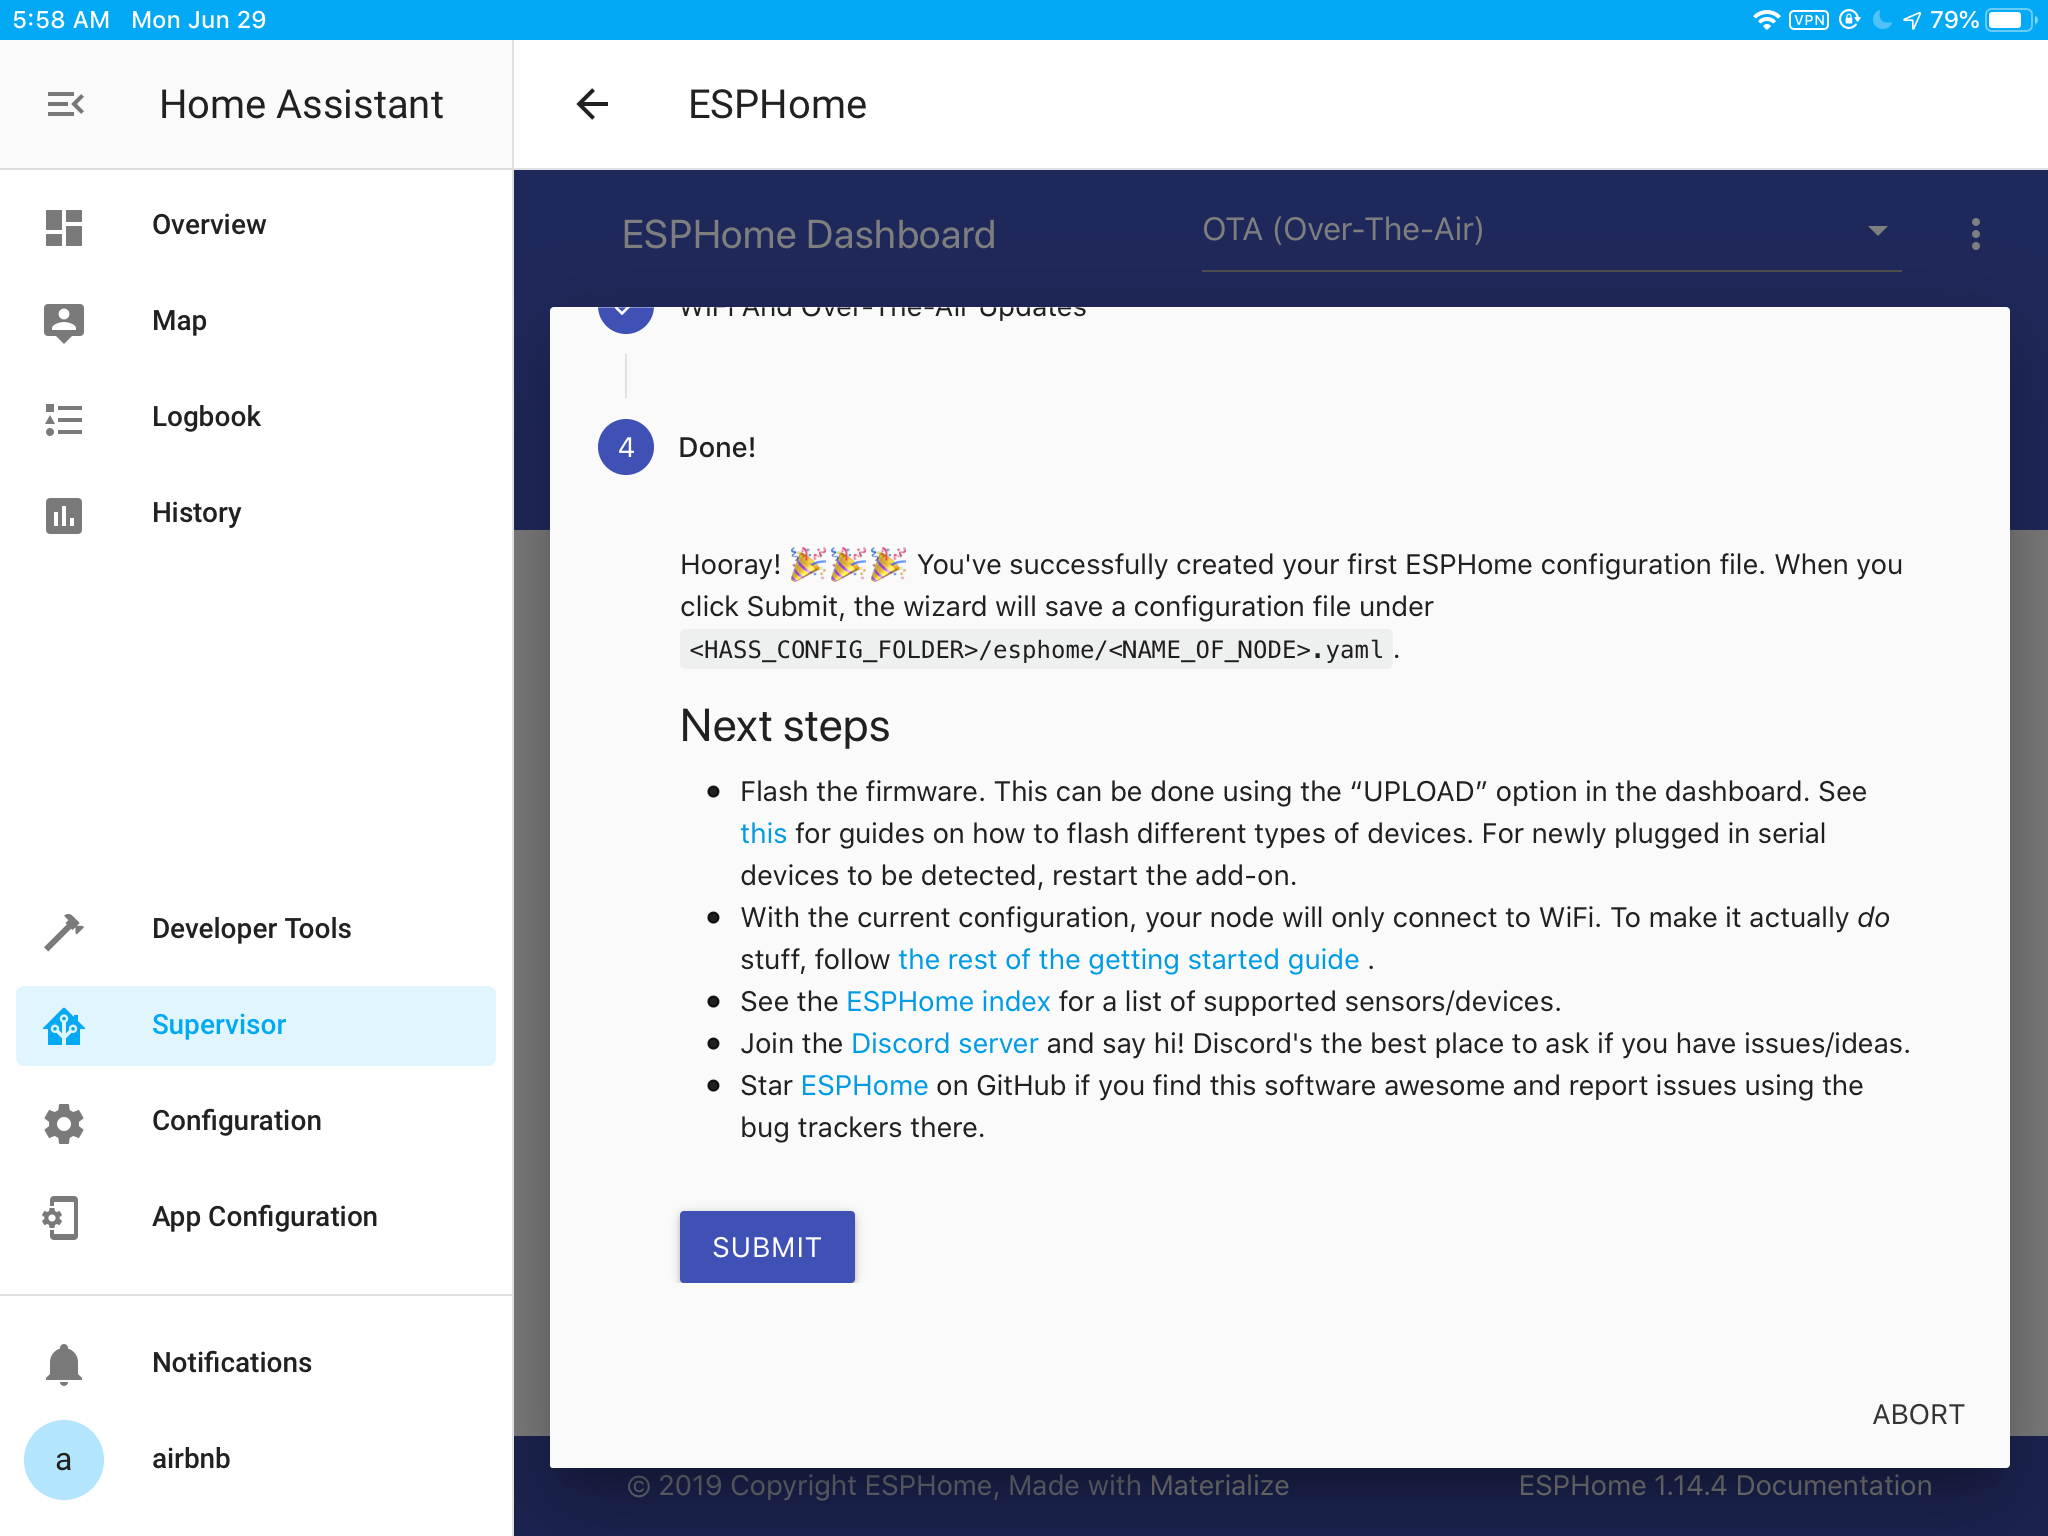
The configuration file is similar to this:
$ cat /config/esphome/livingroom.yaml
esphome:
  name: livingroom
  platform: ESP8266
  board: esp01_1m

wifi:
  ssid: "Your router SSID name"
  password: "Your WiFi password"

  # Enable fallback hotspot (captive portal) in case wifi connection fails
  ap:
    ssid: "Livingroom Fallback Hotspot"
    password: "8YVRLOxpLmGb"

captive_portal:

# Enable logging
logger:

# Enable Home Assistant API
api:
  password: "esphome"

ota:
  password: "esphome"
The configuration file is located at /config/esphome/, ESPHome will create firmware with this config file.
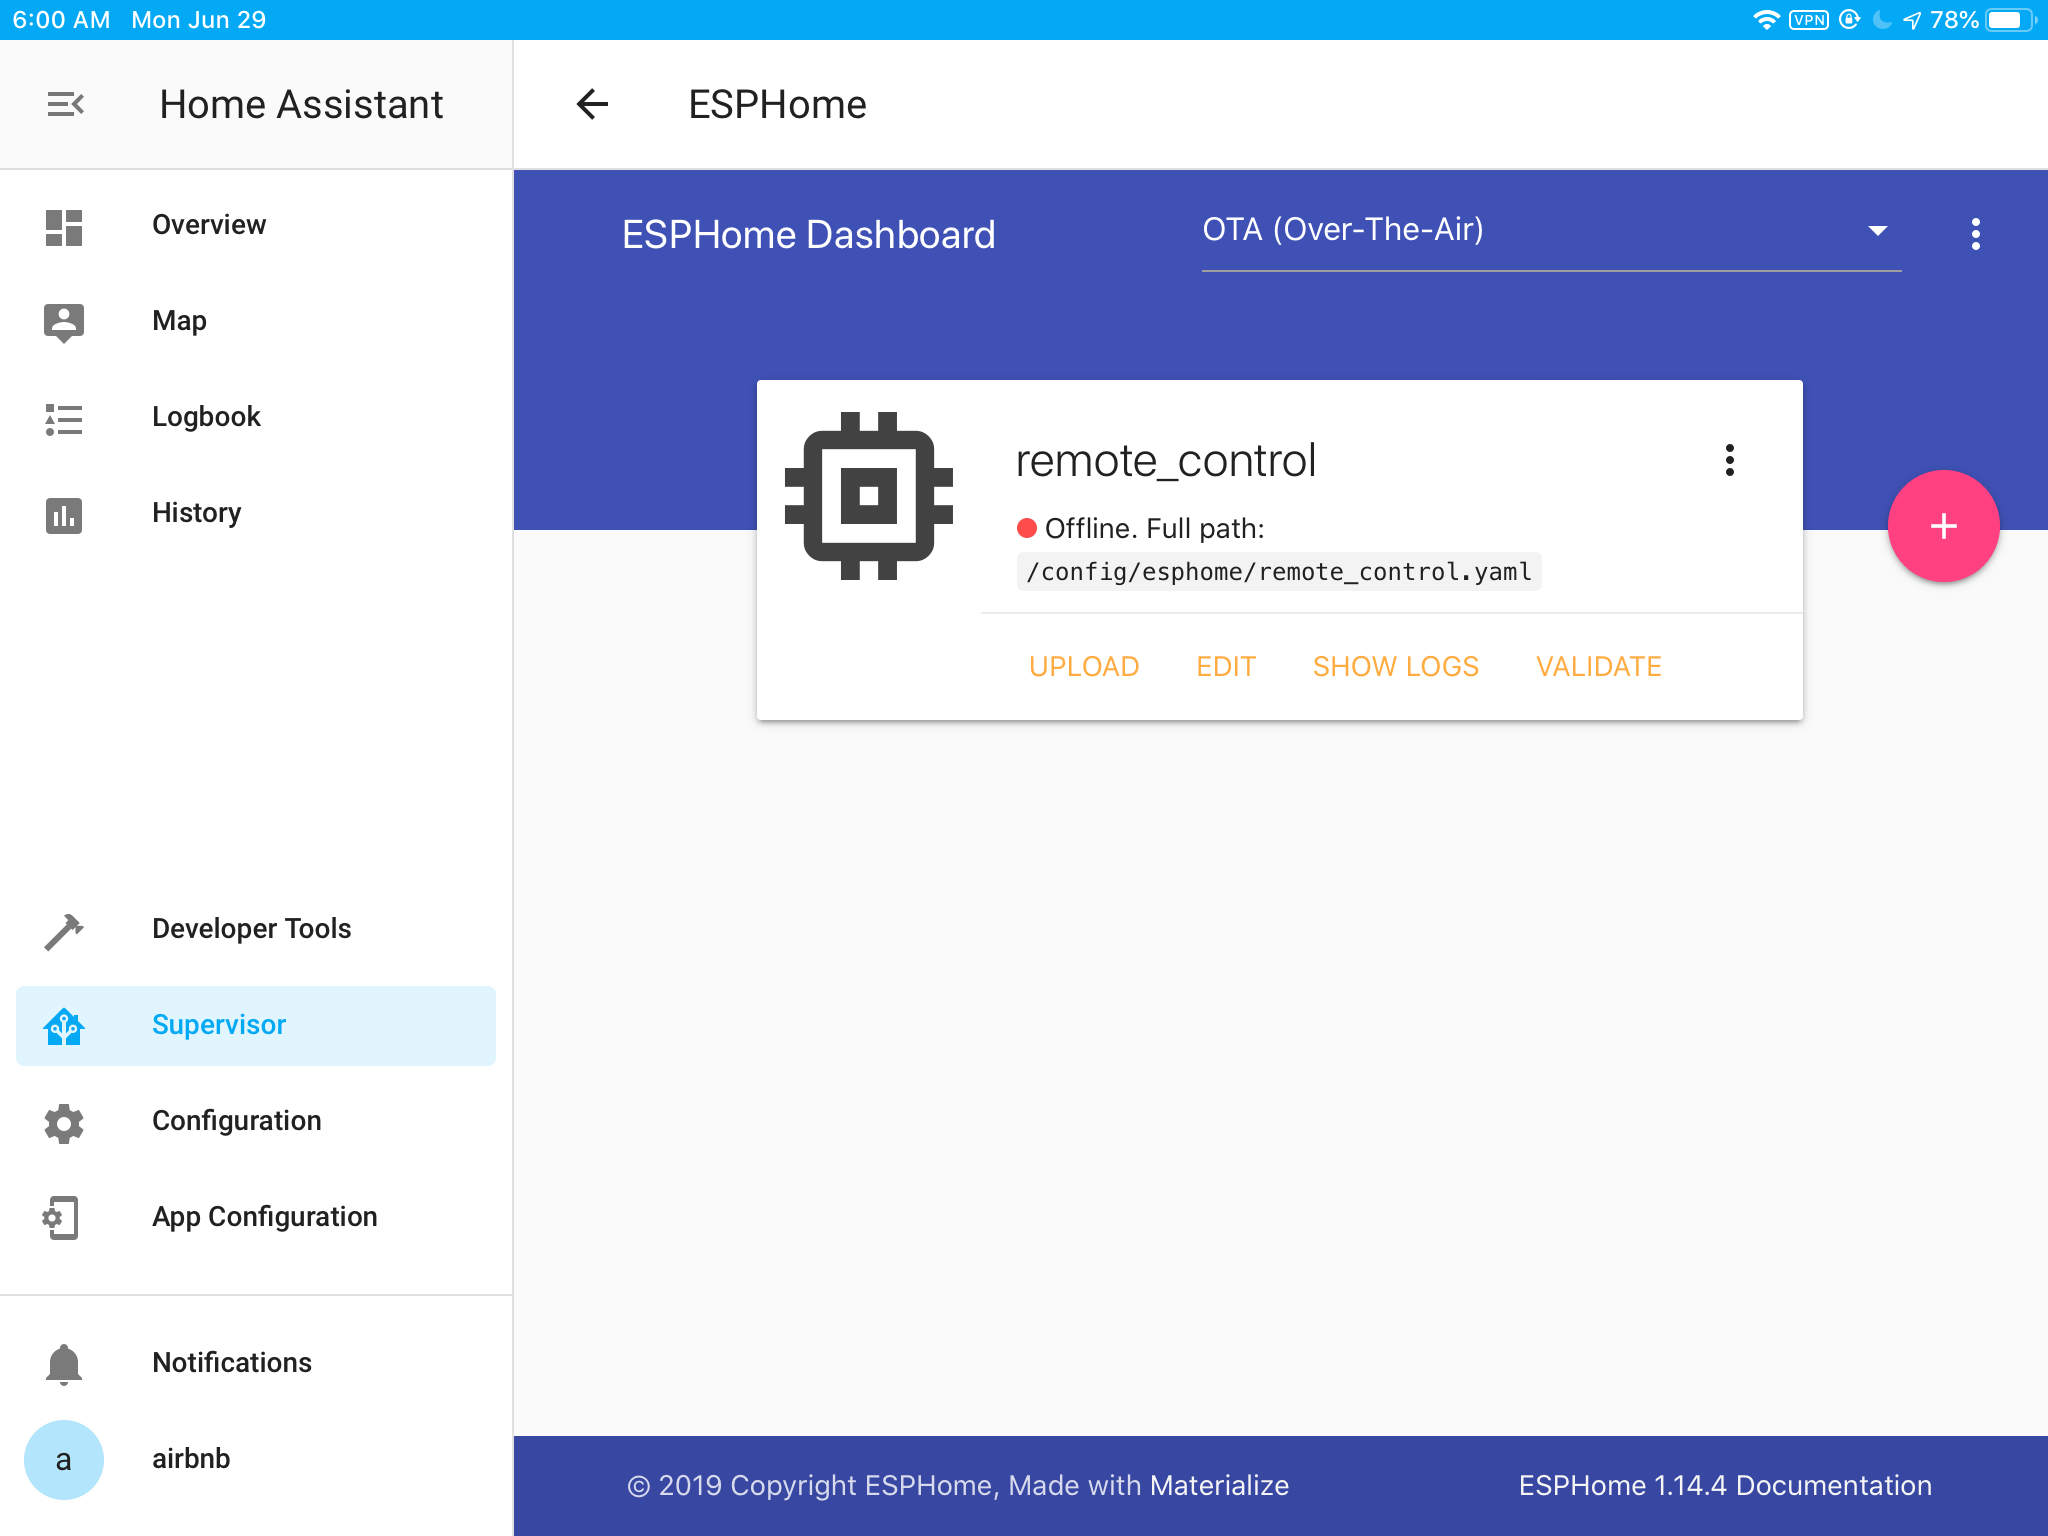
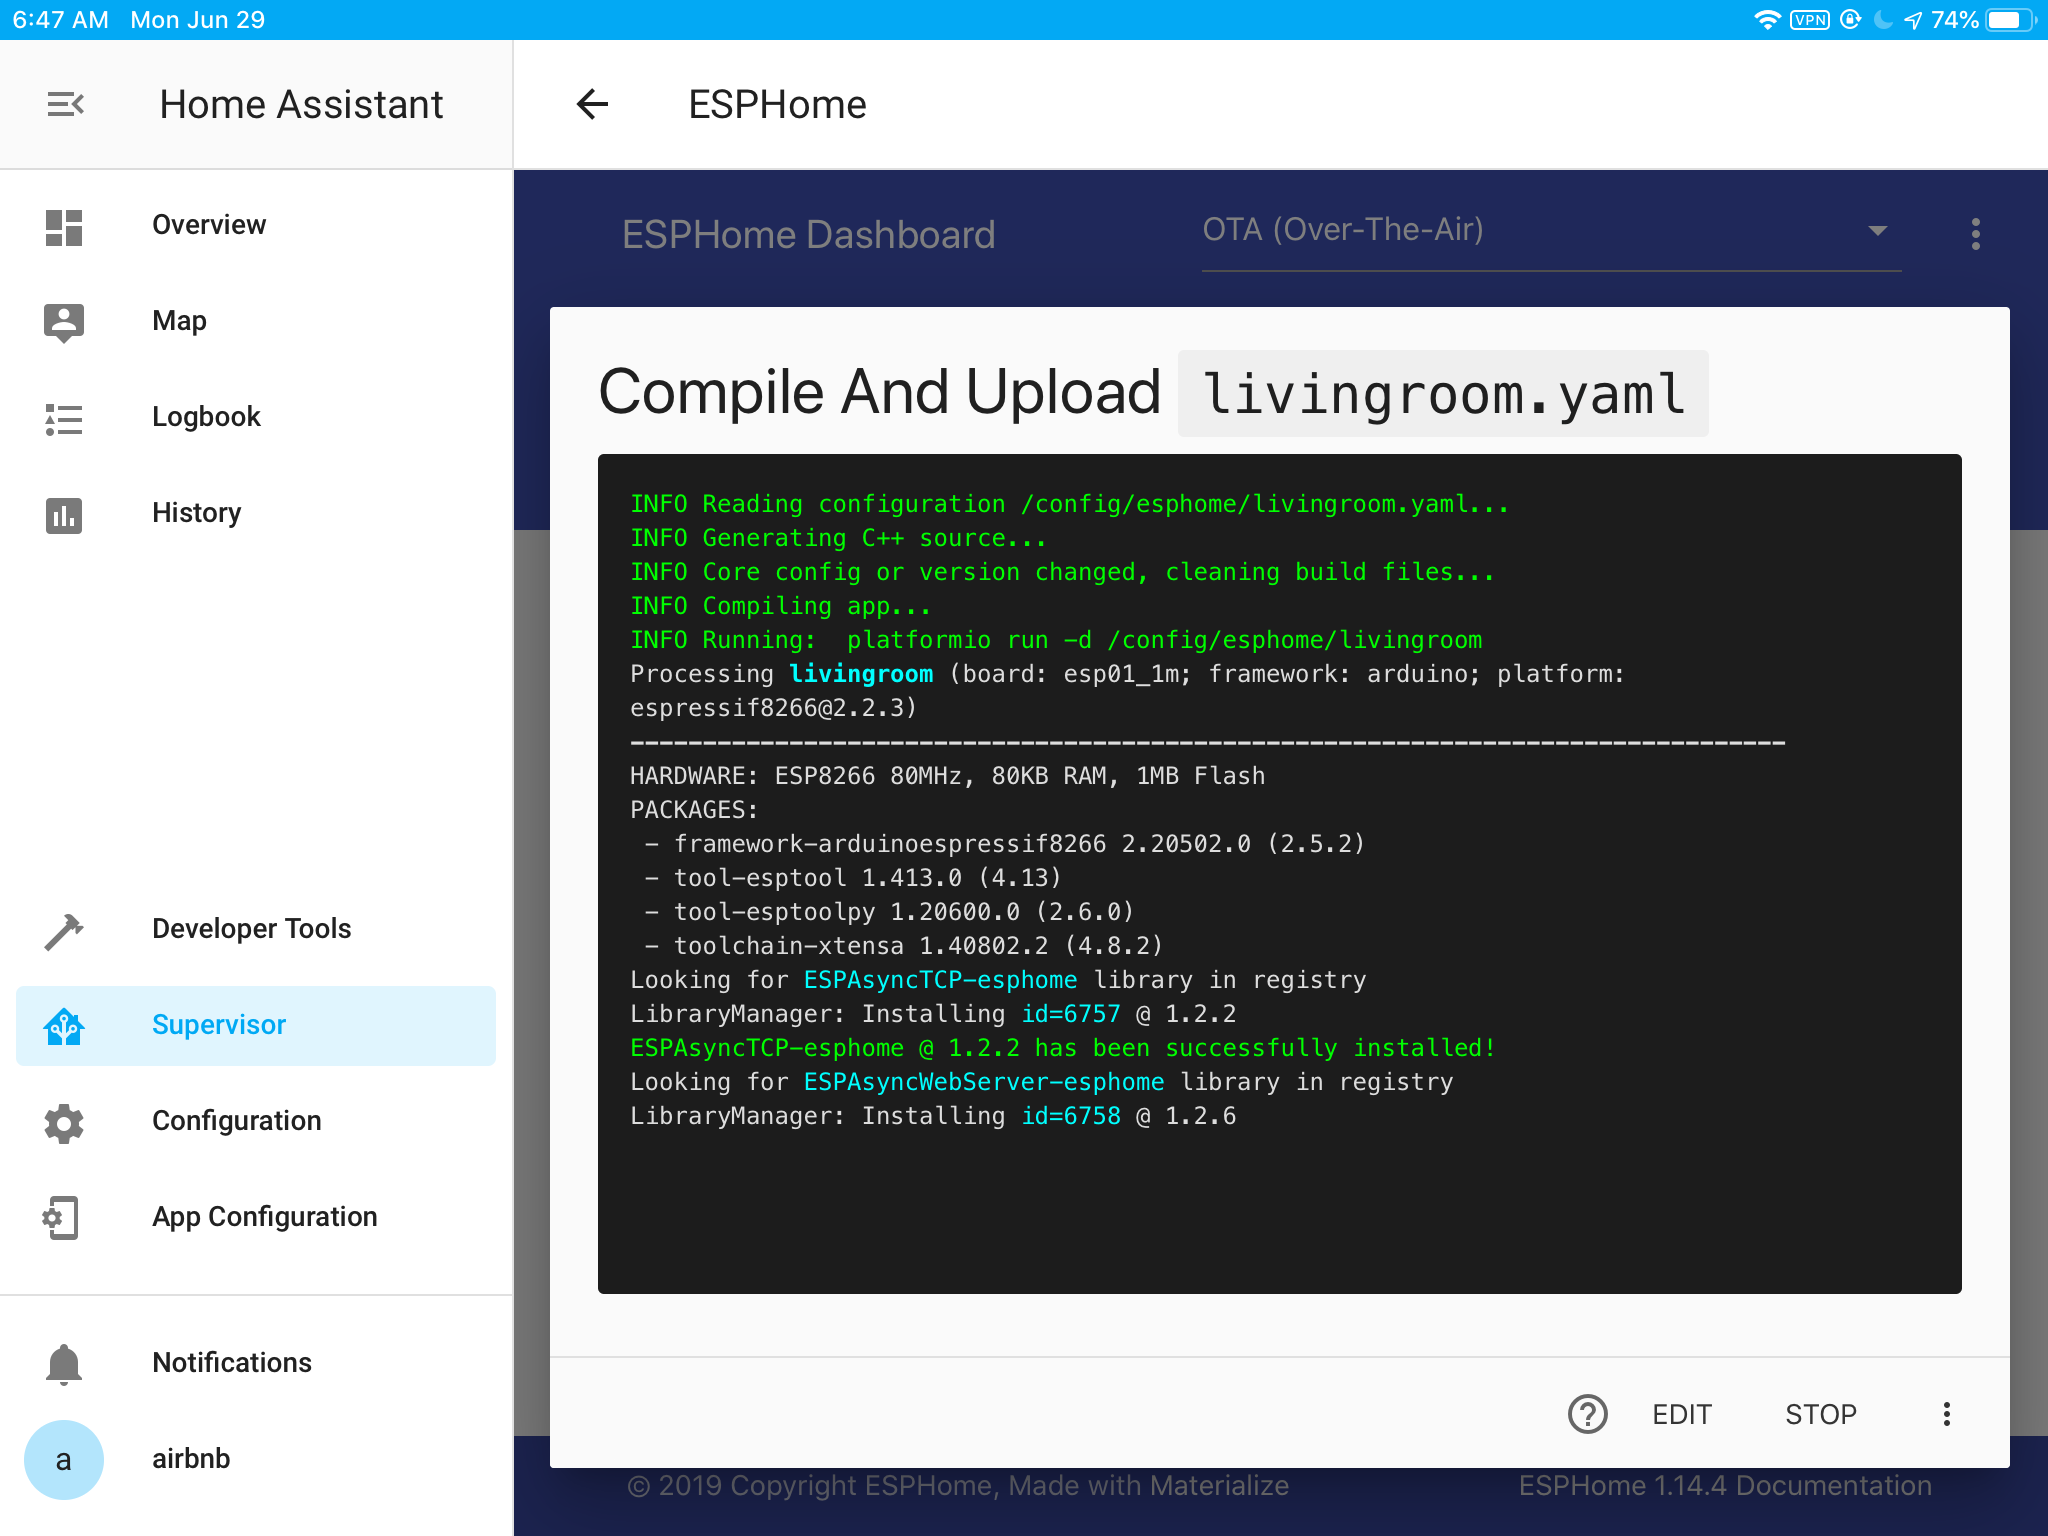
Flash Firmware
This step will create and flash the firmware to nodemcu board, connect the board
to Raspberry Pi with micro USB cable then Click UPLOAD to generating source
code and build the target firmware, then finally upload the firmware through USB
connection.
Make My First IR Remote Control
To make this tiny remote, you need an IR transmit module for sending keys to TV, and IR receive module for IR decoding, this is how it looks after connected, the left one is used for IR transmitting, and the right one is for IR decoding:
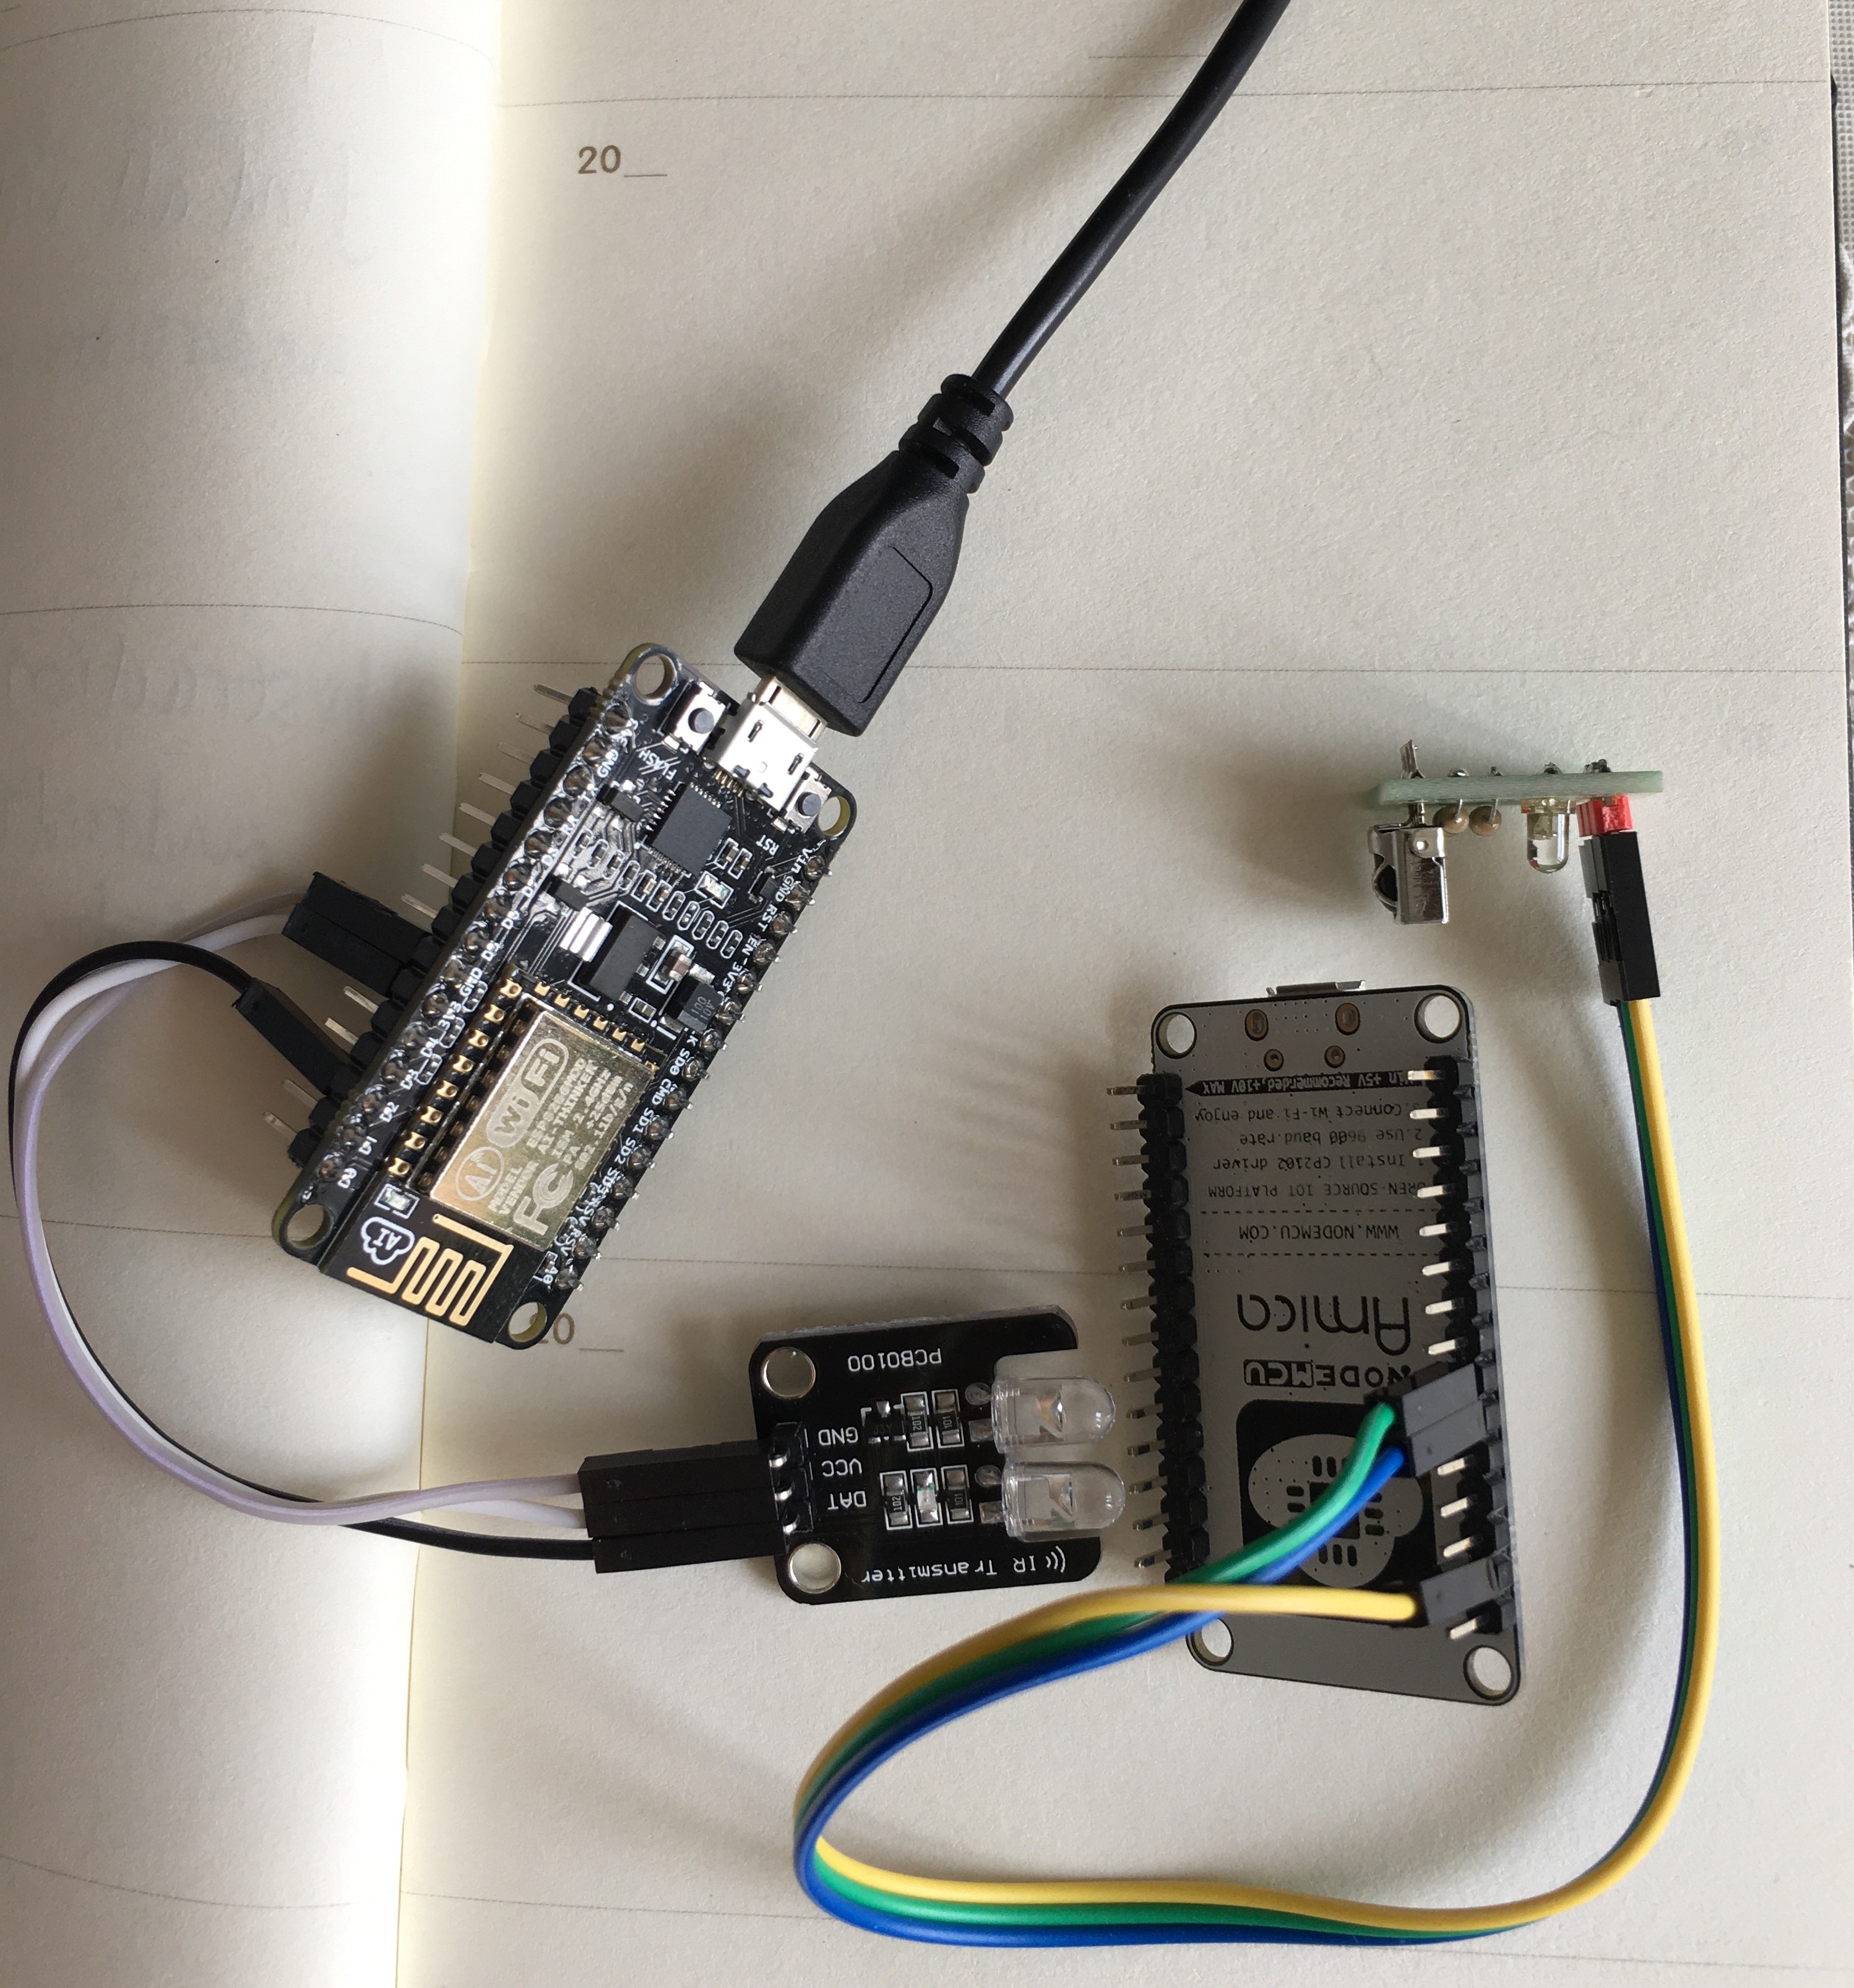
You can connect these two IR modules to the same board, here is the pin map for your reference:
IR Decoder
The remote_receiver component lets you receive and decode IR remote signal, append following to /config/esphome/livingroom.yaml:
remote_receiver:
  pin:
    number: 5
    inverted: True
  dump: all
Then click UPLOAD to flash new firmware, this time you will notice the remote related code are built into firmware:
Compiling /data/ir_decoder/.pioenvs/ir_decoder/src/esphome/components/remote_base/jvc_protocol.cpp.o
Compiling /data/ir_decoder/.pioenvs/ir_decoder/src/esphome/components/remote_base/lg_protocol.cpp.o
Compiling /data/ir_decoder/.pioenvs/ir_decoder/src/esphome/components/remote_base/nec_protocol.cpp.o
Compiling /data/ir_decoder/.pioenvs/ir_decoder/src/esphome/components/remote_base/panasonic_protocol.cpp.o
Compiling /data/ir_decoder/.pioenvs/ir_decoder/src/esphome/components/remote_base/raw_protocol.cpp.o
Compiling /data/ir_decoder/.pioenvs/ir_decoder/src/esphome/components/remote_base/rc5_protocol.cpp.o
Compiling /data/ir_decoder/.pioenvs/ir_decoder/src/esphome/components/remote_base/rc_switch_protocol.cpp.o
Compiling /data/ir_decoder/.pioenvs/ir_decoder/src/esphome/components/remote_base/remote_base.cpp.o
Compiling /data/ir_decoder/.pioenvs/ir_decoder/src/esphome/components/remote_base/samsung_protocol.cpp.o
Compiling /data/ir_decoder/.pioenvs/ir_decoder/src/esphome/components/remote_base/sony_protocol.cpp.o
Compiling /data/ir_decoder/.pioenvs/ir_decoder/src/esphome/components/remote_receiver/remote_receiver_esp32.cpp.o
Compiling /data/ir_decoder/.pioenvs/ir_decoder/src/esphome/components/remote_receiver/remote_receiver_esp8266.cpp.o
After firmware uploaded to nodemcu board and successfully booted, the below message will be shown in the log:
[13:21:01][C][captive_portal:169]: Captive Portal:
[13:21:01][C][ota:029]: Over-The-Air Updates:
[13:21:01][C][ota:030]:   Address: ir_decoder.local:8266
[13:21:01][C][ota:032]:   Using Password.
[13:21:01][C][api:095]: API Server:
[13:21:01][C][api:096]:   Address: ir_decoder.local:6053
Now try to press POWER key in the remote, you will see the signal was decoded:
[10:51:53][D][remote.jvc:048]: Received JVC: data=0x00FD
[10:51:53][D][remote.lg:053]: Received LG: data=0x00FDB04F, nbits=32
[10:51:53][D][remote.nec:068]: Received NEC: address=0x00FD, command=0xB04F
[10:51:53][D][remote.raw:041]: Received Raw: 8998, -2285, 555
Transmit IR Signal
The remote_transmitter component lets you send IR signal
to target device, put these content to the end of livingroom.yaml and upload
to nodemcu board:
remote_transmitter:
  pin: 4
  # Infrared remotes use a 50% carrier signal
  carrier_duty_percent: 50%

switch:
  - platform: template
    name: KEY_POWER
    turn_on_action:
      - remote_transmitter.transmit_nec:
          address: 0x00FD
          command: 0xB04F
Add to Entity to HA
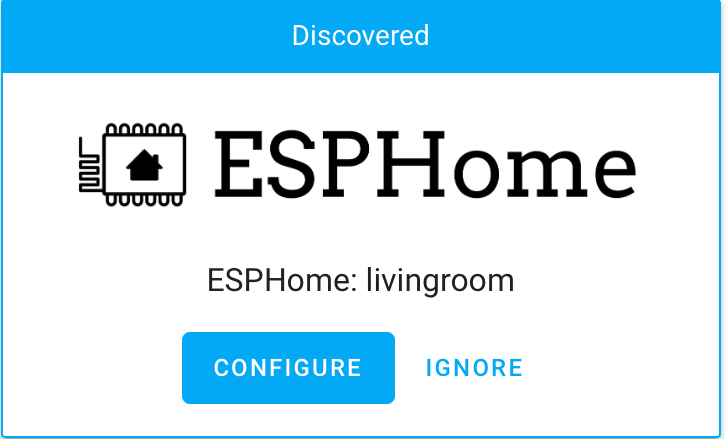
After above process completed, Home Assistant will find the newly added device in Notifications, click Check it out to proceed:
Click CONFIGURE and then SUBMIT to add ESPHome node to HA:

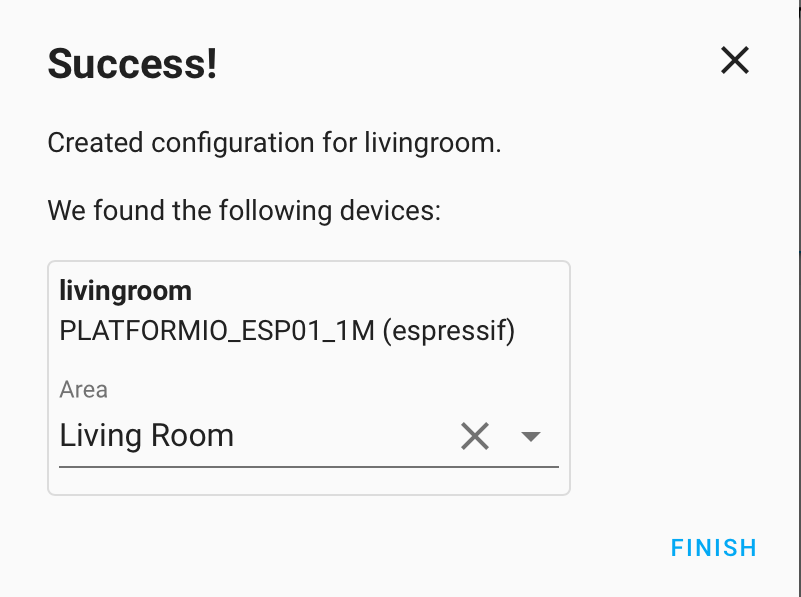 Click FINISH to complete this process.
Test New Cooked IR Remote
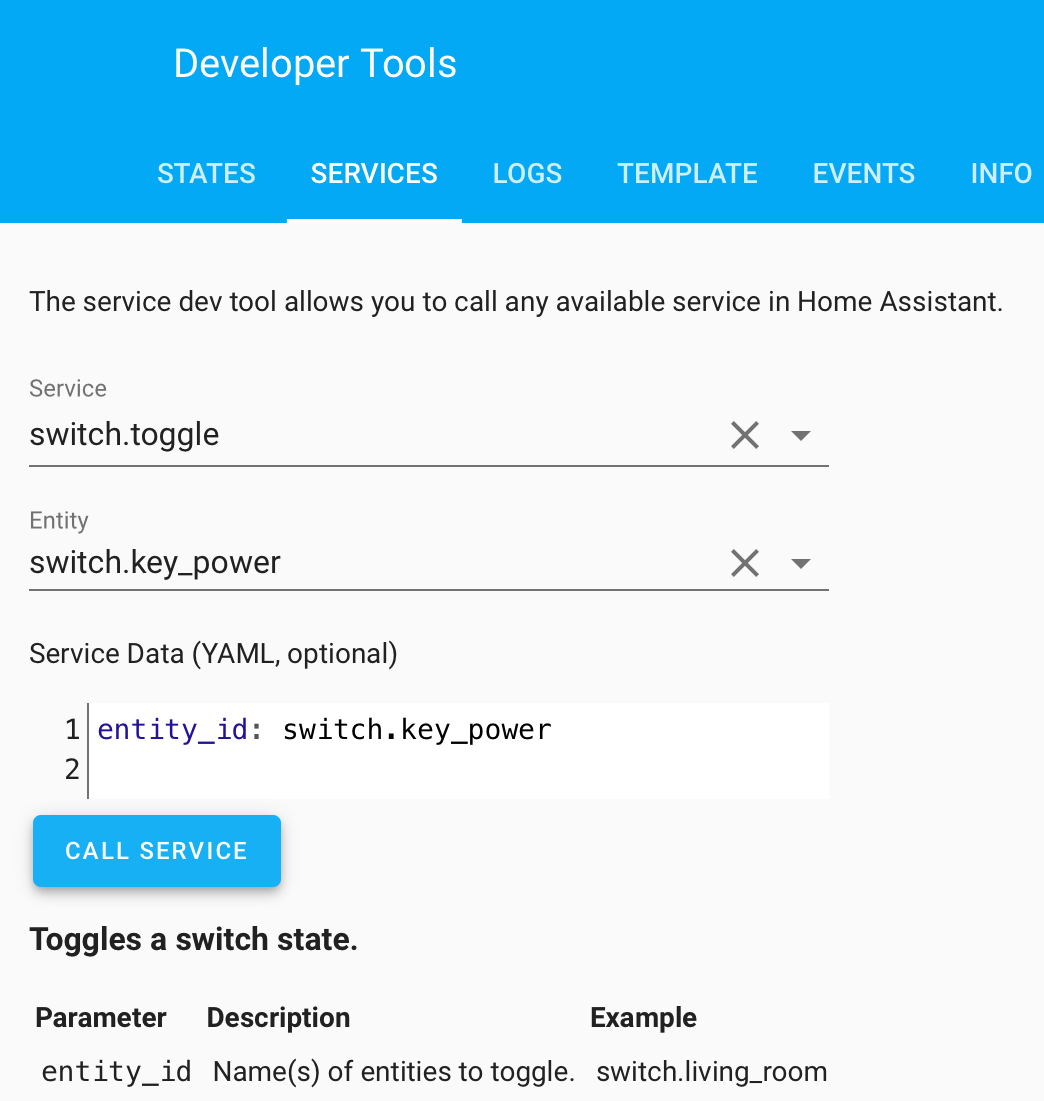
We can test this new remote by calling service switch.toggle in Developer
Tools before integrate it with automation:
Enabling Integration Android TV
The only thing nodemcu do is to turn the TV on, and most of the job is done by
Android TV component.
Configuration
To enable this component, append this config entry to /config/configuration.yaml
media_player:
  # Use the Python ADB implementation
  - platform: androidtv
    name: Android TV
    device_class: androidtv
    host: 192.168.1.11
    exclude_unnamed_apps: true
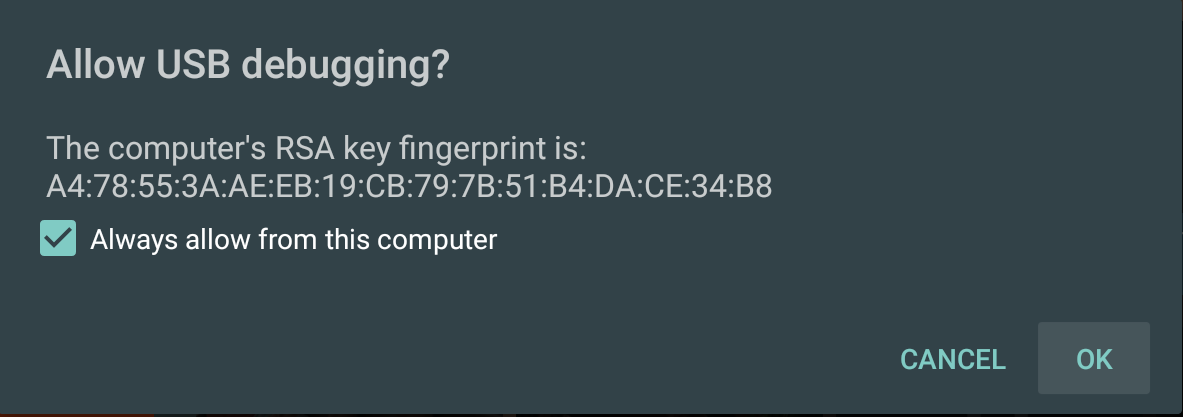
Then reboot HA, if everything goes well, HA will ask for USB debugging permission, check the box and press OK:
If there is no prompt, there must be something wrong with the adb connection.
Custom State Detection
You need to add state_detection_rules for Android TV reflect its states correctly,
it is very important as this automation configuration is heavily depends on the
state reported by Android TV.
The state can be observed by calling androidtv.adb_command service with command:
GET_PROPERTIES, with every service call, there will be a message like this:
2020-07-03 00:06:15 INFO (SyncWorker_14) [homeassistant.components.androidtv.media_player] Output of command 'GET_PROPERTIES' from 'media_player.android_tv': {'screen_on': True, 'awake': True, 'audio_state': 'idle', 'wake_lock_size': 3, 'current_app': 'org.videolan.vlc', 'media_session_state': 3, 'audio_output_device': '', 'is_volume_muted': False, 'volume': None, 'running_apps': ['STREAM_NOTIFICATION:']}
To get the above info, you need to enable logger in you config file,
the messages will be logged into file /config/home-assistant.log.
Record media_session_state and wake_lock_size, after every states being recorded,
put them into /config/configuration.yaml like this:
media_player:
  # Use the Python ADB implementation
  - platform: androidtv
    name: Android TV
    device_class: androidtv
    host: 192.168.1.11
    exclude_unnamed_apps: true
    state_detection_rules:
      'com.dangbei.tvlauncher':
        - 'standby'
      'org.videolan.vlc':
        - 'playing':
            'media_session_state': 3  # this indentation is important!
        - 'paused':
            'media_session_state': 2  # this indentation is important!
        - 'standby'
NOTE:
- The indentation is very import.
- There must be a default branch in each appid, such as
standby. - TV Launcher app must be included and put to the first place.
Test Android TV
In this setup, I use VLC to play local video, you can get the android apk file
from here, the older version may have issue with playing video file without
sound.
After VLC installed to android TV, now we can call androidtv.adb_command service
to test if it works, put the this line of code to Service Data field:
# play local file with VLC
{"entity_id" :"media_player.android_tv", "command": "am start -a android.intent.action.VIEW -d file:///mnt/usb/ADBC-A078/english-learning.mkv -n org.videolan.vlc/.gui.video.VideoPlayerActivity"}
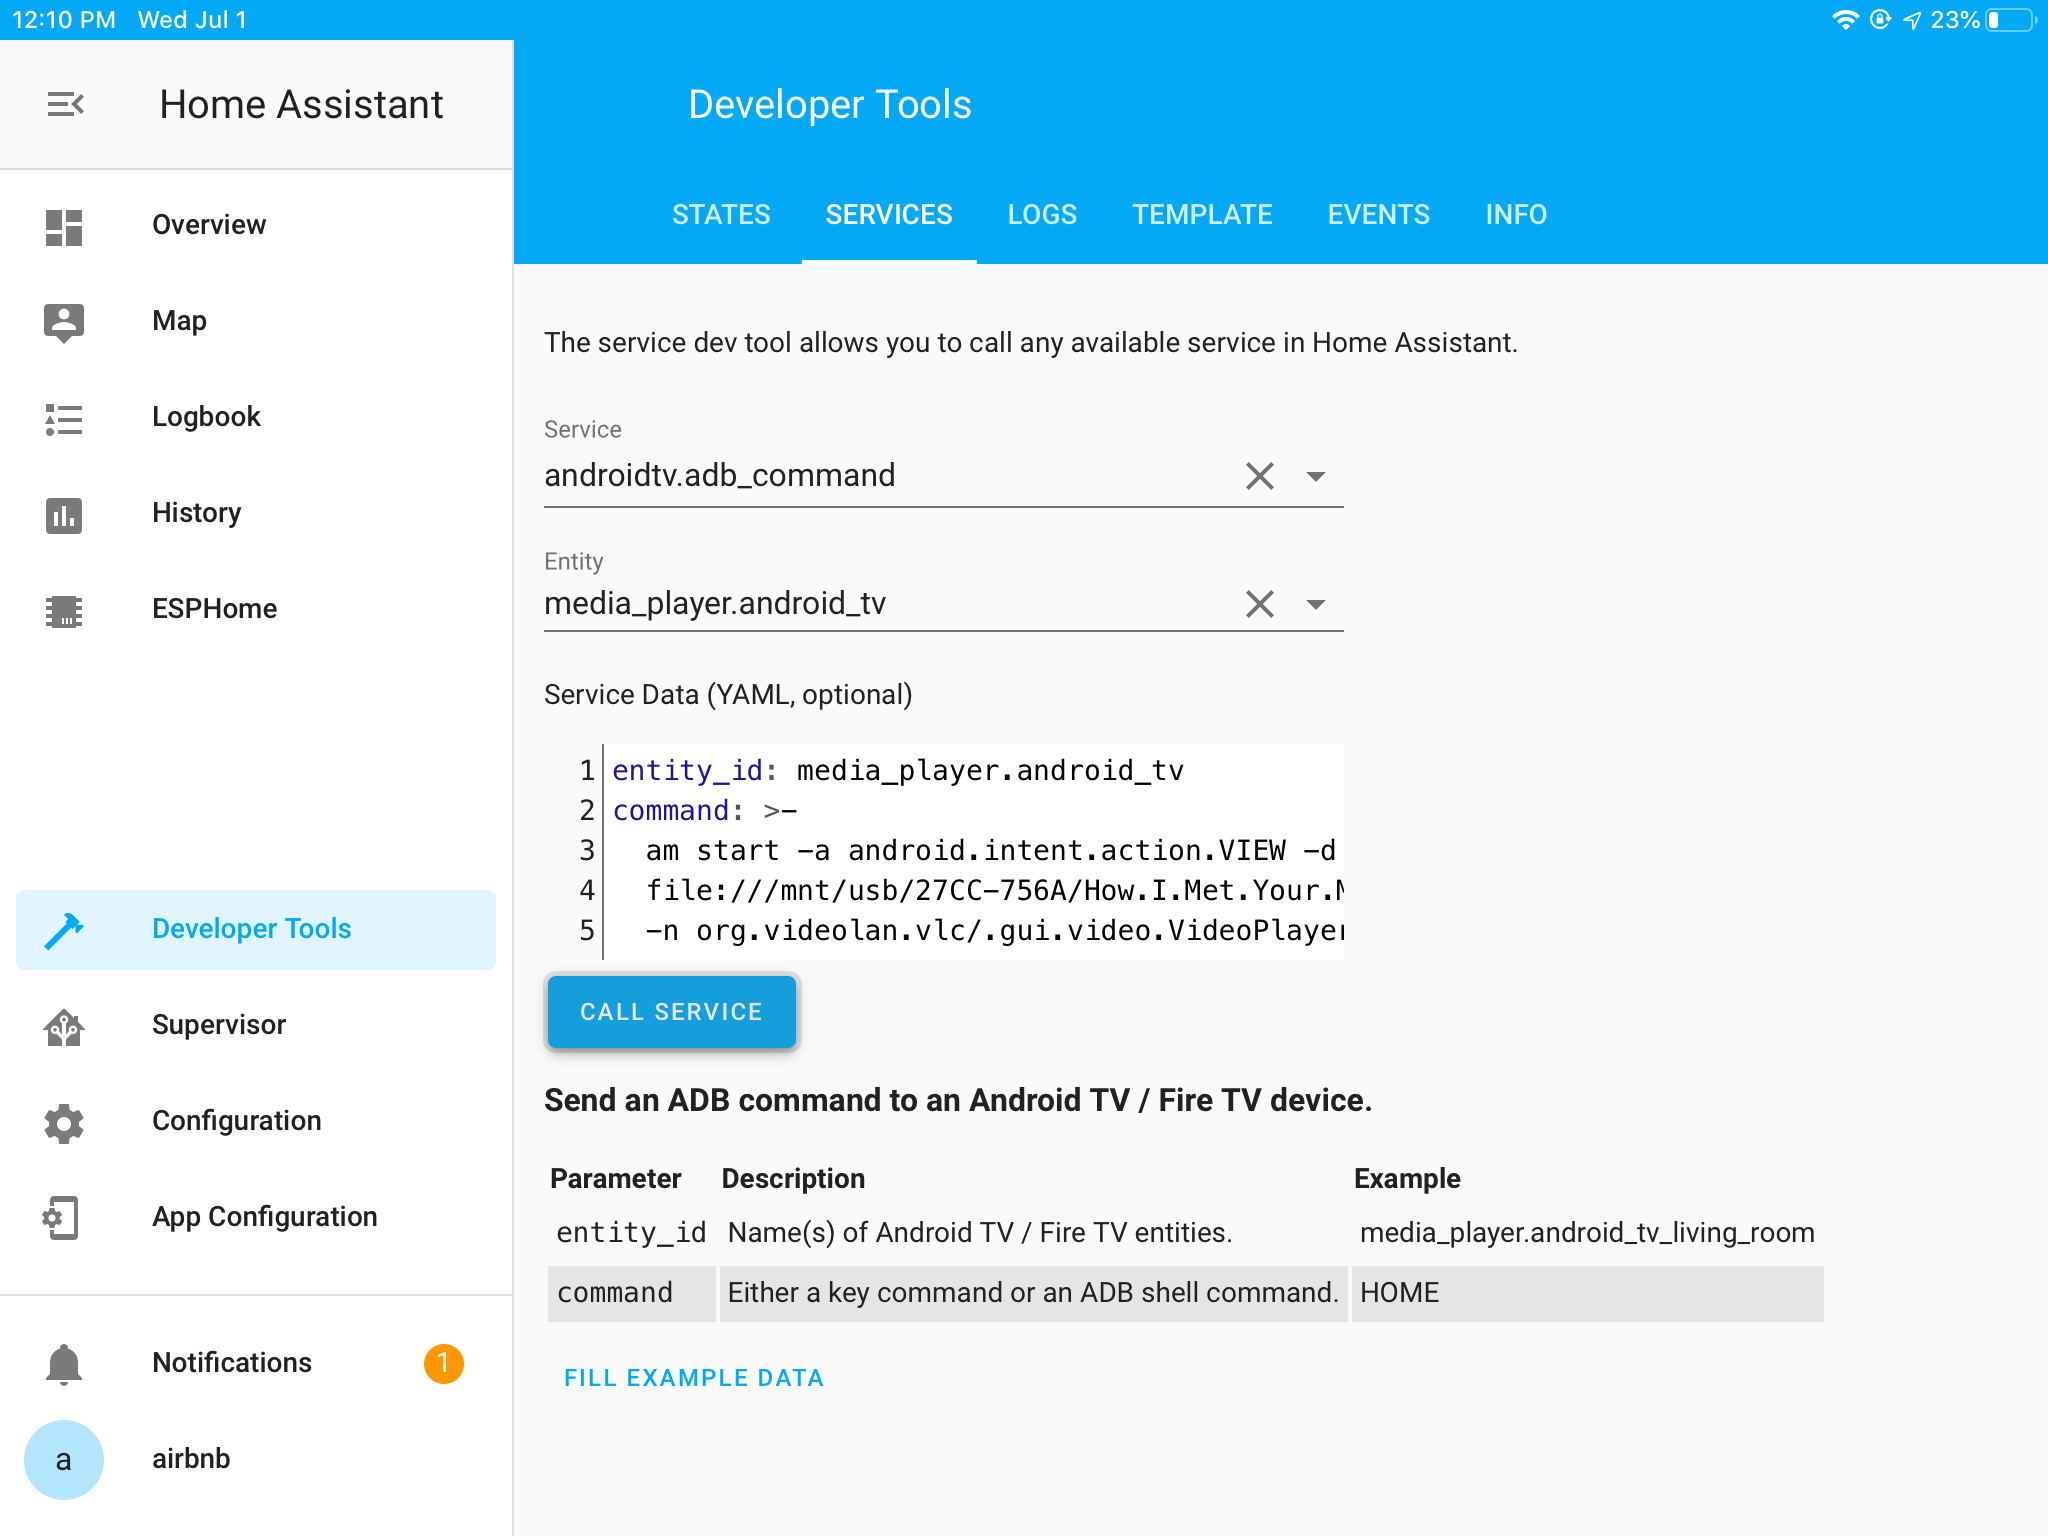 Then click CALL SERVICE, if it works we can move on.
You may find this gist useful, if you are using other media players.
Prepare Video Files
I have a list of video files, and want to pick one from the top of the file, then play it with VLC, for now I cannot find another way to do this, as I am just on start journey to HA, so I choose to use shell script to do this for me:
#!/system/bin/sh

media_root="/mnt/usb/ADBC-A078/"
episode="/data/episode.txt"
playlist="${media_root}"/playlist.txt

# busybox truncate -s "${playlist}"
cat /dev/null > "${playlist}"

files=`find "${media_root}" -name "*.mkv" | sort`
for f in $files; do
    echo $f >> "${playlist}"
done

if [ ! -f "${episode}" ]; then
    head -1 "${playlist}" > "$episode"
else
    for ep in `cat "${playlist}"`; do

        if [ "${ep}" == `cat ${episode}` ]; then
            found="true"
            continue
        fi

        if [ "${ep}" != `cat ${episode}` ] && [ "$found" == "true" ]; then
            echo "${ep}" > "${episode}"
            exit 0
        fi
    done
fi
Copy this script to Android TV’s /data/ directory for picking video file to play.
Automation
Every morning at 5:30, morning_call will be triggered and turn Android TV on,
later when Android TV state changed to standby from unavailable, the second
trigger will be activated and play some predefined video file, turnoff_tv will
turn Android TV off at the end of playing, here is the automation config file:
- id: morning_call
  alias: Turn on Android TV
  description: Turn on Android TV
  trigger:
  - at: '5:30'
    platform: time
  condition:
  - condition: device
    device_id: 16716fda59919890105f8d0c588d7890
    domain: device_tracker
    entity_id: device_tracker.bay
    type: is_home
  action:
  - data: {}
    entity_id: switch.key_power
    service: switch.toggle

- id: english_learning
  alias: English Learning
  description: Learning English Every Morning
  trigger:
  - entity_id: media_player.android_tv
    from: unavailable
    platform: state
    to: standby
  condition: []
  action:
  - data:
      command: /data/vlc.sh; episode=`cat /data/episode.txt`; am start -a android.intent.action.VIEW
        -d file://"${episode}" -n org.videolan.vlc/.gui.video.VideoPlayerActivity
    entity_id: media_player.android_tv
    service: androidtv.adb_command

- id: turnoff_tv
  alias: Turn Off Android TV
  description: Turn Off Android TV When Media Playing Finished
  trigger:
  - entity_id: media_player.android_tv
    platform: state
    from: playing
    to: standby
  condition: []
  action:
  - data: {}
    entity_id: switch.key_power
    service: switch.toggle
Reboot HA again, you will find this is shown in Configuration » Automations:

Automation can also be created with Web UI interface.
Troubleshooting
ESPHome cannot decode any IR signal
On my first try, remote_receiver cannot decode any IR signal of all of my IR
remote, only raw data were reported:
[D][remote.raw:028]: Received Raw: -9043, 4522, -537, 568, -554, 551, -552, 552, -553, 552, -555, 550, -552, 552, -552, 553, -553, 551, -554, 1655, -554, 1656, -553, 1656, -554, 1656, -552, 1709, -553, 1656, -554, 550, -553, 1658, -526, 1682, -551, 554, -551, 1658, -553,
[D][remote.raw:041]:   1656, -553, 551, -554, 551, -553, 551, -553, 552, -554, 551, -527, 1708, -554, 551, -552, 553, -553, 1656, -552, 1657, -554, 1655, -554, 1656, -552
[D][remote.raw:041]: Received Raw: -9042, 2261, -580
A: Check the log message, if there is a entry like this: [W][remote_receiver.esp8266:063]: Remote Receiver Signal starts with a HIGH value. Usually this means you have to invert the signal using ‘inverted: True’ in the pin schema!
Then change remote_receiver config from:
remote_receiver:
  pin: 5
  dump: all
to:
remote_receiver:
  pin:
    number: 5
    inverted: True
  dump: all
I can not find androidtv.adb_command service
If the USB debugging prompt never show up, there must be some issue in adb
connection, check Developer » LOGS to get more info.
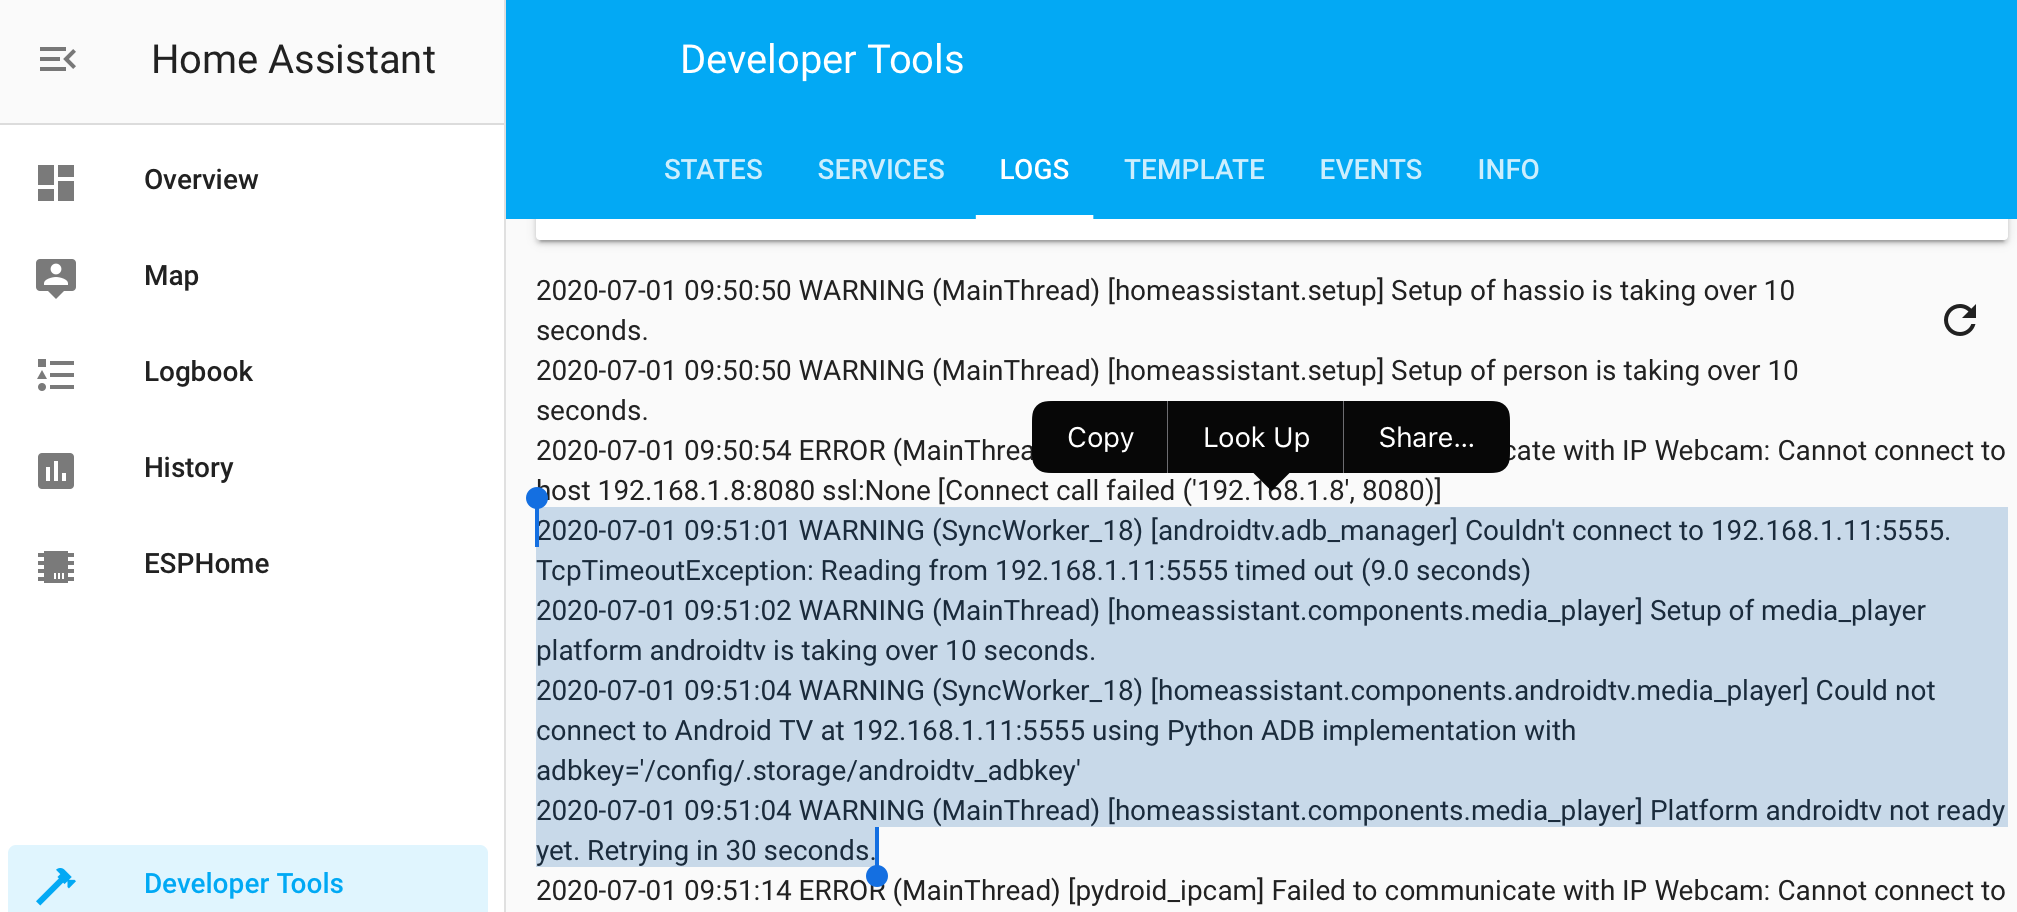
A: Android only allow one adb connection, if you have your computer connected to Android TV, disconnect it, then HA will try to reconnect.
I find another way to grant USB debugging permission, find your adb
key in /config/.storage/androidtv_adbkey.pub and append it to /data/misc/adb/adb_keys.
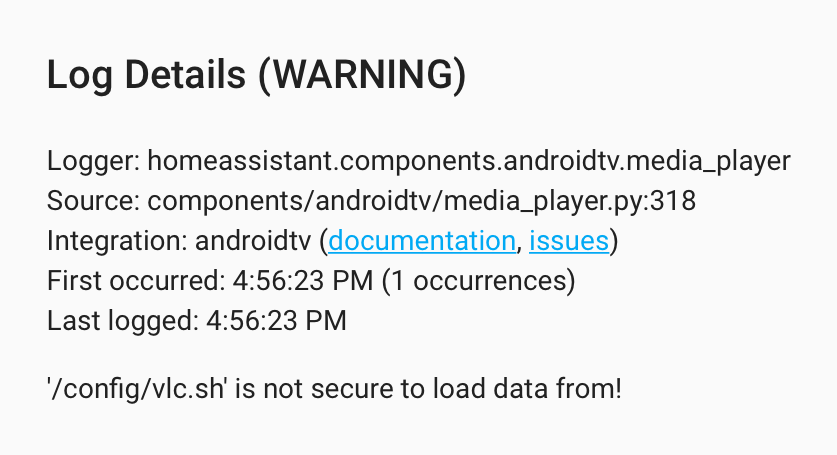
I cannot upload shell script file to Android TV
You may wanna push files to android system with androidtv.upload service by
calling that service with data:
{"entity_id" :"media_player.android_tv", "device_path": "/data/vlc.sh", "local_path": "/config/vlc.sh"}
Actually …
A: For security reasons, uploading script file is disallowed:
For other issues related to adb, refer to ADB Troubleshooting section.